A guide on Intune Software package deplyoments on Windows
03 April 2025
Windows: Create, Deploy, Test, and Assign App Packages
We use Microsoft Intune to distribute apps to our clients. The following guide describes how to create a package, integrate it into distribution, and test it.
Create a Package
To upload a Windows package to Intune, it must first be packaged as a .INTUNEWIN file using the Microsoft Win32 Content Prep Tool. This is a type of compression similar to ZIP, but specifically for Intune. Please download the latest version of the tool.
Save the tool to a location of your choice on your client.
In this example, we assume that the installation files are fully located under C:\Data\MyPackage\ on your client. The installation file in the package can be a .exe, .msi, .ps1, .bat, etc. This example demonstrates the process using the .MSI installer for Google Chrome, but you can adapt it for other installers.
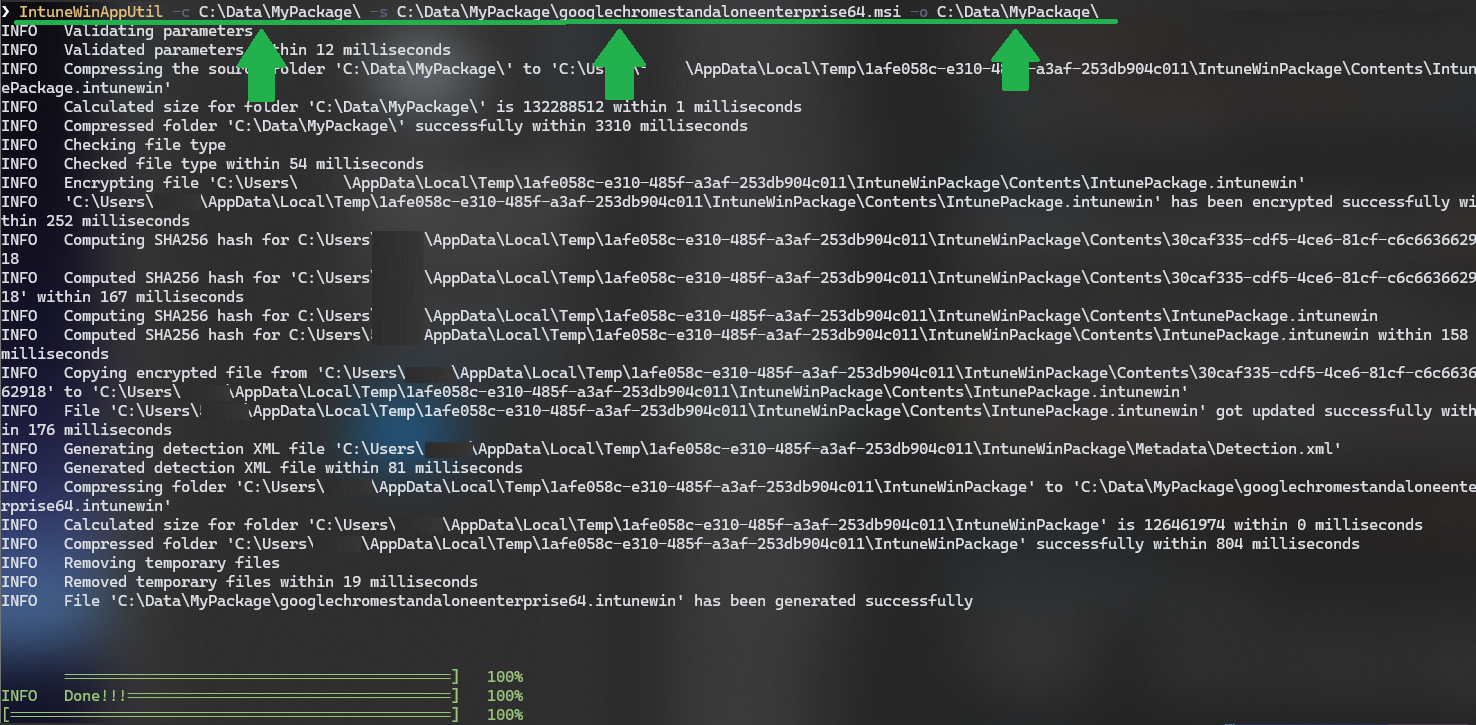
Open a PowerShell console, navigate to the directory where you downloaded the Microsoft Win32 Content Prep Tool using cd Path\to\IntuneWinAppUtil, and execute the following command, adjusting the paths in the parameters as needed:
.\IntuneWinAppUtil.exe -c "C:\Data\MyPackage" -s "C:\Data\MyPackage\Installer.exe" -o "C:\Data\MyPackage"
Parameter Definitions:
| Command-line Parameter | Description |
|————————-|—————————————————————————–|
| -c
A PowerShell call for this demo package would look like this:
Since I specified in the parameter that the .INTUNEWIN should be created in the same directory, the folder on my client looks like this:

In this example, all files necessary for installation are included in the .MSI. If your package includes additional files or folders, you can include them in the .INTUNEWIN as well. The Microsoft Win32 Content Prep Tool takes all contents of the folder specified by the -c parameter and packages them into the .INTUNEWIN.
Integrate the Package
Now that we have packaged our files into a .INTUNEWIN, we can upload it to Intune.
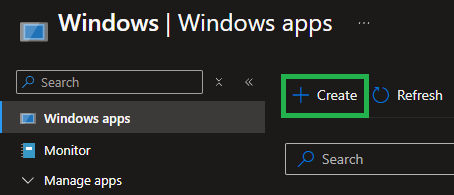
Open the Intune portal and navigate to Apps -> Windows.
Click the + Create button:
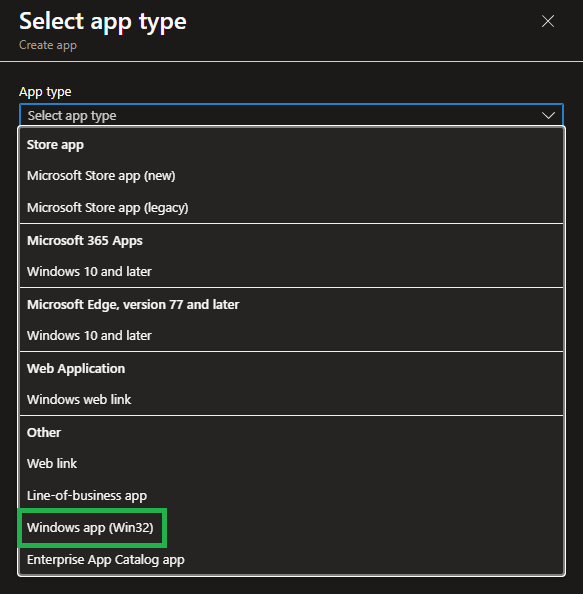
A menu will open on the right side. Select Windows app (Win32):
🛈 HINT
I would recommend you to only use the Windows app (Win32) type and if you use another one - dont mix them.
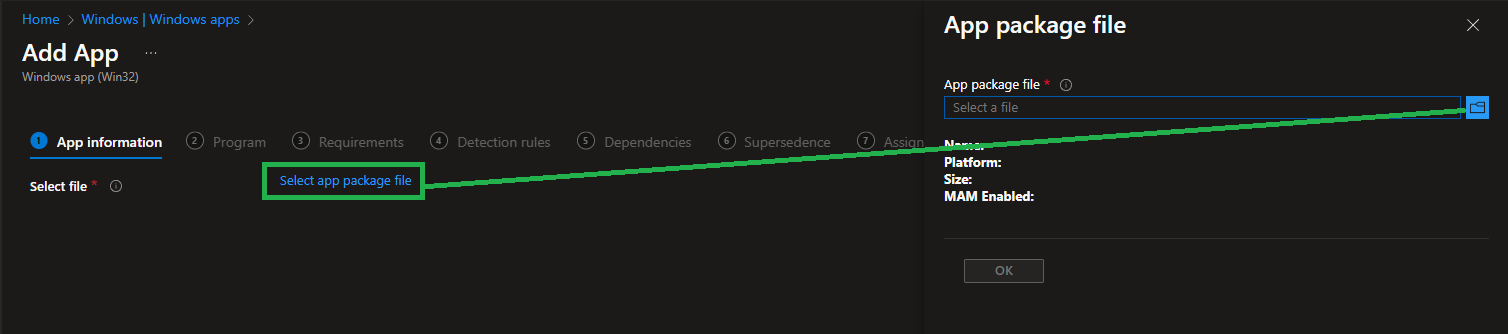
Click Select at the bottom to start uploading the package.
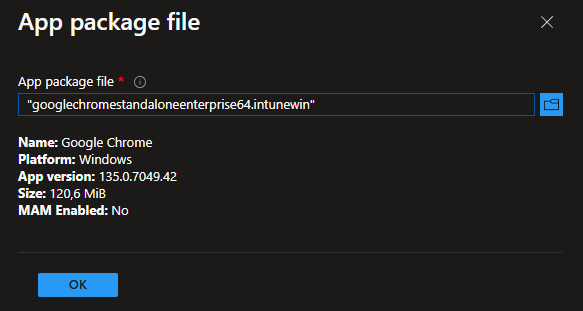
Then click Select app package file to upload your .INTUNEWIN:
Verify that the detected content matches what you packaged, and click OK:
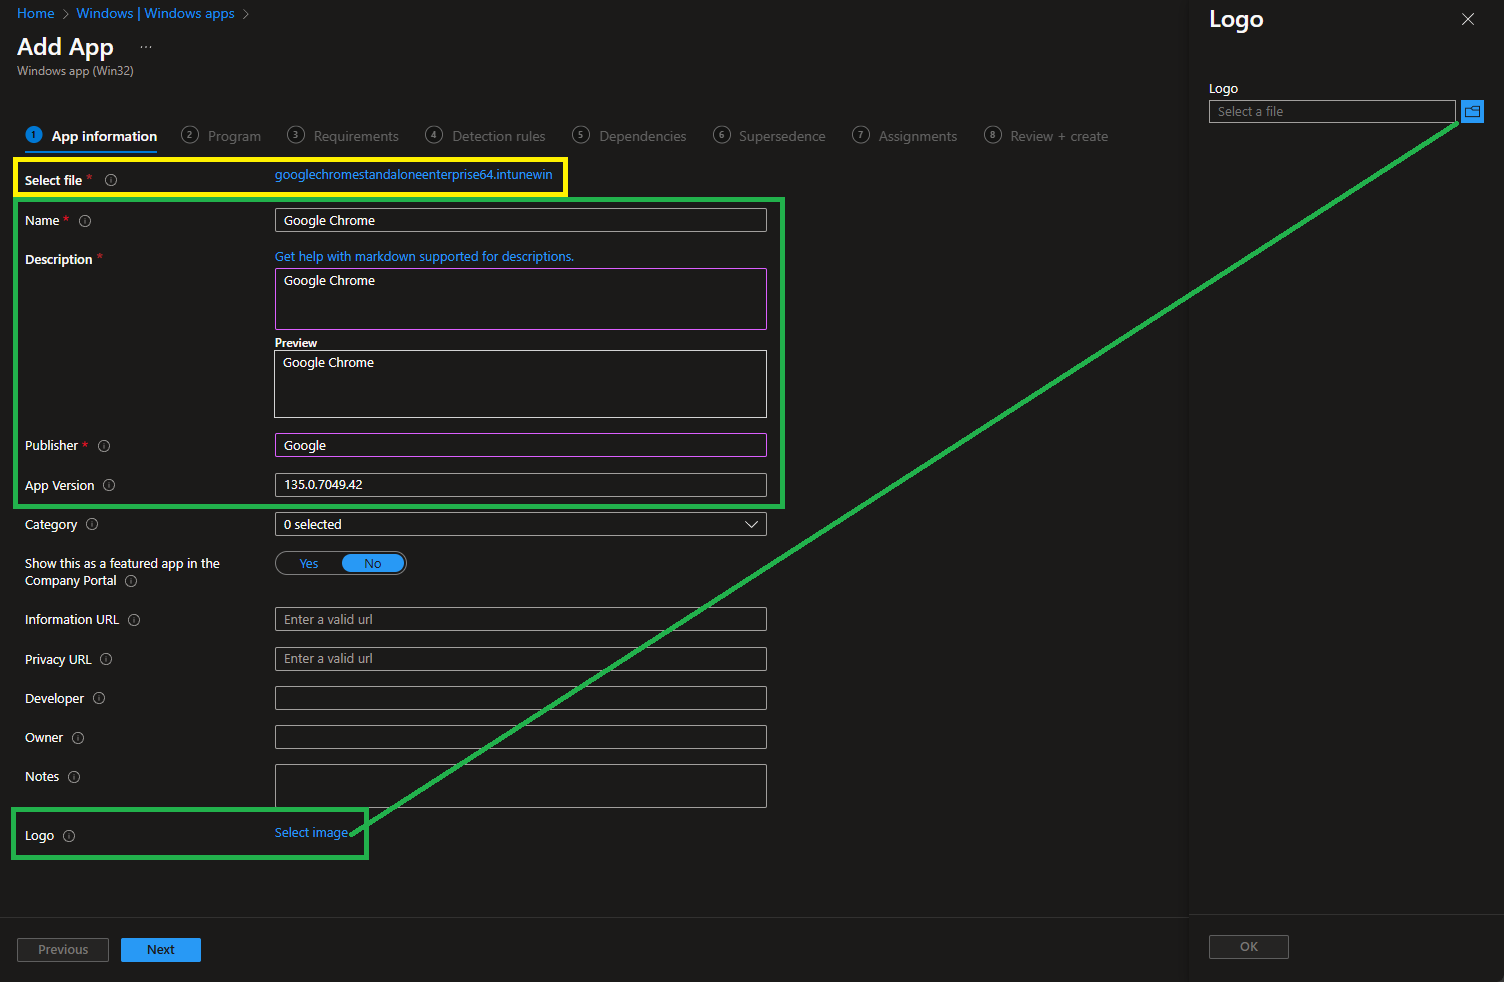
Define App Information
Now define the Name, Description, Publisher, App Version, and Logo of the app:
🛈 HINT
Always include a logo if the app is to be made available to users via the company portal.
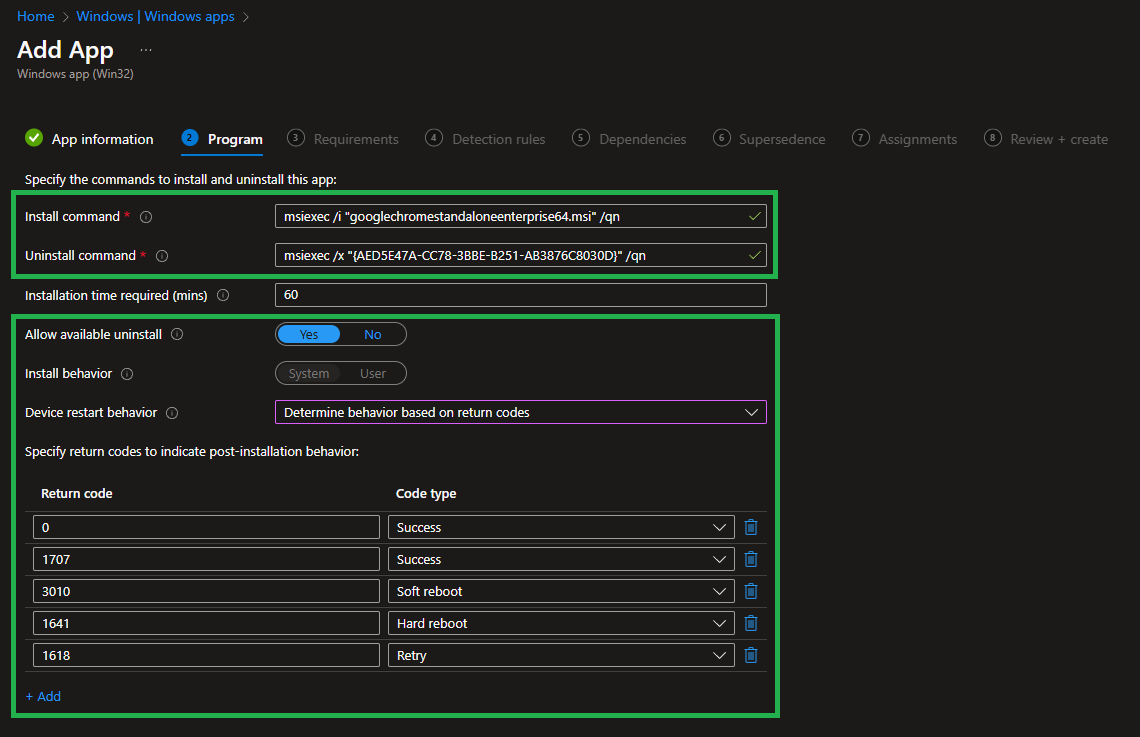
Define Install and Uninstall Commands
Now define the Install command, Uninstall command, Allow available uninstall, and Install behavior for the app:
🛈 HINT
For Install behavior, use return codes. Most apps complete a successful installation with exit code 0. For other exit codes, you can edit the list below.
Command Descriptions:
| Command | Description |
|————————|———————————————-|
| Install command | Command to run the installer silently, including all necessary parameters for automatic installation. |
| Uninstall command | Command to run the uninstaller silently, including all necessary parameters for automatic uninstallation. |
| Allow available uninstall | Configure whether users can uninstall the package themselves via the company portal. |
| Install behavior | Configure whether the package should be installed in the SYSTEM or USER context. |
For this demo package, it looks like this:
🛈 HINT
If an.MSIinstaller is used, Intune automatically populates the default parameters for unattended installation. Adjust these as required by the PV/DM.
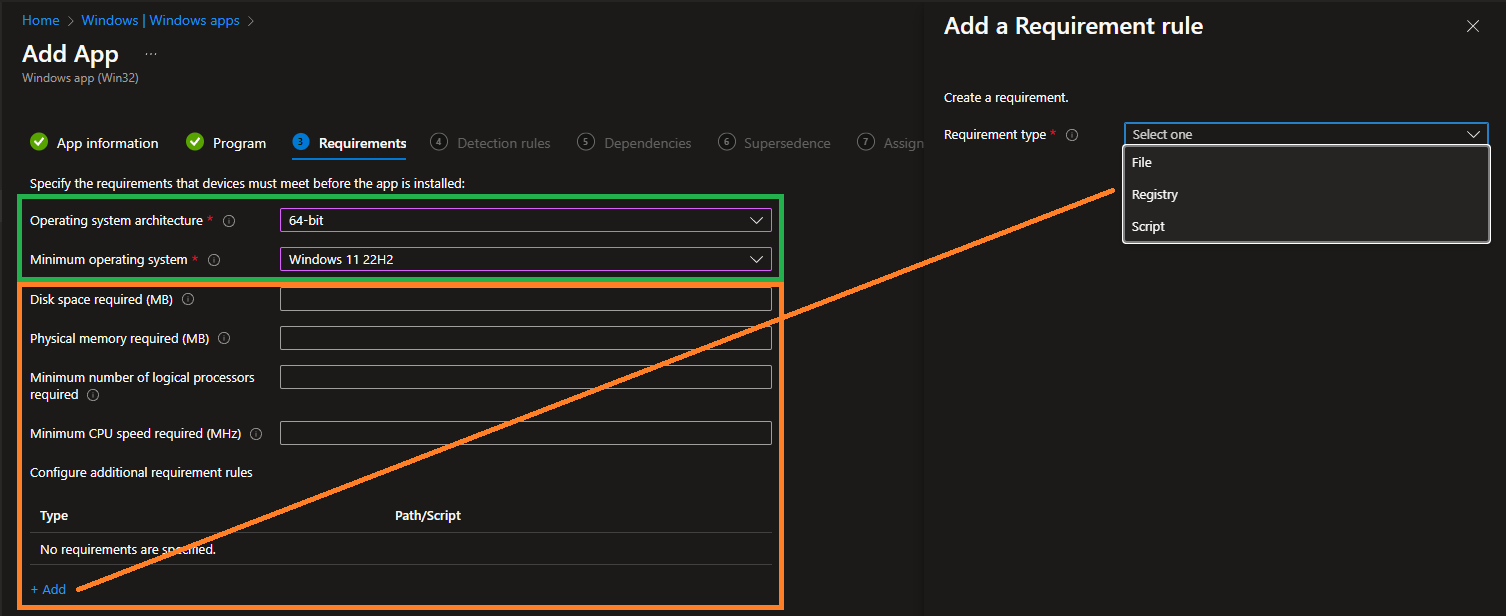
Define App Requirements
Now define the Operating system architecture and Minimum operating system for the app:
Define App Detection Rules
Now define how Intune should verify that the app was successfully installed.
Detection can be done using manual rules or a script:
🛈 HINT
Use one of these options to reliably confirm that the app was successfully installed.
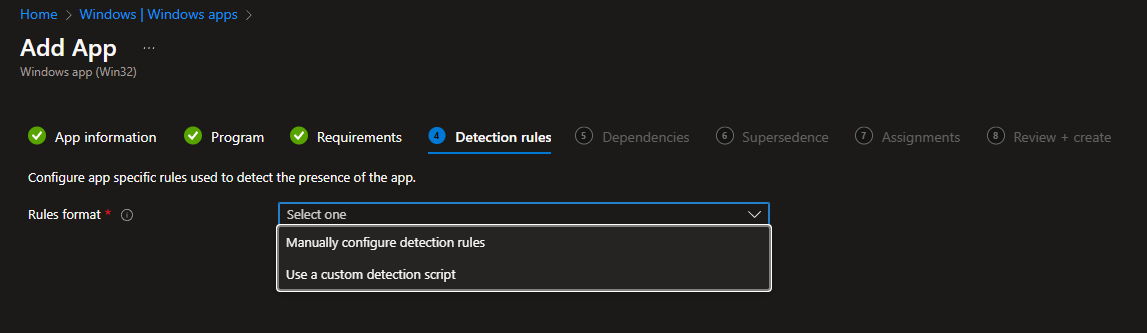
For manual detection rules, you can query MSI, FILE, or REGISTRY:
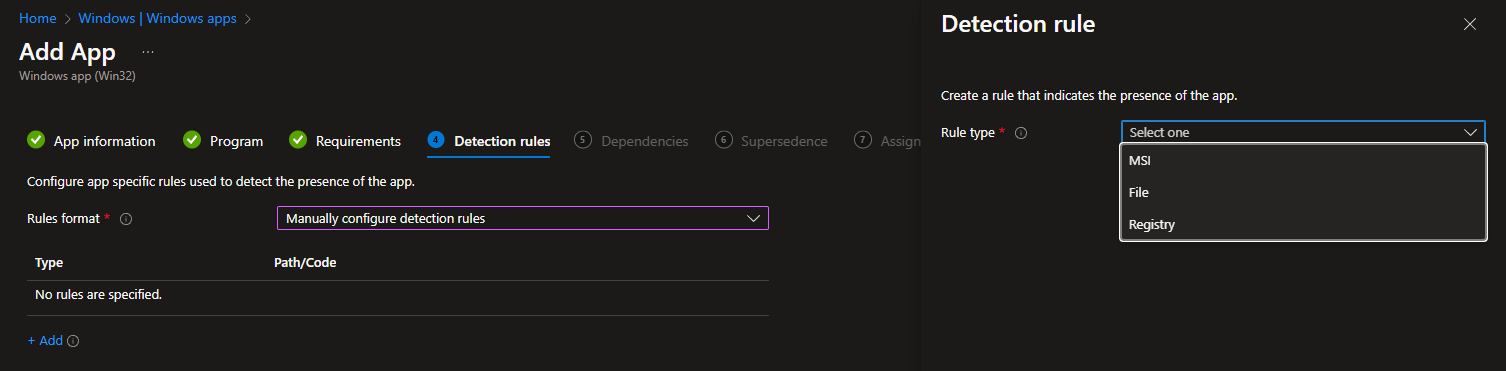
For script-based detection rules, you need to write a PowerShell script that checks the installation status and outputs a message using Write-Output, then exits with exit 0:

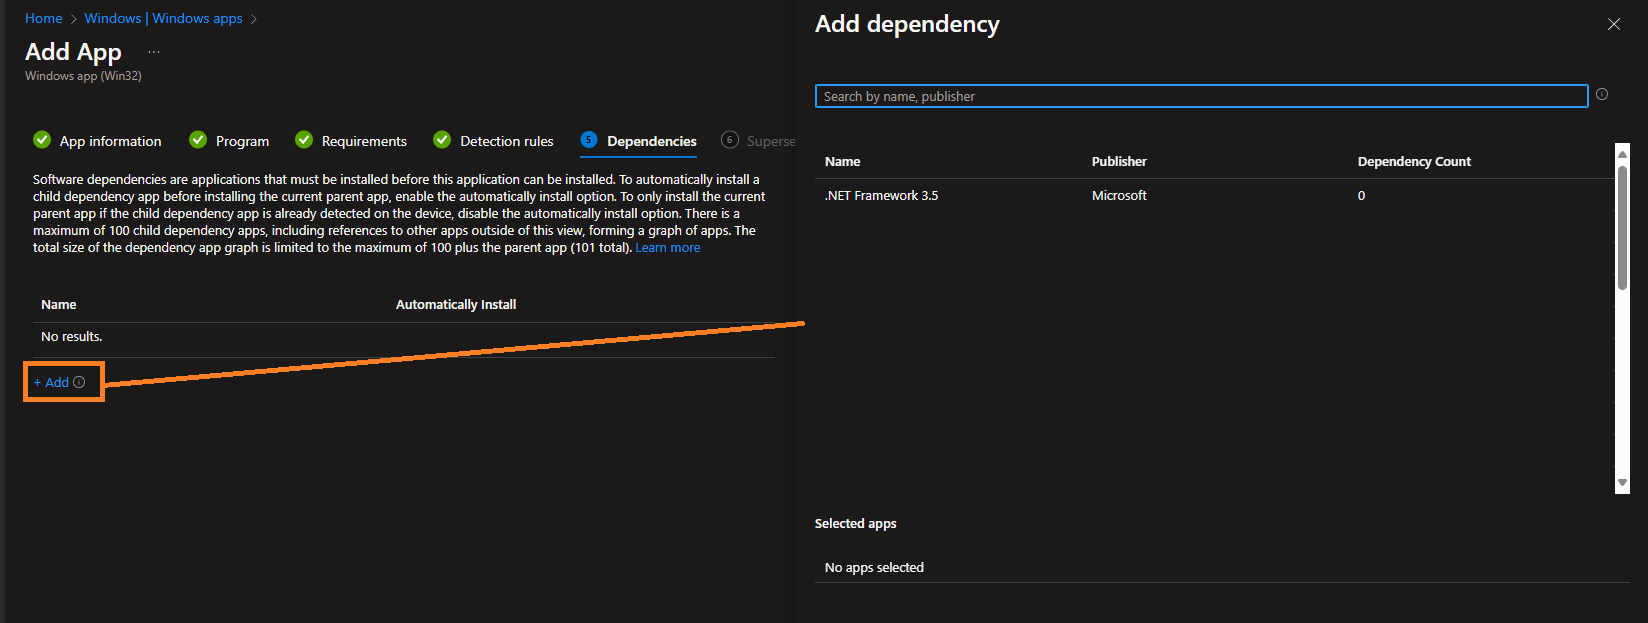
Define App Dependencies
If the app requires another app as a dependency, you can define up to 100 apps that must be installed on the client before this app can be installed. If your app has no dependencies, simply click Next:
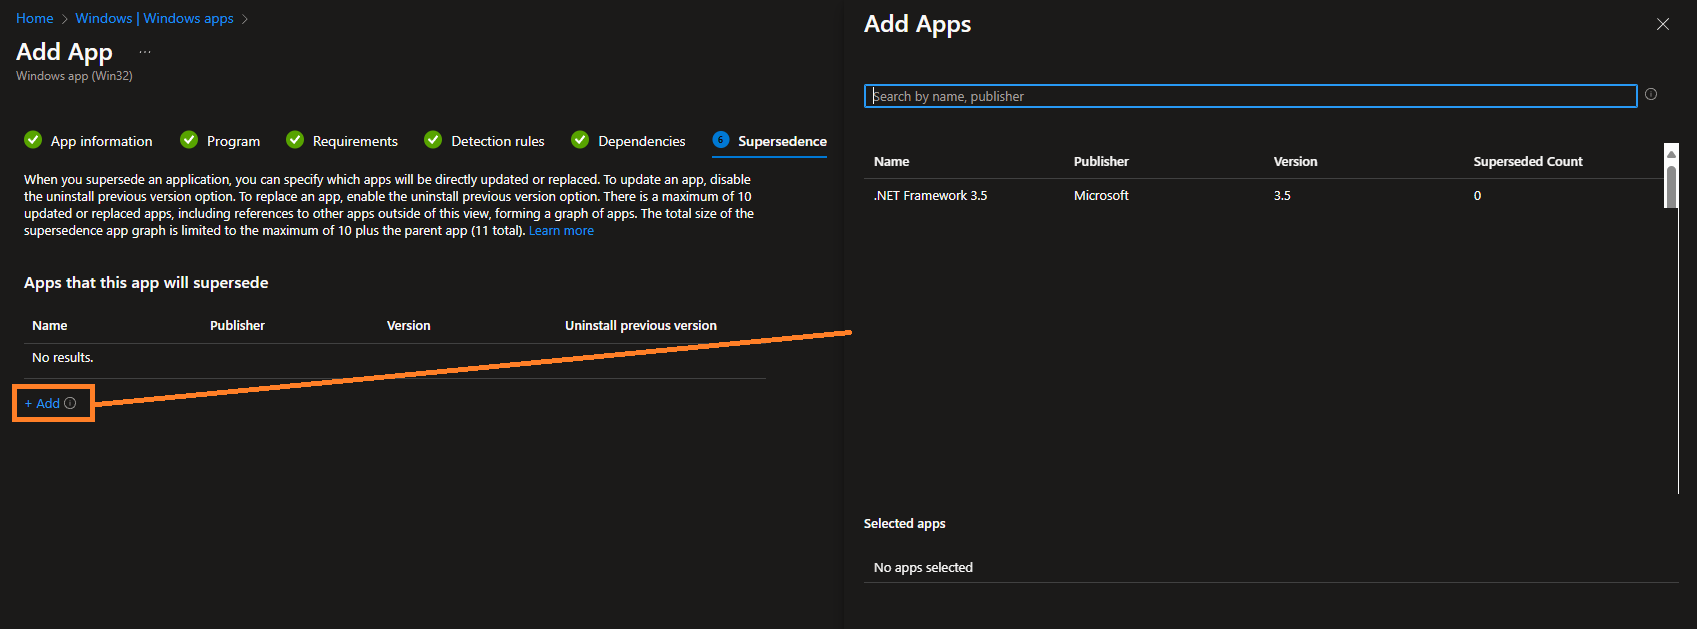
Define App Supersedence
If the app replaces a previous version or another app, you can define this here and select the previous app. It will be uninstalled before the new app is installed. If your app does not replace any other apps, simply click Next:
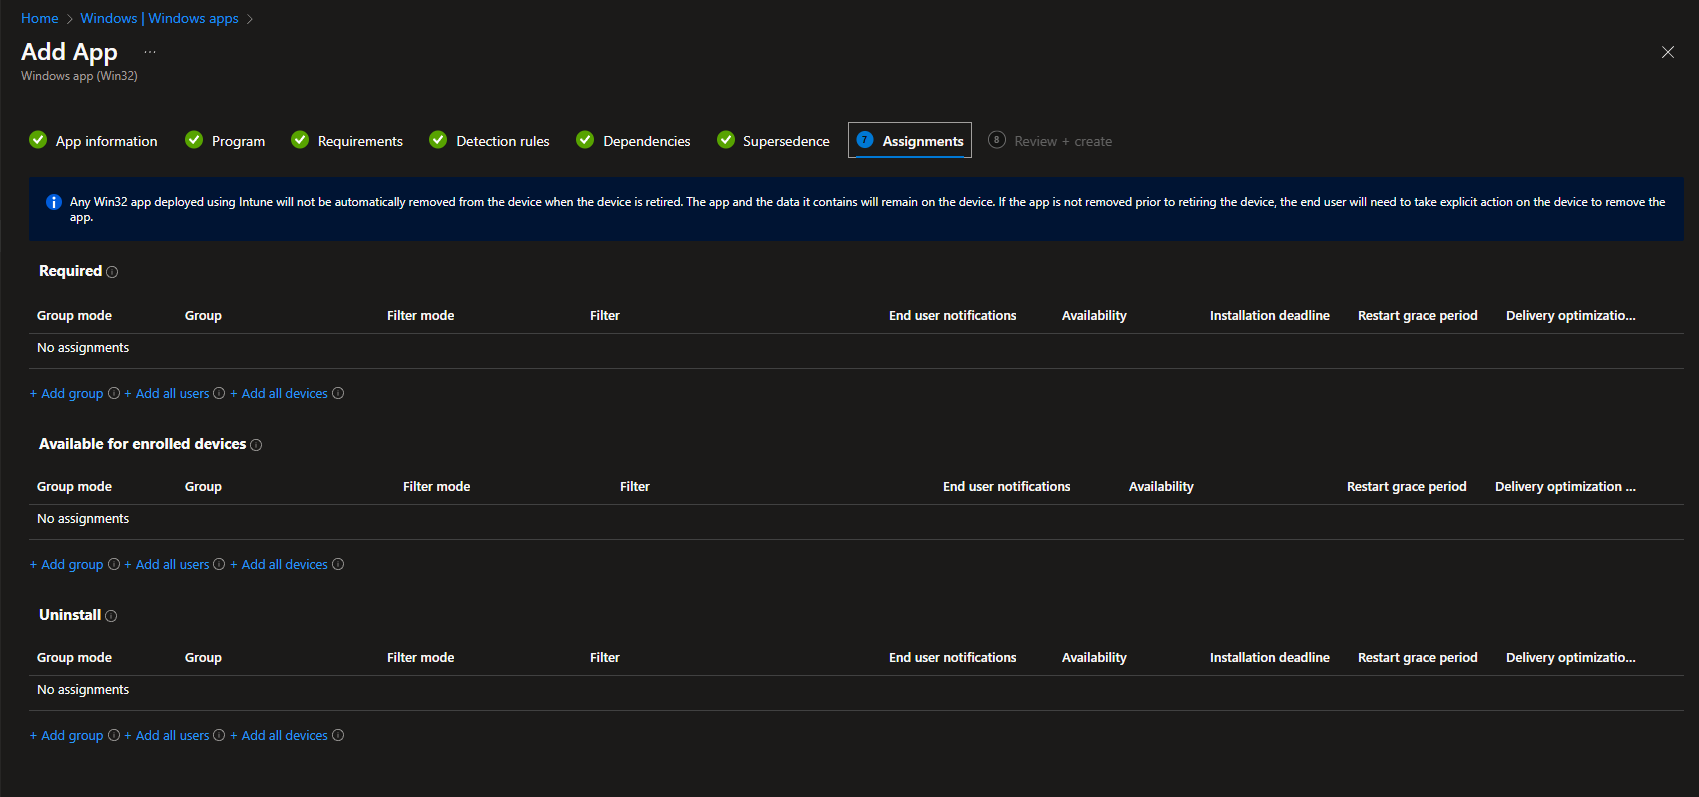
Assign the App
To deploy the app via Intune to clients, we need to configure the assignment.
🛈 HINT
Always use group-based assignments. For the initial test, assign the app to the groupMEM-TEST-AA-UG-Softwaretest. This allows you to perform quality assurance. If the PV has its own test group, assign it as well.
Assignment Types:
| Command | Description |
|————————|———————————————-|
| Required | Define an Entra ID group with the users/clients where the app should be force-installed. |
| Available for enrolled devices | Define an Entra ID group with the users/clients where the app should be available in the company portal. |
| Uninstall | Define an Entra ID group with the users/clients where the app should be uninstalled. |
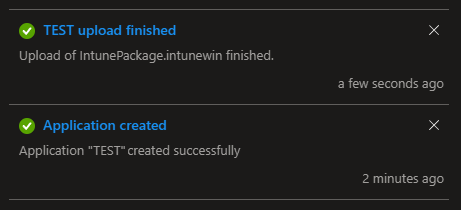
Finally, click Next and, after reviewing everything on the review page, click Create. Wait for Intune to confirm the upload:
🛈 HINT
Depending on the size of the app package, this may take some time. Do not close the window and keep your client powered on and online.
Test the Package
We perform a full quality assurance (QA) for each package. This consists of the following steps:
- Install the app.
- Open the app without error messages (no functionality test, just a launch test).
- Uninstall the app.
- Reinstall the app.
- Open the app without error messages (no functionality test, just a launch test).
- Uninstall the app and verify that no remnants are left.
Additionally, if the app is part of the required apps for a product, a provisioning test is conducted. The app is assigned to the TEST product, and a test is performed via Autopilot enrollment. If the app is only made available, the Autopilot test can be skipped.
Assign the Software Package
Once the app has been successfully uploaded to Intune and passed QA, the PV/DM will submit a change request for rollout. After approval, you can deploy the app to production.