How to create Intune Cloud PKI Instances?
03 April 2025
Intune Cloud PKI
What is Cloud PKI?
Intune Cloud PKI is a cloud-based Public Key Infrastructure (PKI) solution provided by Microsoft Intune. It enables organizations to securely issue and manage digital certificates without the need for on-premises PKI infrastructure. These certificates can be used for various purposes, such as authenticating users and devices, securing network communications, enabling Wi-Fi and VPN access, and ensuring compliance with organizational security policies. By leveraging Intune Cloud PKI, organizations can simplify certificate management, reduce operational overhead, and enhance security in a scalable and efficient manner.
The deployment of certificates using Cloud PKI and Intune is really simple, compared to a classic PKI deployment on Intune using NDES:

What are the requirements for it?
To use Intune Cloud PKI, you need the following prerequisites:
- Intune License: Ensure you have an active Microsoft Intune license for your organization.
- Cloud PKI Add-On: The Cloud PKI Add-On must be enabled in your Intune subscription to access the Cloud PKI features.
- Intune Environment: A configured Intune environment with managed clients is required to deploy and manage certificates effectively.
These prerequisites ensure that your organization is ready to leverage the full capabilities of Intune Cloud PKI for secure certificate management.
How to setup a two-tier PKI?
This post will show you how to setup a two-tier Cloud PKI in Intune. We will create a Root Certification Authority (I will call this one the RootCA) as well as a Issuing Certification Authority (This one will be called SubCA in my post).
So lets start by creating the nessesary root CA.
Creating a Root CA
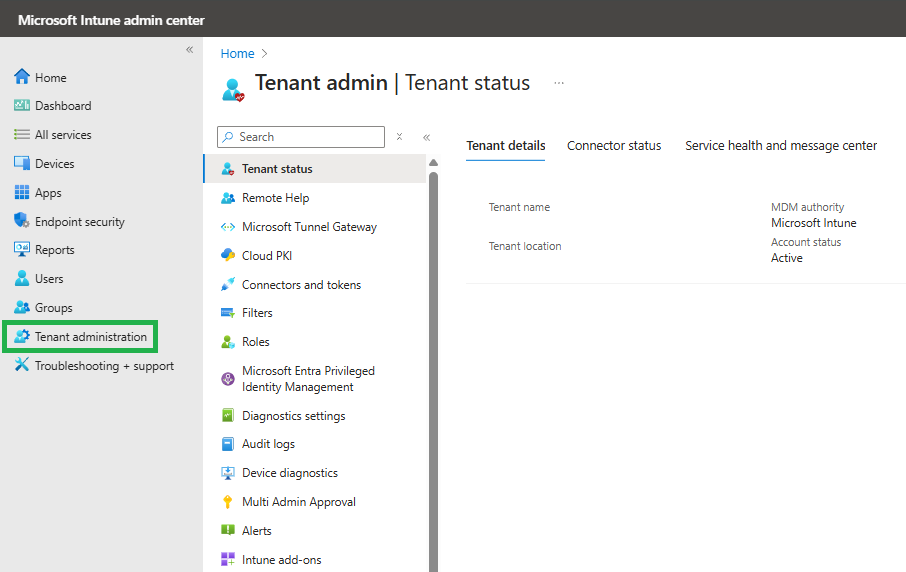
Navigate to Tenant Administration inside of the Intune Portal:
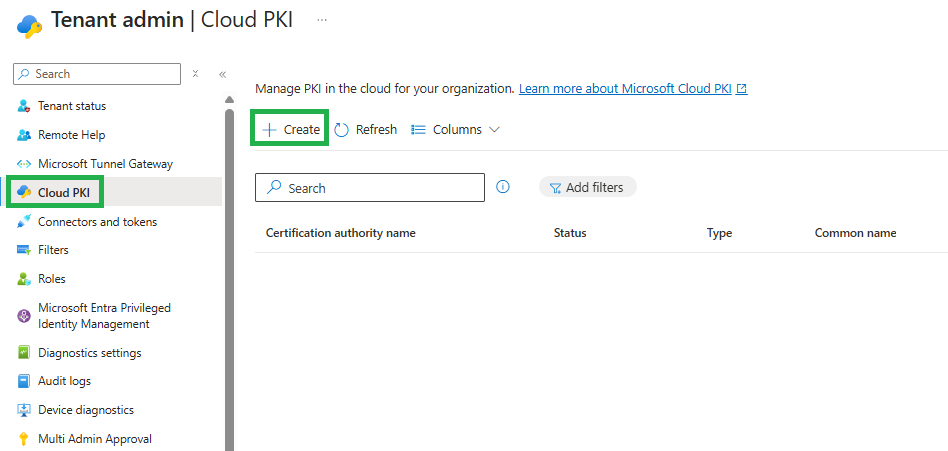
Here, click on Cloud PKI and as we want to create a new PKI, click on + Create:
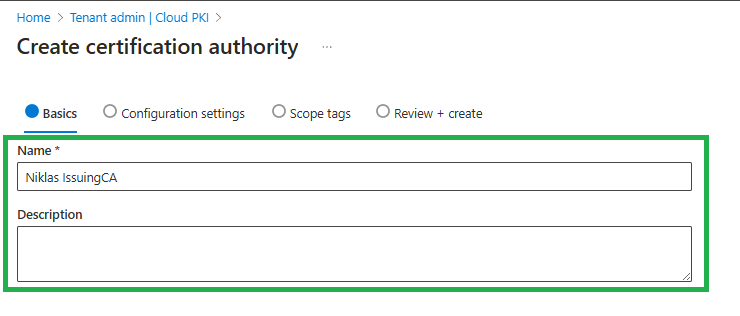
Define a name to identify it as your Root CA:

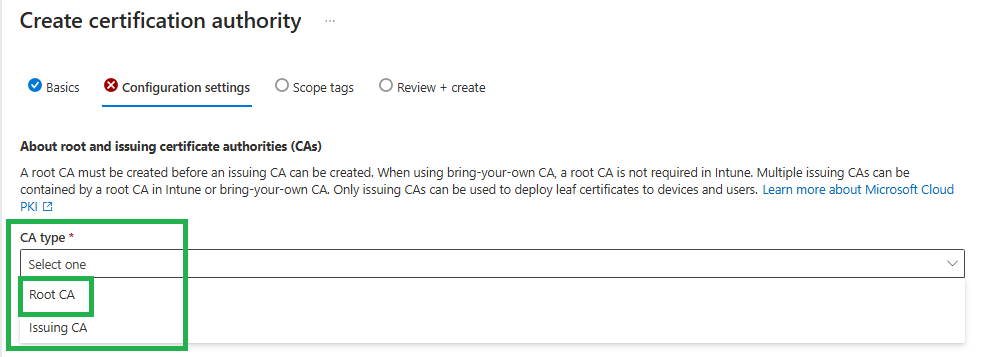
Select Root CA as the CA type:
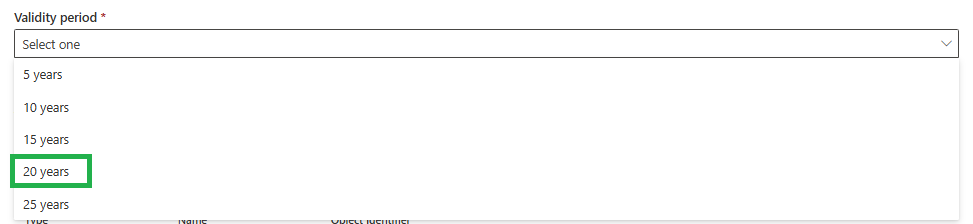
Define the period for which this CA should be valid. We are using 20 years here:
Define which usages should be created from this PKI. This will limit which certificate types it can issue. I am going with:
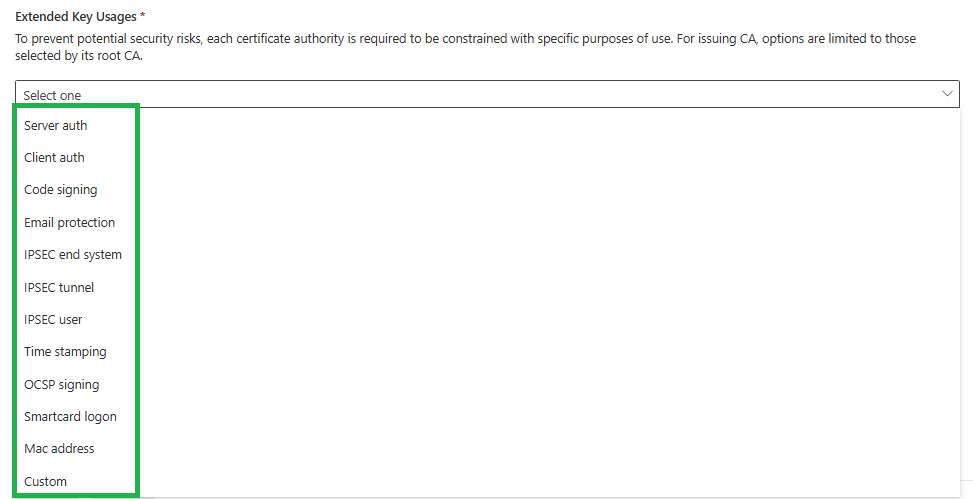
For this PKI, I´ve selected the following ones as I only need those:
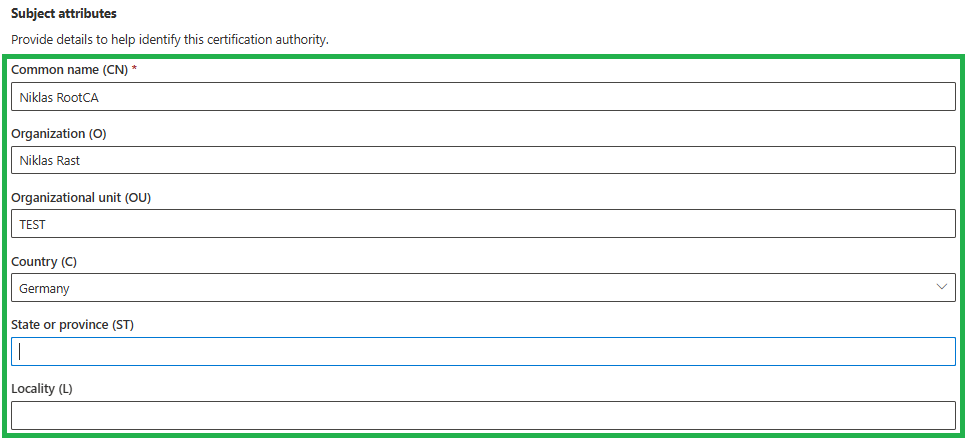
Define the Informations for your PKI:
Lastly you need to define the encryption for it. I am going with the highest one:

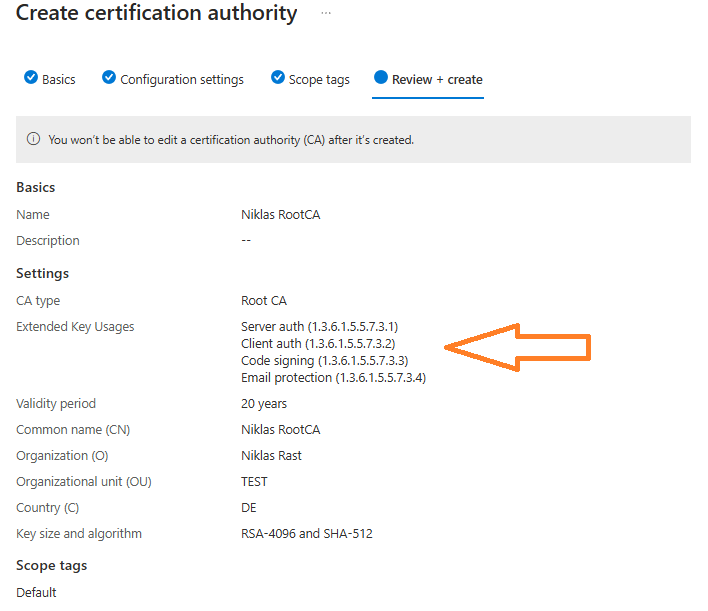
Review and make sure, that all usage types that you need are configured as you cannot change this later:
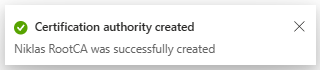
Wait for the PKI to be created. This should only take a few seconds:
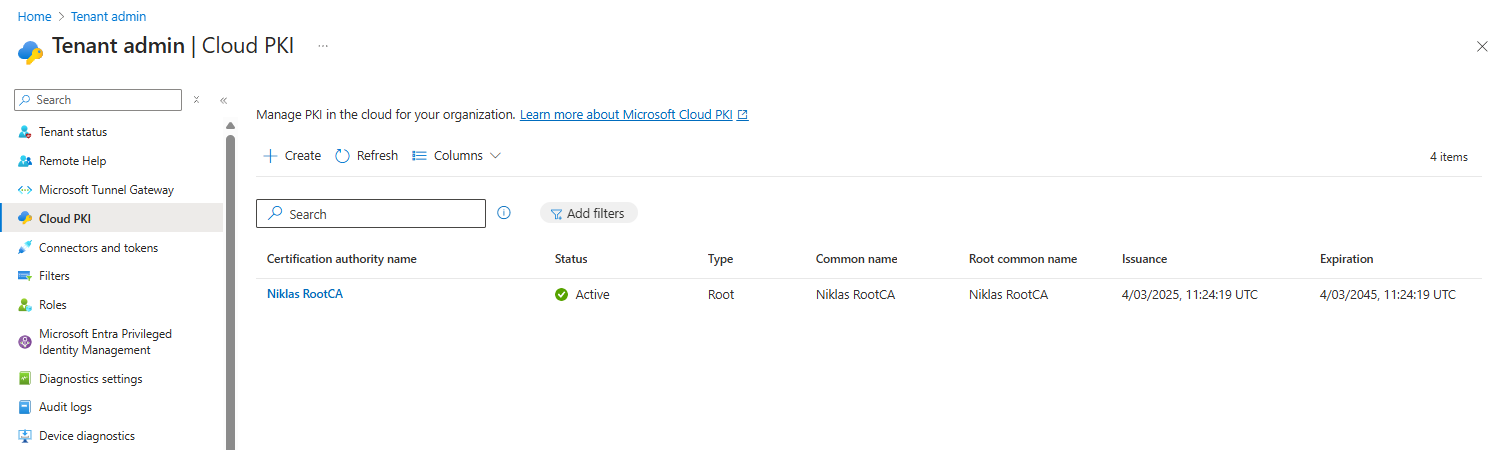
Now that your RootCA is created click on it:
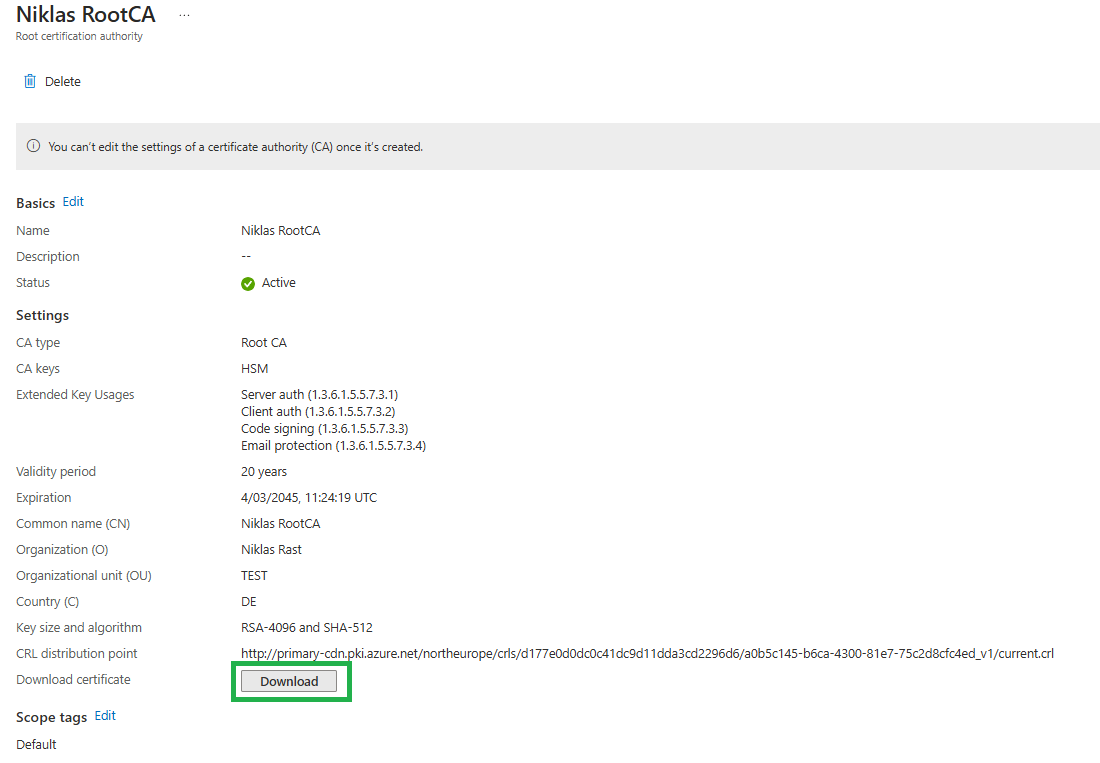
Here you need to download the RootCA certificate as we later need to deploy this to our clients for the trust chain.
Creating a Issuing CA (also called SubCA)
So, now that we have created our RootCA lets go on with creating a IssuingCA that we will use to issue certificates to users or clients for authentication or what ever usages you need. Back at the Tenant Administration blade, again click on Cloud PKI and + Create:

Define a name for your new Sub- or IssuingCA:
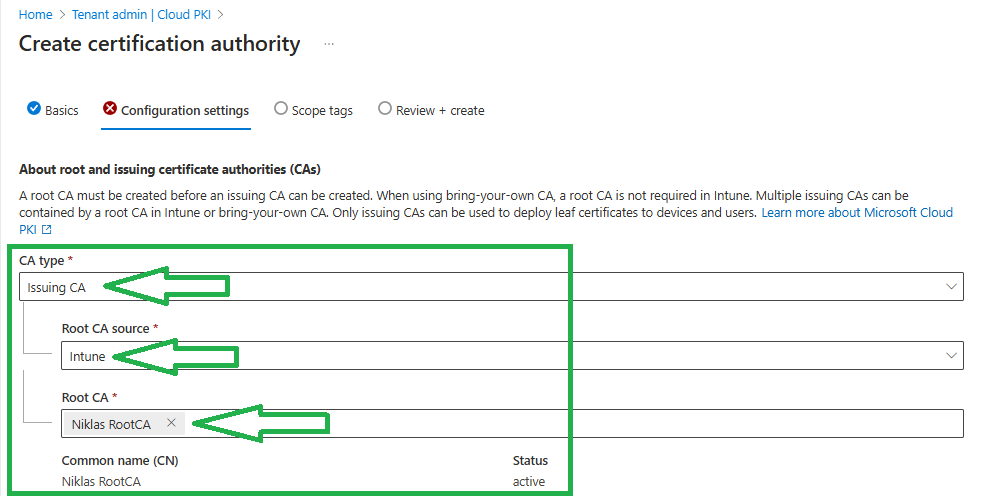
This time we select Issuing CA as the type and pick the RootCA that we created earlier:
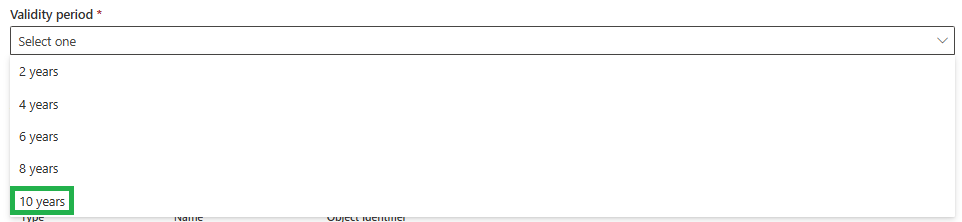
Again define the validity period in years. I am going with 10 years for this Issuing CA:
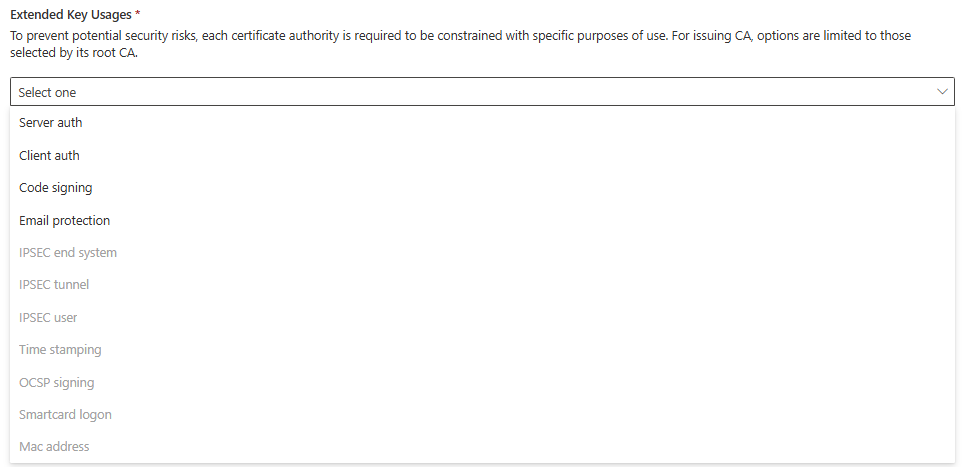
This time we only see usages that our RootCA supports. As this IssuingCA should issue certificates for this purposes, I am going to select all of them here:
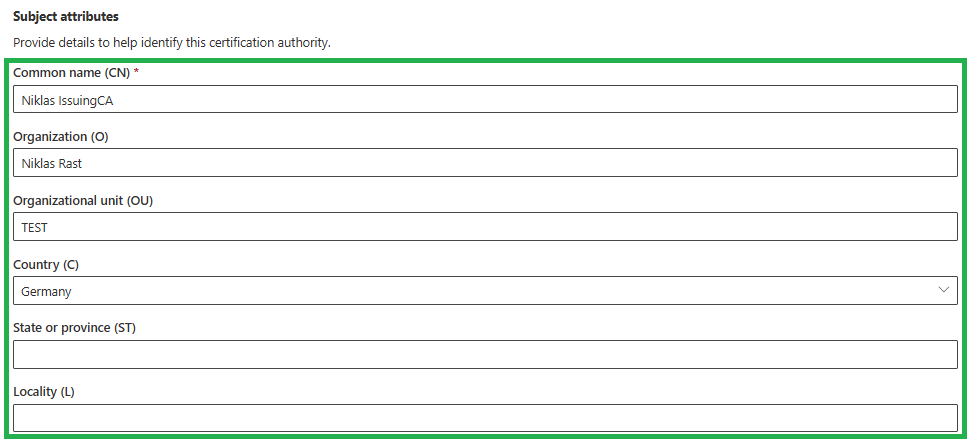
Define the Informations for your Issuing CA, similar to your RootCA:
The encryption is automatically matched to your RootCA:

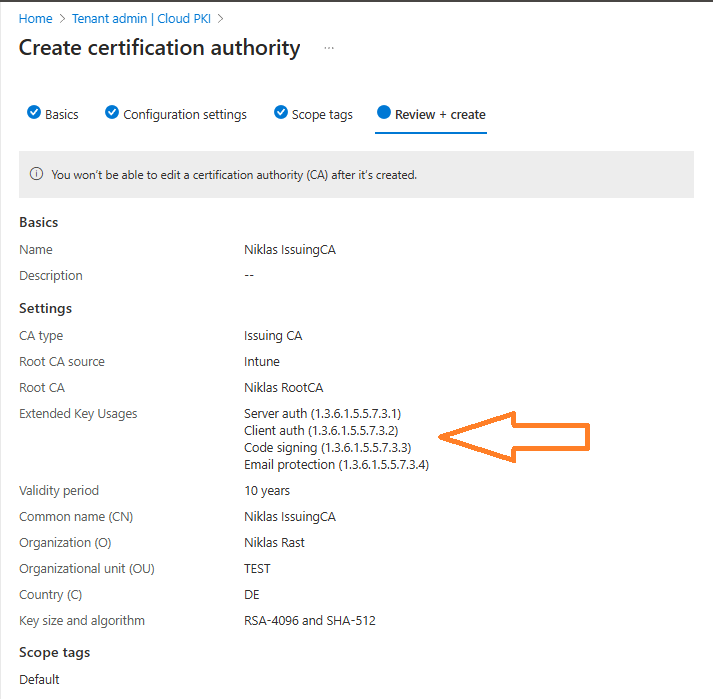
Make sure that everything is configured how you need it and create the Issuing CA:
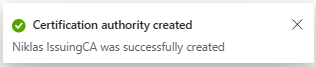
This also should only take a few seconds:
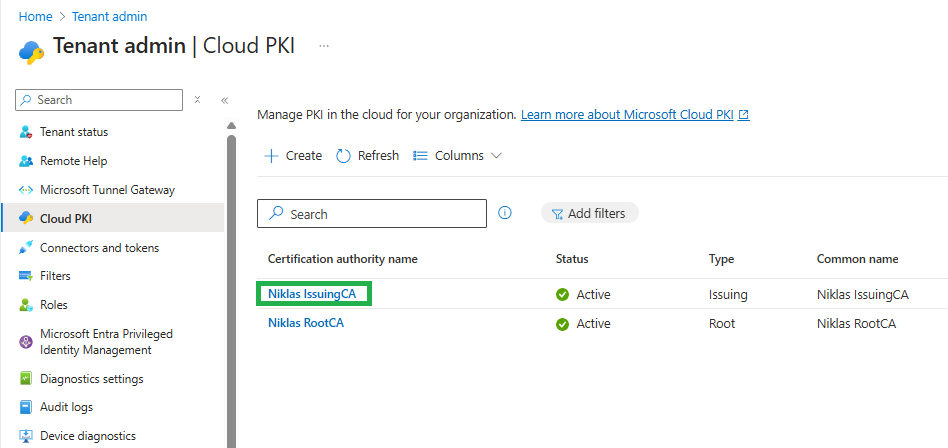
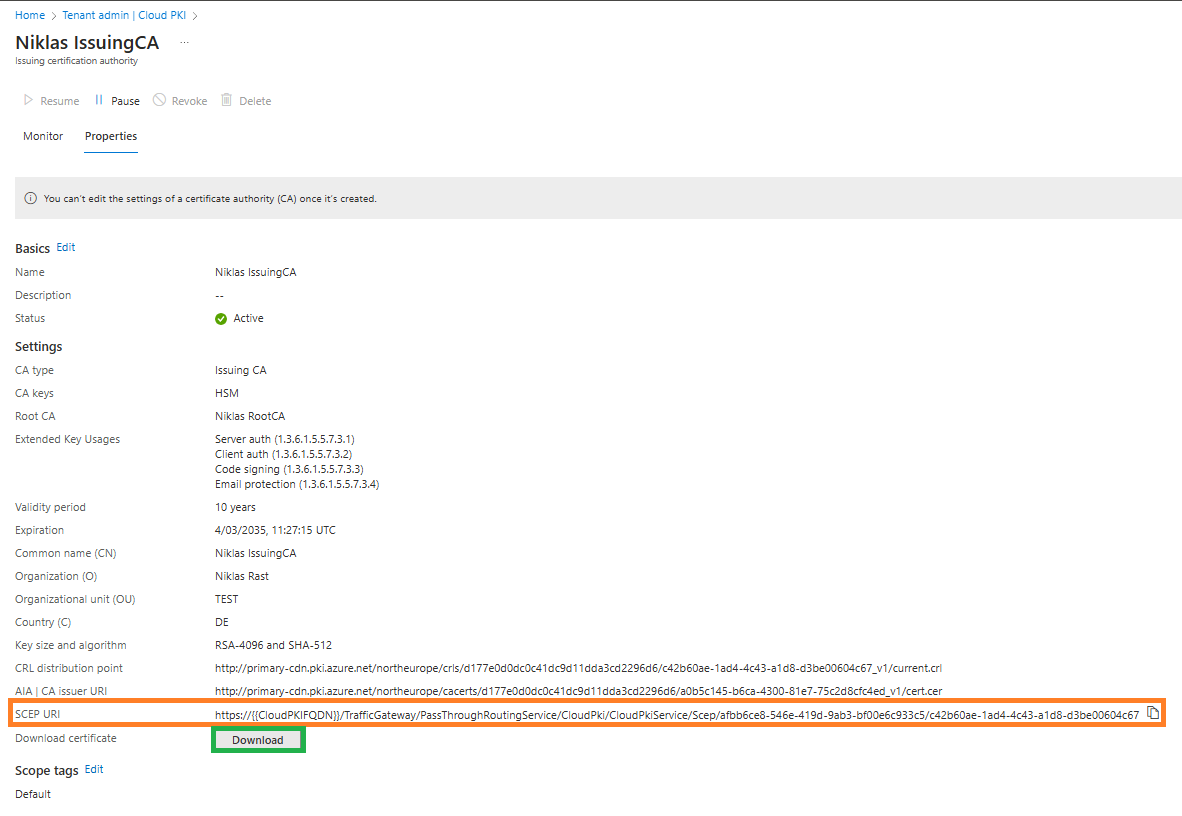
Click on your Issuing CA:
Here Copy the SCEP URI as we need this in the next step and also download the Issuing certificate:
Your two-tier PKI is now ready ;)
Deploying the Root and Issuing certificates
Now that you PKI Infrastructure is ready, lets deploy the Root and Issuing certificates to our clients. You need to deploy them to each platform (Windows, macOS, iOS and Android) where you need certificates seperately.
I am going to deploy it to Windows here but it is similar for the other platforms.
Firstly we need to create a Trusted certificate Template here:
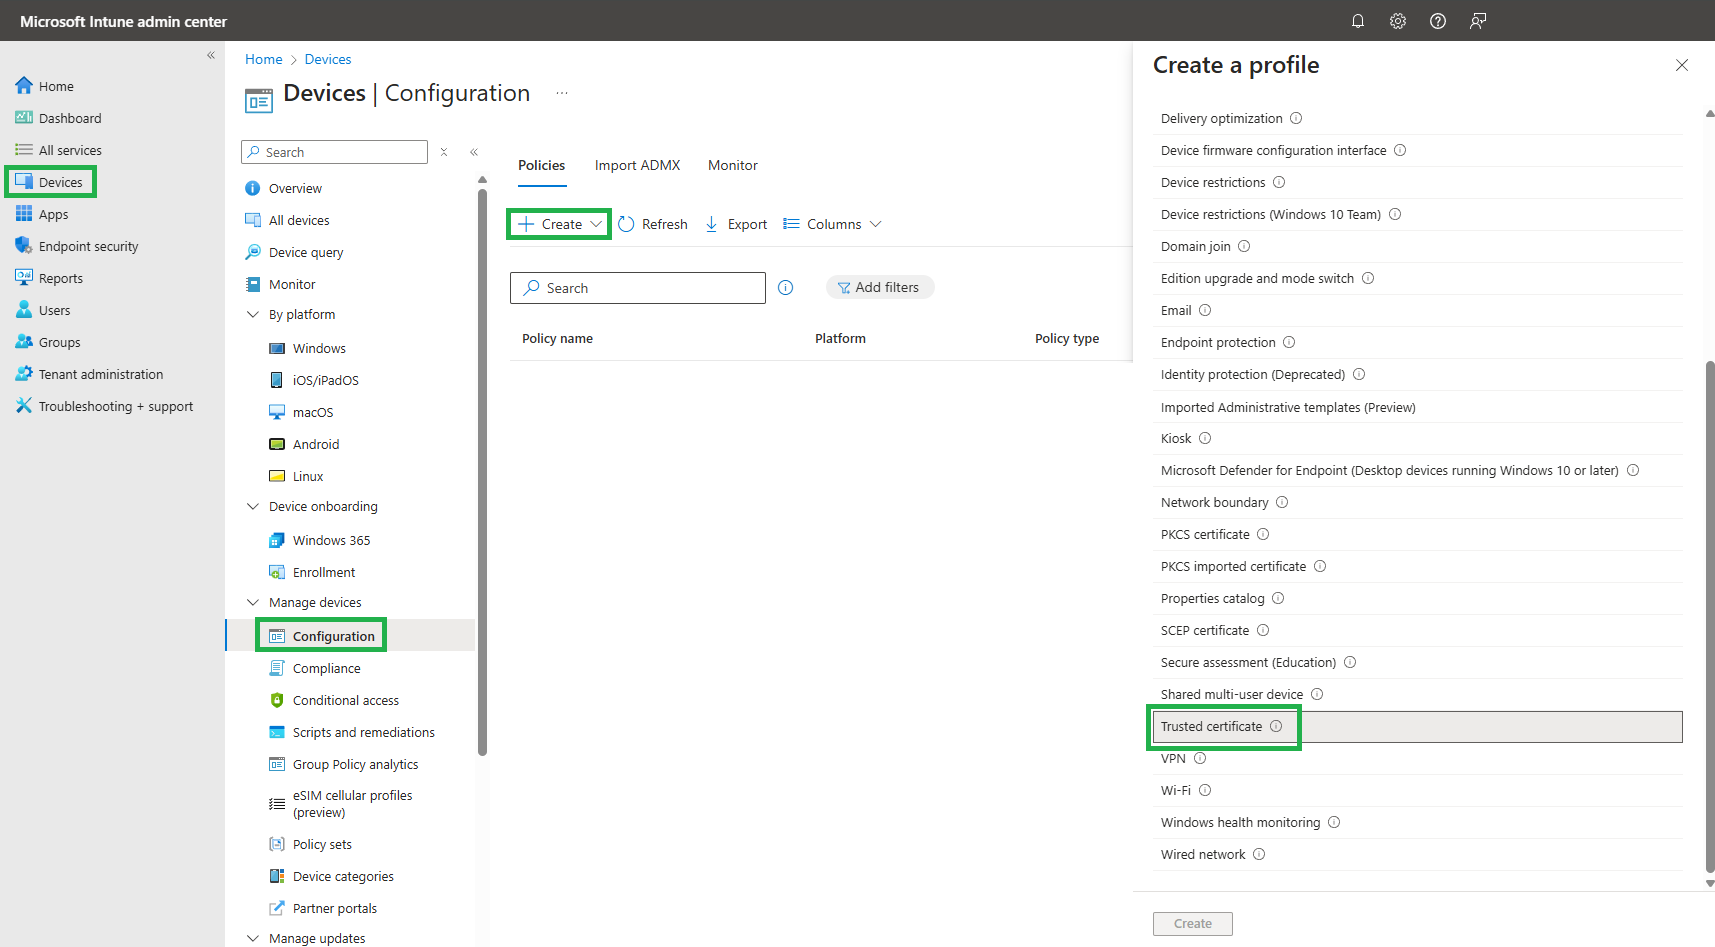
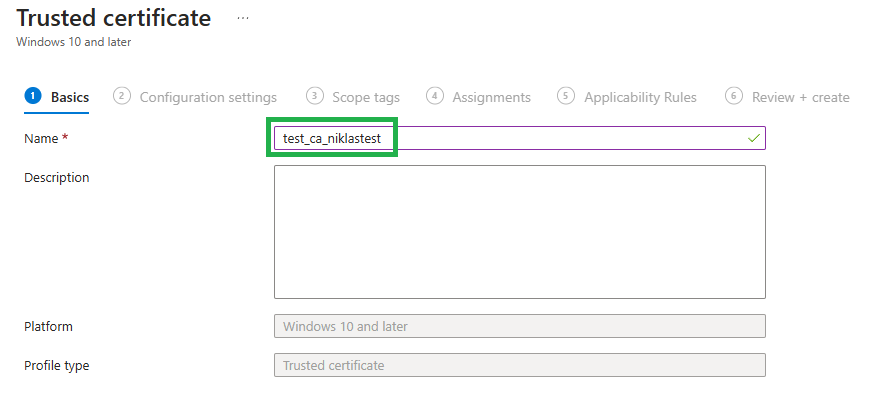
Give it a name:
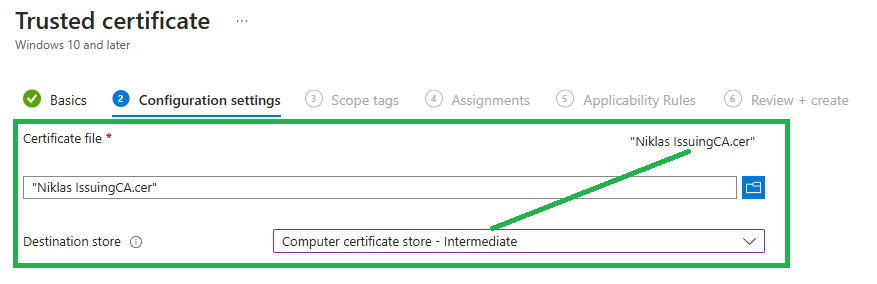
Import the .cer file for the RootCA and choose Computer certificate store - Root. Then deploy the profile to your device group:
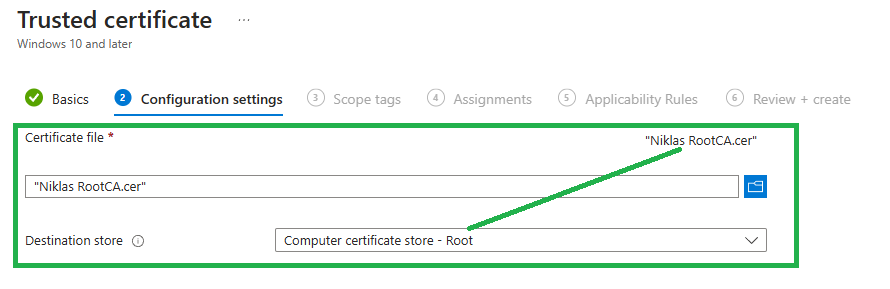
Repeat this for the .cer file for the IssuingCA and choose Computer certificate store - Intermediate.
Both certficates need to be deployed to your devices, so that issued certificates can be fully trusted and used.
Creating SCEP profiles
A SCEP (Simple Certificate Enrollment Protocol) template is a configuration profile used to automate the distribution of certificates to client devices. It simplifies the process of certificate enrollment by allowing devices to request and receive certificates from a Certification Authority (CA) without manual intervention.
Im going to show you how to create client and user scep templates which issue certificates either for a client or a user.
Deploy client certificates
Lets start with creating a SCEP template to deploy client certificates. Those can be used to authenticate a client agains ressources like wifi.
That where we are going to use Client auth for and as I needed it for Windows Remote Management (WinRM) I added Server auth.
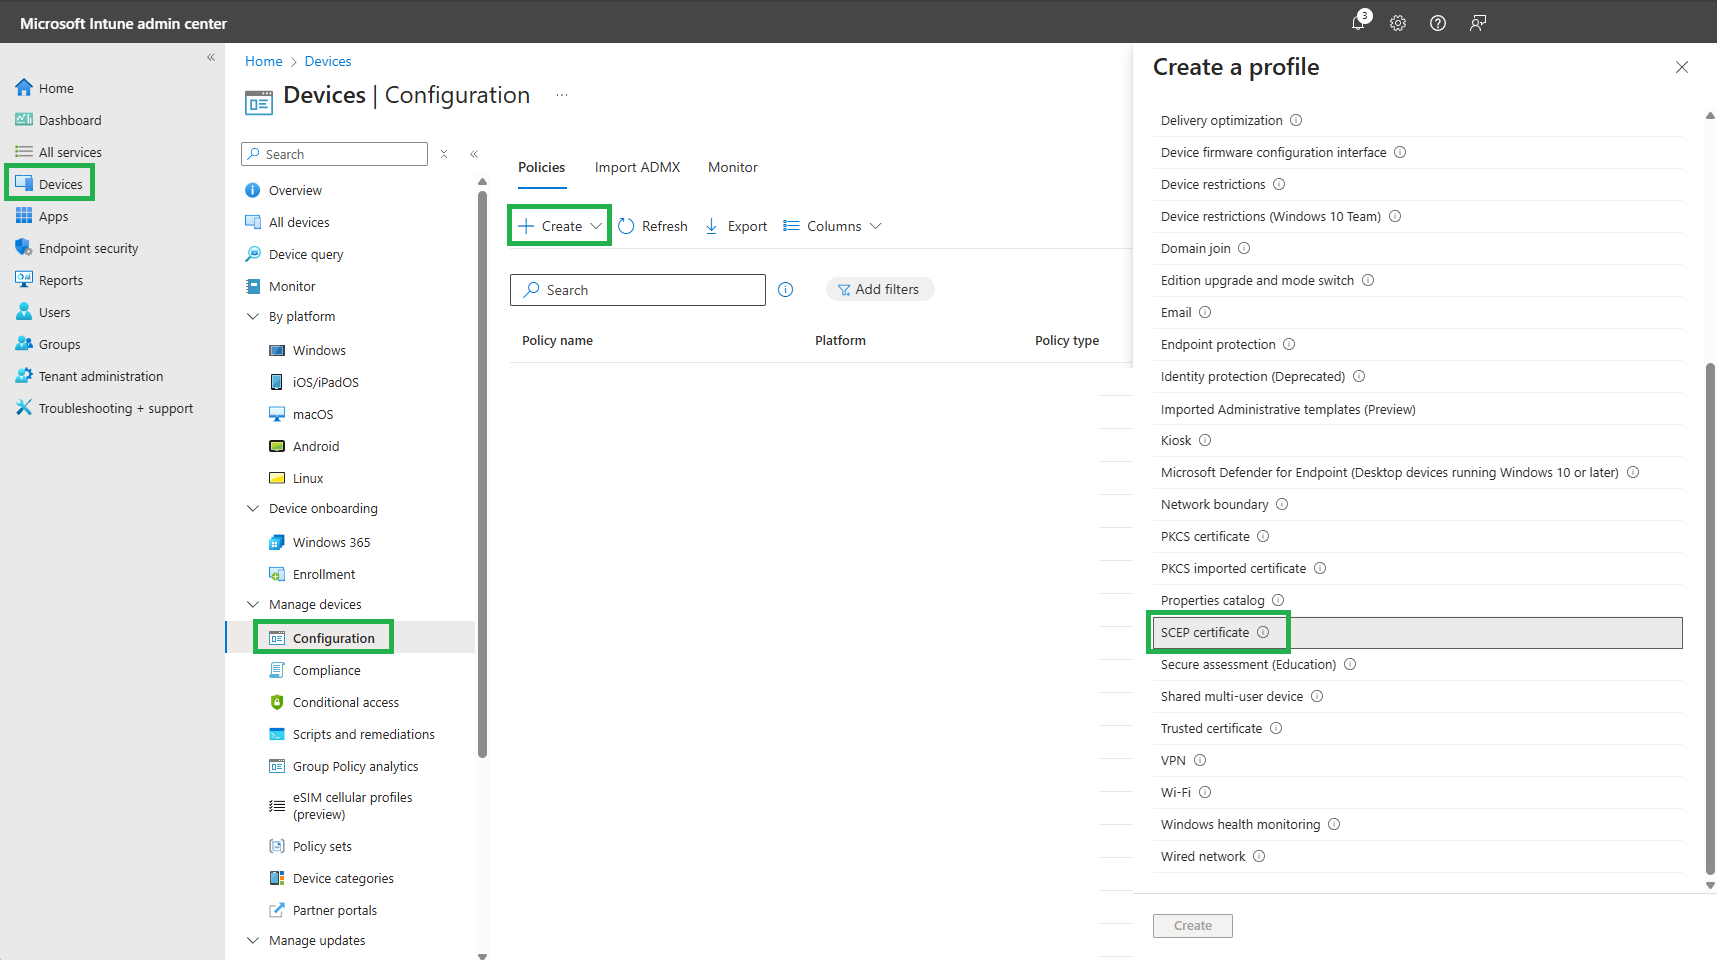
Create a new Template for SCEP certificate:
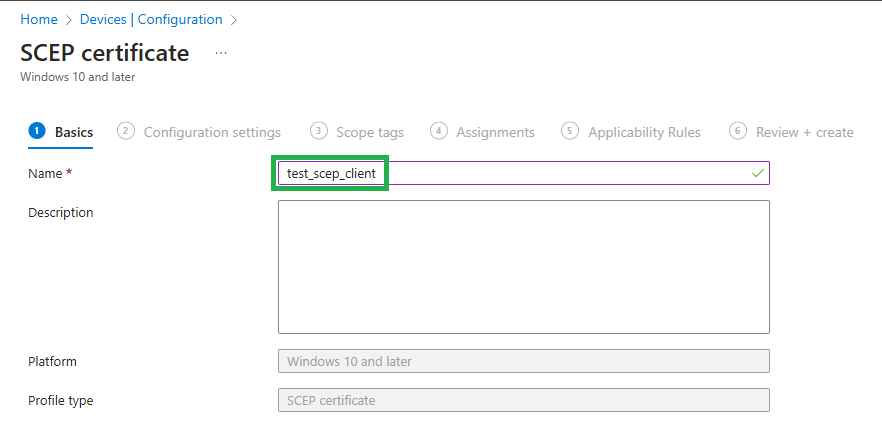
Define a name:
Configure the following settings:
- Certificate type: Device
- Subject name format: Define the Common name for the certificate
- Subject alternative name:Define alternative Attributes for a certificate like DNS.

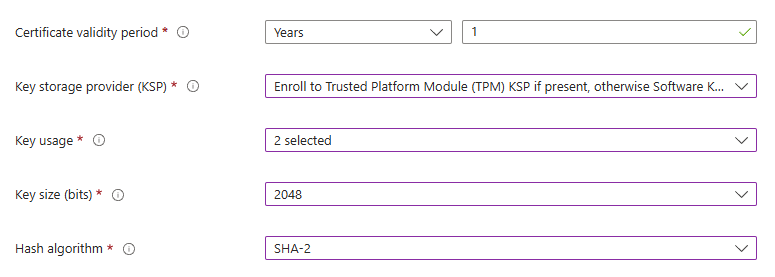
Define the parameters for the certificate and its security:
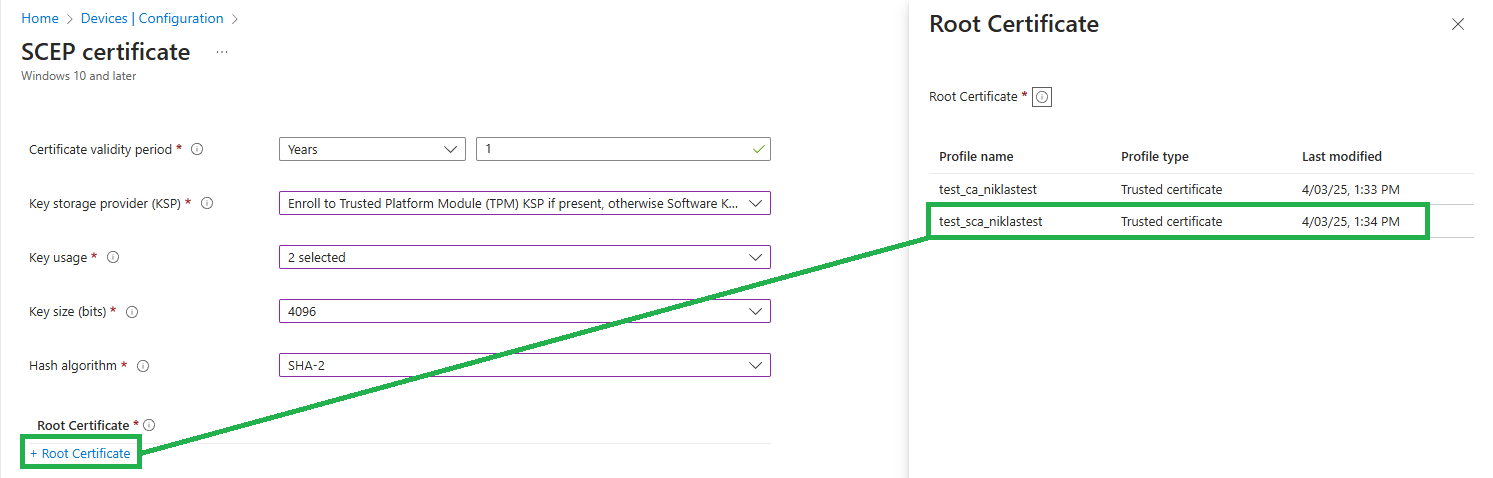
Define the certification authority that this certificate will be issued from. In this example this is our Issuing CA which I imported as test_sca_niklastest:
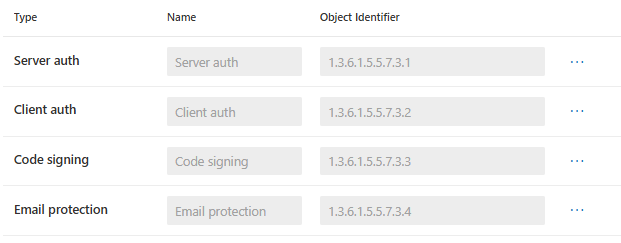
Next we need to define which purposes this certificate should have. Some are available from the picker….
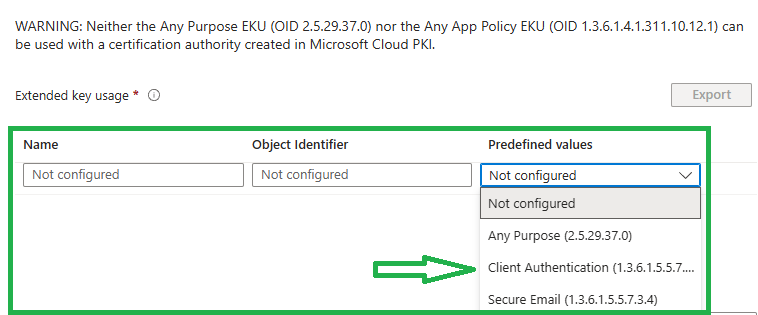
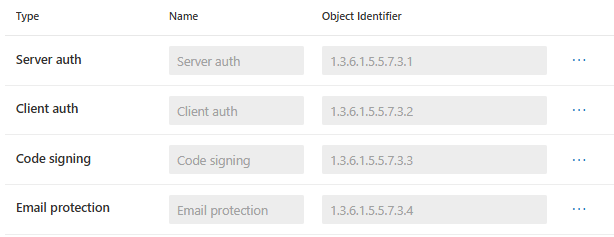
… others can be added trough the Object Identifier and Name but it only works if your Issuing CA can issue those purposes:

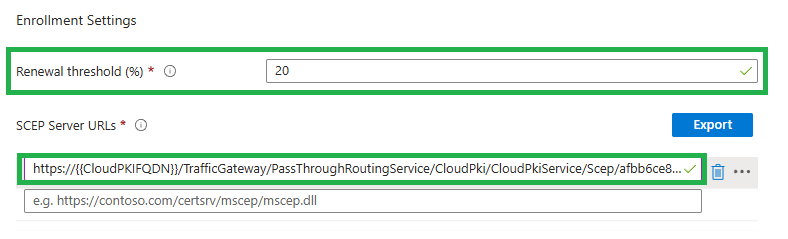
Lastly we need to define when the certificate will be renewed and from where it will be issued. Remember when you earlier copied the SCEP URI from the issuing CA? Paste this URI in the SCEP Server URLs filed:
🛈 HINT
For example if a certificate is valid for 1 year and the renewal treshold is set to 20% it will be renewed after arround 9-10 months.
Assign the profile to a group of devices where you need the certificate and your done :)
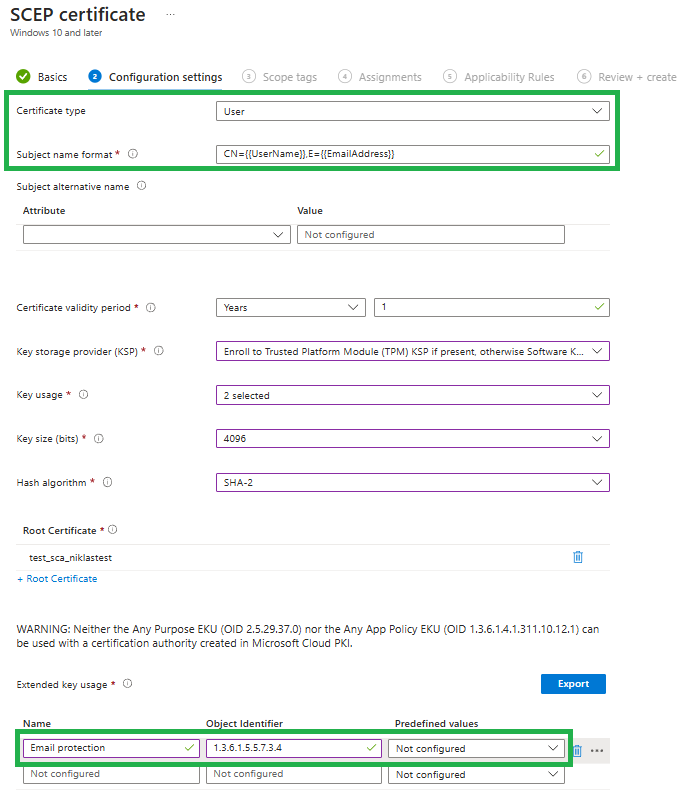
Deploy user certificates
Now lets see how we can deploy custom certificates to users.
This might be helpfully if you want to deploy Code signing, E-Mail Protection (SMIME) or other user purposes.
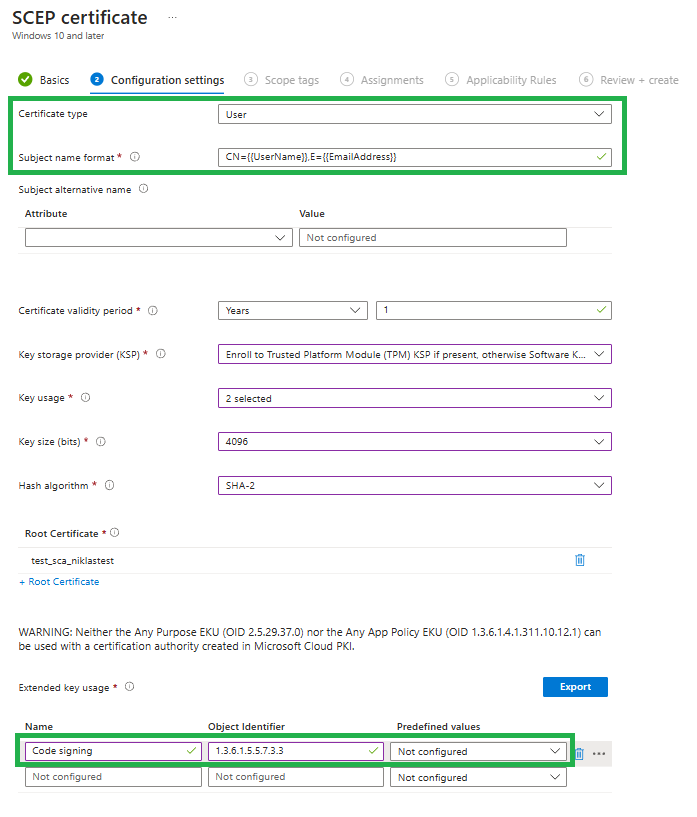
The process is the same as for client certificates, but this time we pick User as the Certificate type and attributes to identify users instead of clients:
Sample for Code Signing certificates
Sample for E-Mail Protection (SMIME) certificates
Assign the profile to a group of devices where you need the certificate and your again done :)
Conclusion
Intune Cloud PKI is a powerful solution that simplifies certificate deployment and management for Intune-managed devices in a cloud-native environment. By eliminating the need for on-premises PKI infrastructure, it reduces complexity and operational overhead, allowing administrators to focus on other critical tasks. The seamless integration with Intune ensures that certificates can be deployed efficiently across various platforms, enhancing security and compliance without manual intervention. From my perspective, Intune Cloud PKI is an excellent extension to Intune device management, providing a scalable and user-friendly approach to certificate management that truly makes an admin’s life easier. If you’re looking for a modern, cloud-based PKI solution, Intune Cloud PKI is definitely worth considering.