Defining a Multi-App Kiosk for Windows 11 devices using Assigned Access within Microsoft Intune
06 December 2024
Defining a Multi-App Kiosk for Windows 11 devices using Assigned Access within Microsoft Intune
When it comes to implementing kiosk systems on Windows devices, Microsoft offers a powerful feature known as Assigned Access. Assigned Access, also referred to as kiosk mode, is a built-in functionality in Windows operating systems that allows administrators to restrict user access to a single application or a set of applications, effectively transforming a standard Windows device into a dedicated kiosk.
With this post I want to show you how to simply implement assigned access from Microsoft Intune to create a defined multi-app windows experience that is deployable through Windows Autopilot for that „Zero-touch-deployment“ experience. That can be very handy for frontline workers that have managed devices for their tasks but where you need to restrict that no other apps are available or used.
Previous post
In my last post we talked on single-app kiosk systems. Definitely check it out to learn about single-app mode and the underlying assigned access feature from Windows that we will use for our kiosk systems.
Setup a Multi-App device
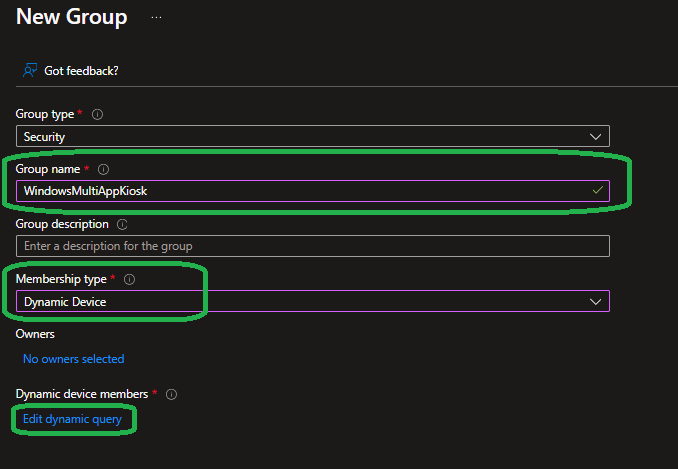
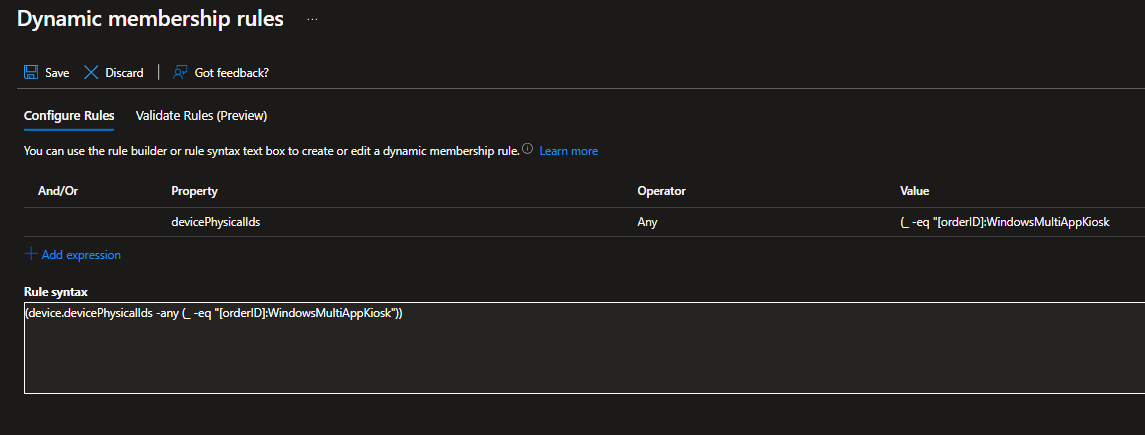
As always firstly we need a fresh Entra ID group that will contain our devices and to reduce tasks we will make it a dynamic device group that automatically adds devices with a specific Windows Autopilot grouptag.
Here we create a new group in Entra ID and assign it a dynamic membership rule that collects all devices using the “WindowsMultiAppKiosk” grouptag in Autopilot:
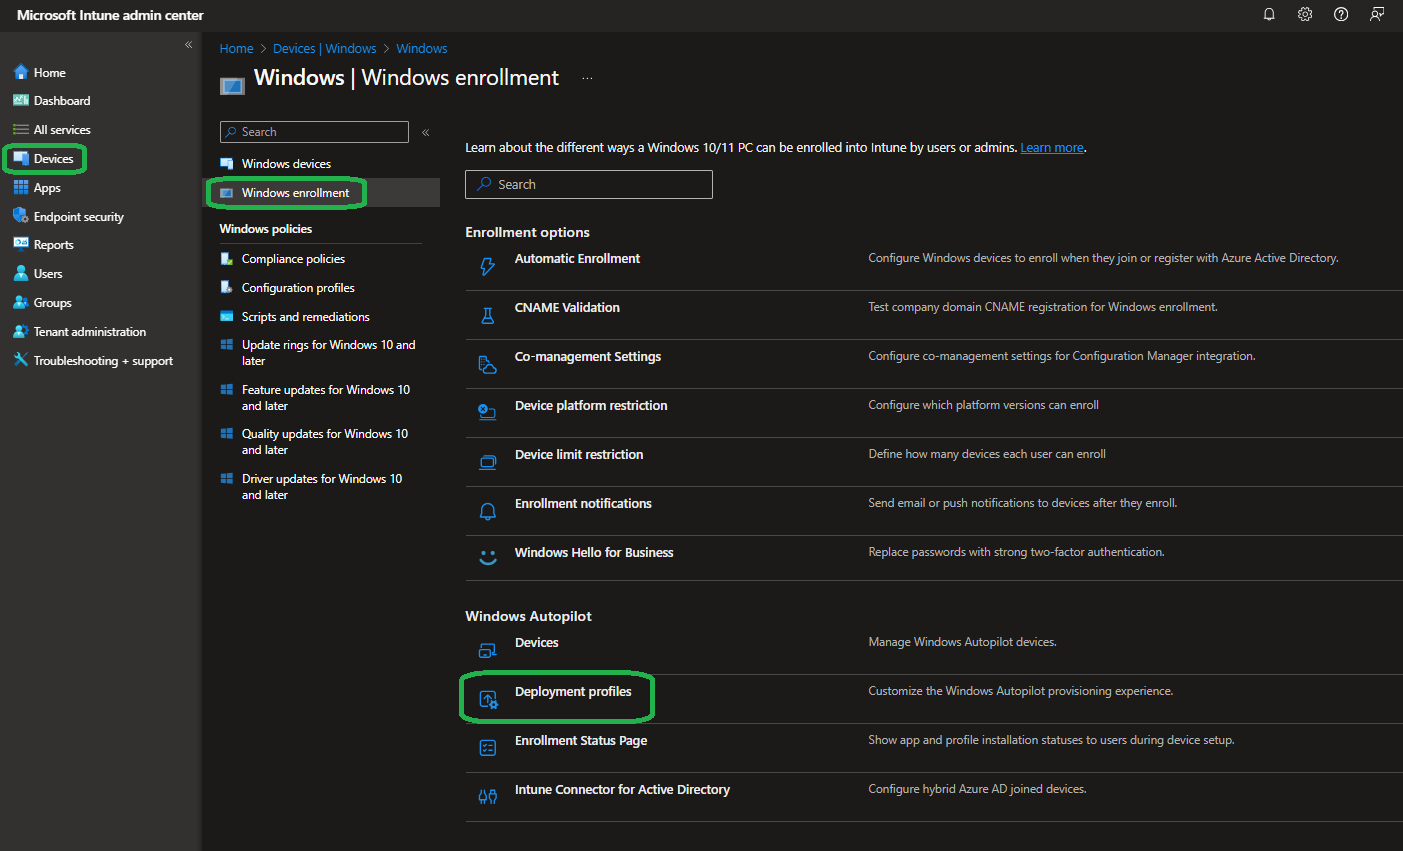
Next create a new Windows Autopilot profile that configures devices with our “WindowsMultiAppKiosk” grouptag. To do so open “Deployment profiles” in the “Windows enrollment” section in Intune:
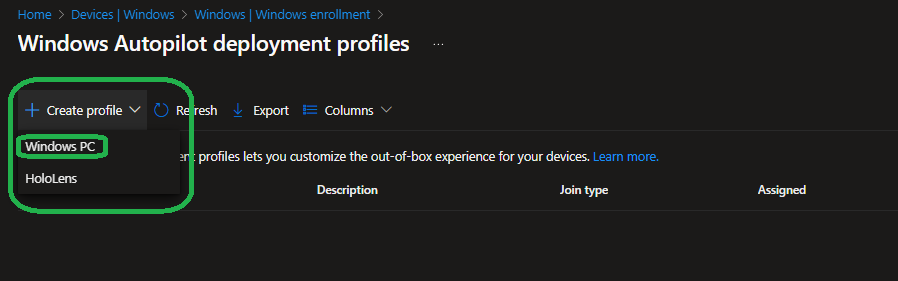
Create a new profile for “Windows PC”:
Give it a name, I will use the same as my Grouptag to identify it more simply later on:
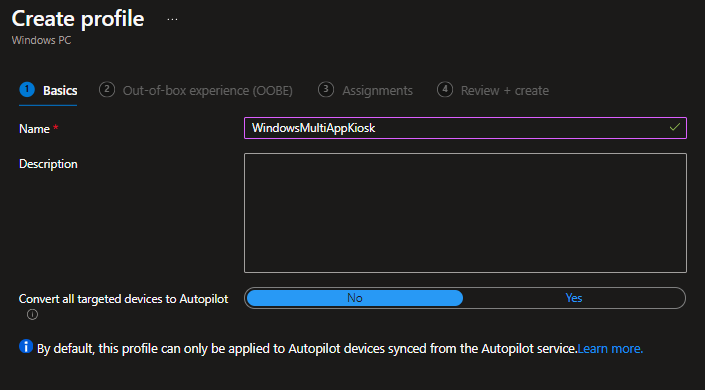
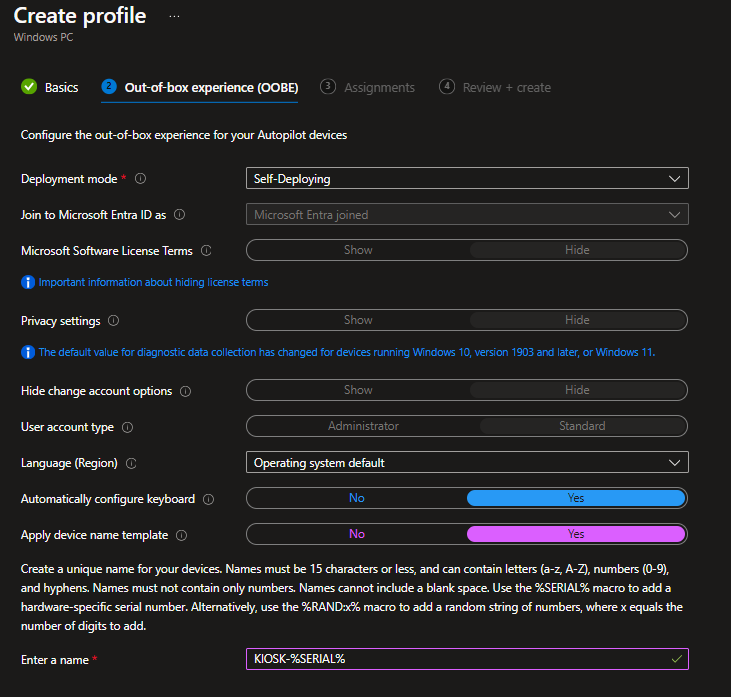
Make the profile “Self-Deploying” so that we do not have to do something manually for the enrollment and if you like define a naming template as “KIOSK-%SERIAL%”:
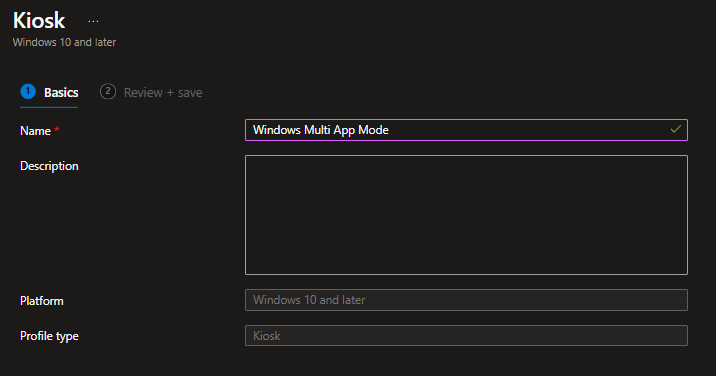
Now we have prepared the device onboarding. All that’s left is to configure the device into assigned access (aka kiosk mode). Therefore wen need to create a new configuration profile from the “Kiosk” type:
Select „Multi app kiosk“ as the kiosk mode and set „Target devices running Windows 10/11 in S mode“ to No. Configure Autologon and the next part is to add our multi-kiosk apps:
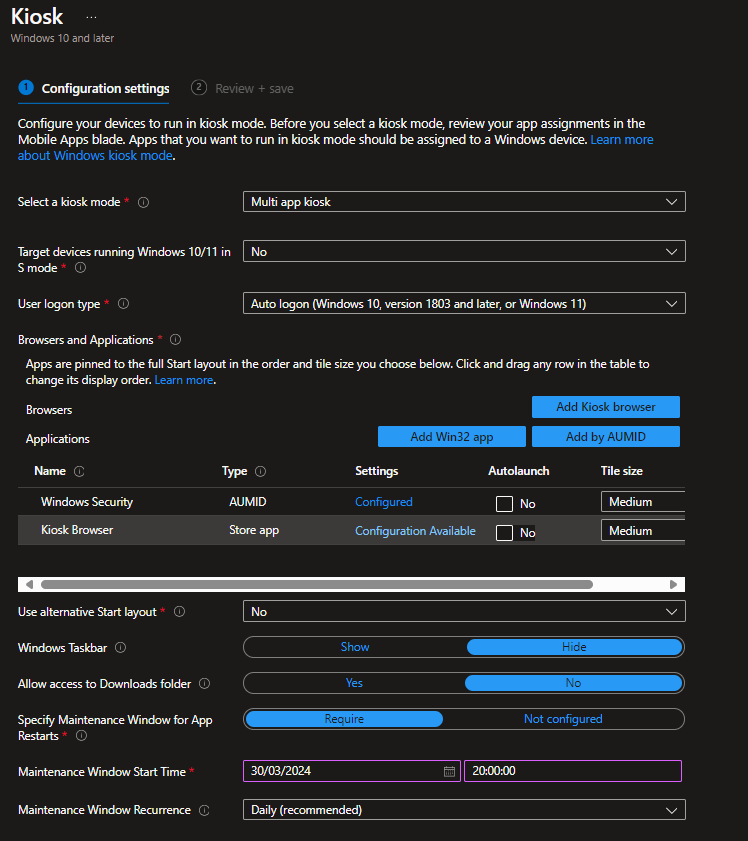
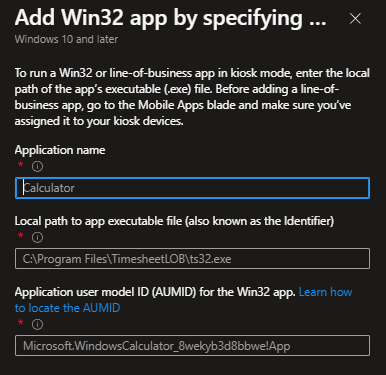
When clicking on „Add Win32 app“ you will see this from the right hand side of your screen. Here you need to configure the name, path and the AUMID of your kiosk app. Never heared of AUMIDs? Those are internal app ids that windows can use to use apps. You can get them by opening a PowerShell and type „Get-StartApps“ where they will be shown as „AppID“. Simply copy them from there.
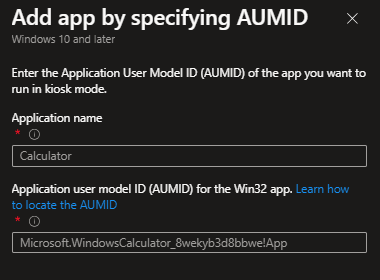
When clicking on „Add by AUMID“ you will see this from the right hand side of your screen. Here you just need to configure the name and the AUMID of your app.
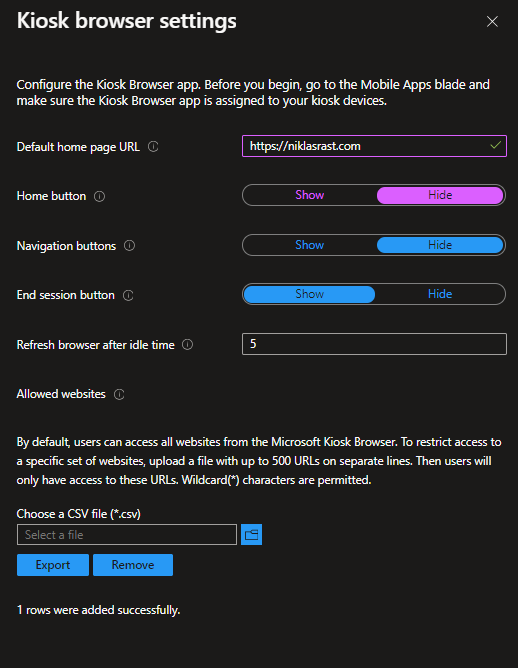
The last option „Add kiosk browser“ opens this side-window where you simply configure a website and some basic settings, but this requires that you imported the Microsoft Kiosk Browser from the store to your environment and deployed it to your device group upfront. Then you can create a simple csv file for allowed urls. That might be handy when you have links on a website but you only want users to use the direct site an no other websites/domains.
Next it is required to add a maintenance window to update the app. This all will be done automatically but we can define when the update window starts. Here we will use 8PM for our demo on a daily schedule.

Assign the profile and an Windows Update configuration (or Windows Autopatch) to the device group and you’re done. Now we have configured everything needed for a device to enroll and start assigned access mode with a specified app. Once a device is enrolled with this grouptag it will auto logon as “KIOSK” and show the multi-app experience. It will look something like that:

Conclusion
In conclusion, Windows Assigned Access serves as a valuable tool for creating secure and efficient kiosk systems. By harnessing the power of Assigned Access, businesses and organizations can deploy kiosk systems with less effort and a zero-touch-deployment. In my last post we learned how to configure single-app and in this post multi-app kiosk systems using assigned access. In the next post we will see how you can define and deploy kiosk systems that only act as an web-app and block the whole windows experience out – stay tuned to check that out.