Setup Azure AD Cloud Sync to sync your OnPrem Active Directory identities to Azure
31 December 2023
Setup Azure AD Cloud Sync to sync your OnPrem Active Directory identities to Azure
As more organizations adopt cloud technologies, it is becoming increasingly common for them to use Microsoft Azure Active Directory (AD) as their identity and access management solution. However, many organizations still maintain a Windows Server-based Active Directory infrastructure for their on-premises environments. Managing identities across these two environments can be challenging, but thankfully, Microsoft provides a solution with Azure AD Connect, a tool that allows for synchronization of identities between an on-premises Windows Server AD environment and Azure AD.
Why Sync Your On-Premises Active Directory Identities to Azure AD?
There are several reasons why an organization might want to manage its users in a Windows Server AD environment rather than in Azure AD. For one, an on-premises AD environment can provide more control over security and compliance, as administrators can enforce policies that are specific to their organization. Additionally, many organizations may already have an on-premises AD infrastructure in place, so syncing identities to Azure AD allows them to leverage their existing investments in that technology.
Requirements for Setting Up Azure AD Cloud Sync
To set up Azure AD cloud sync, there are a few requirements that must be met. Firstly, you must have an Azure AD tenant and an on-premises Windows Server-based Active Directory environment. Additionally, you will need to download and install the Azure AD Connect tool onto a server in your on-premises environment. This server must be running Windows Server 2012 or later and must be able to communicate with both the on-premises AD environment and the internet.
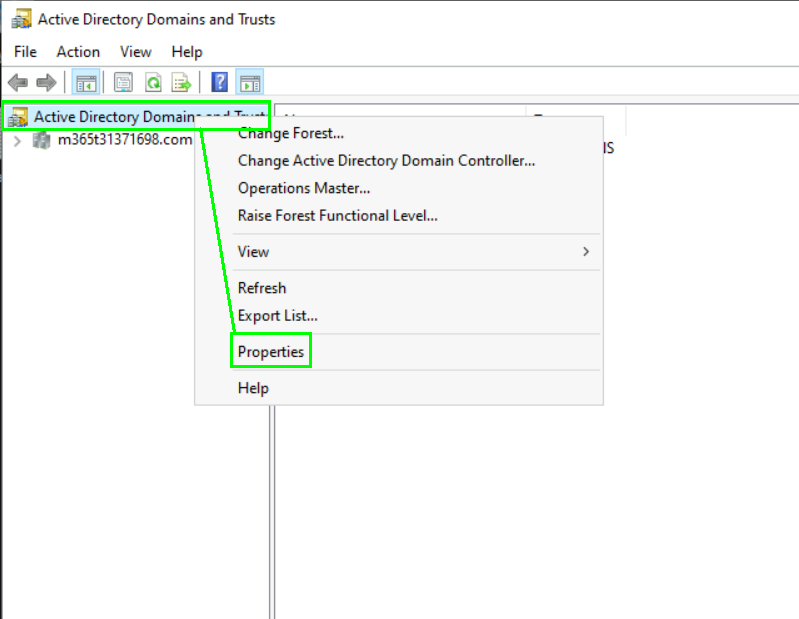
Firstly we should add the domain that we are using in Azure AD to our local Windows Server AD to match the UPNs of our user accounts. To complete this step we need to open the Properties of „Active Directory Domains and Trusts“ on our local domain controller:
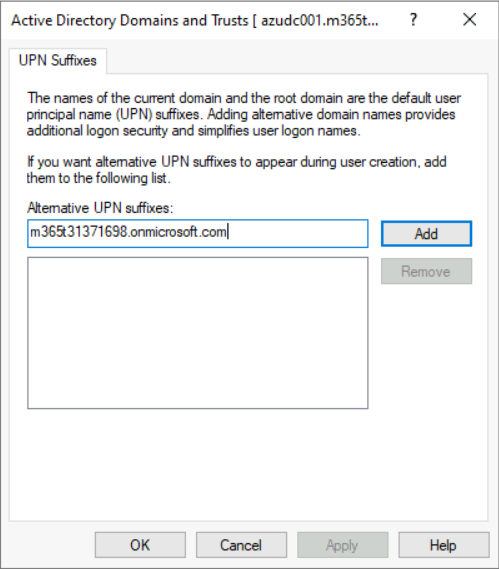
Now add the domain that you use in your Azure AD tenant. In this example Im going to use the .onmicrosoft.com domain:
Now you should be able to use the new domain for your UPNs:
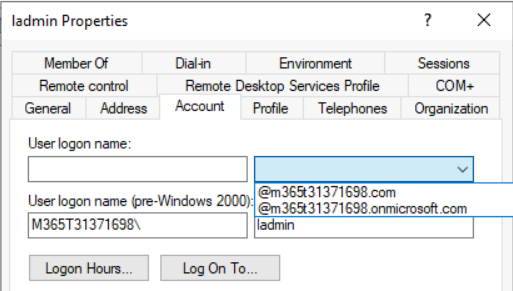
You might want to change all UPNs to match that domain for Single-Sign-On in Azure or if you have for example company.com as your local Windows Server AD domain register company.com in Azure AD as your primary domain.
Now that we have matched our domains we can continue by installing the Azure AD Sync Connector. Follow those instructions to setup the connector:
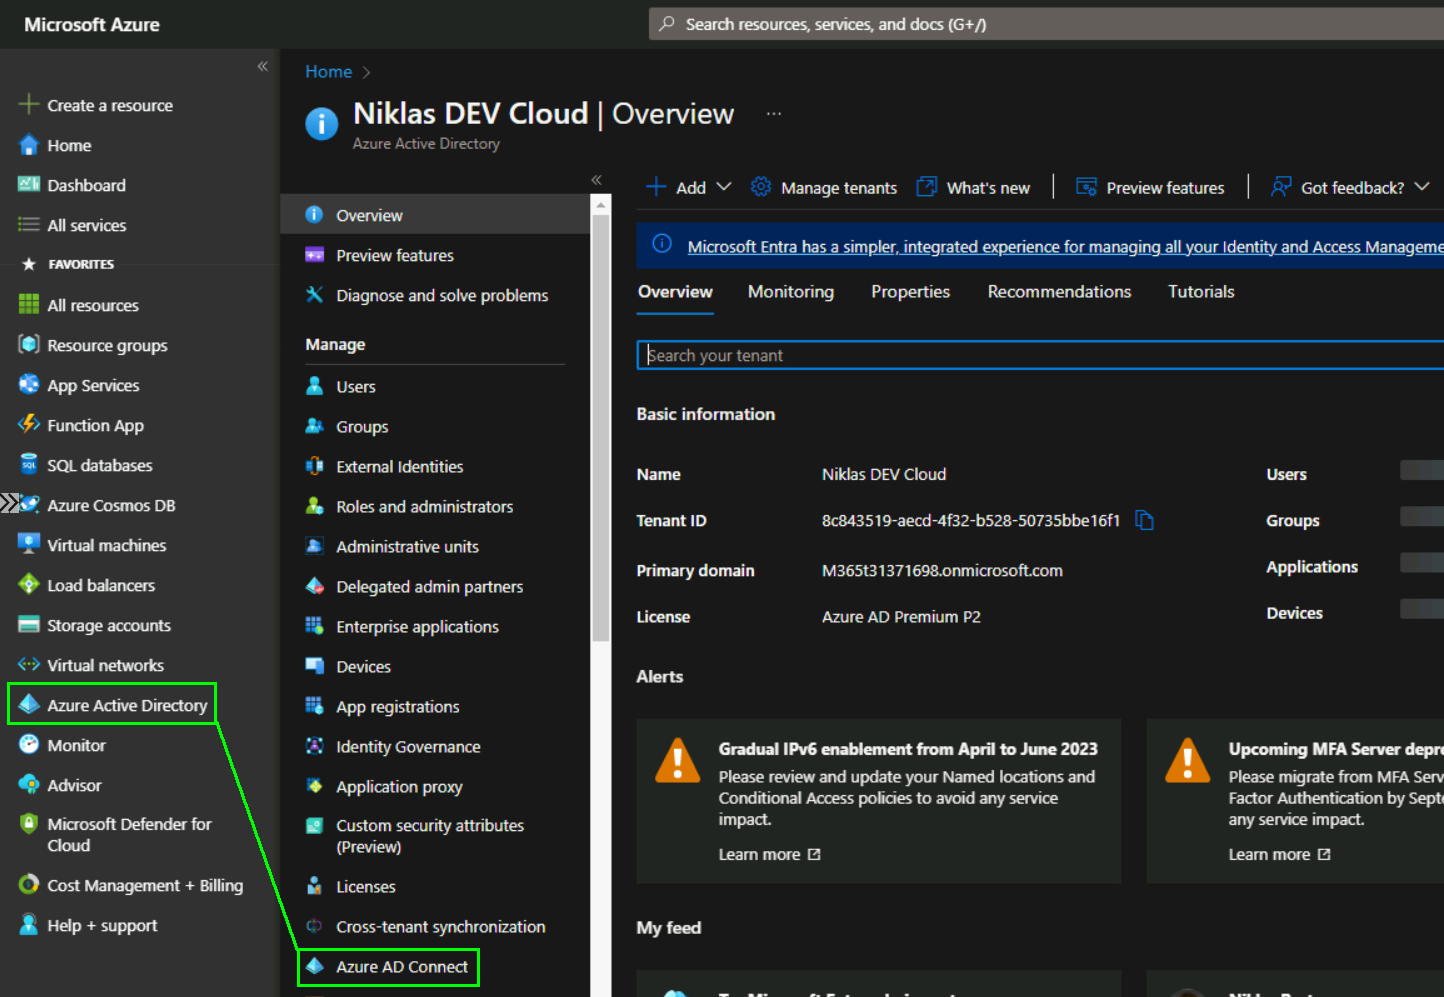
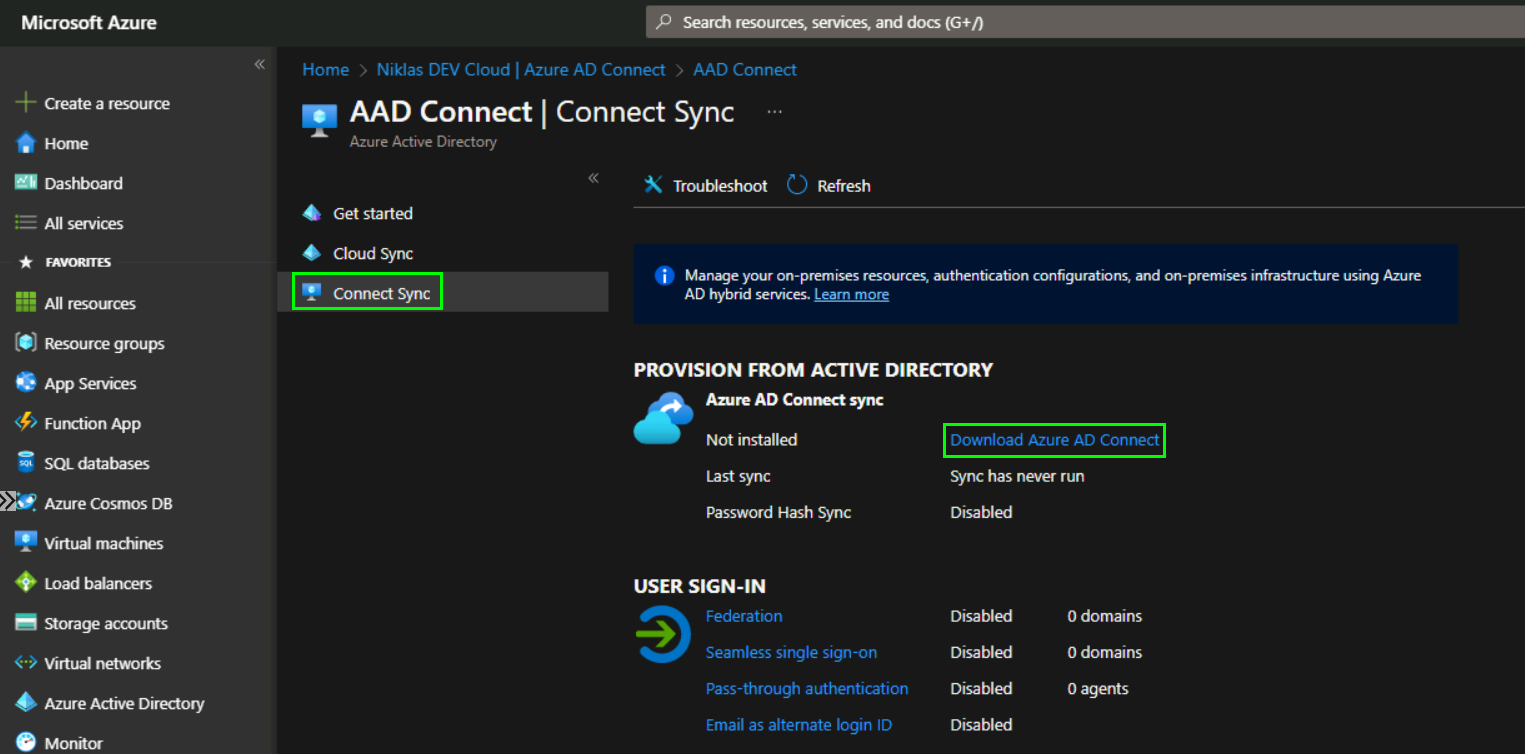
You need a Windows Server connected to your OnPrem AD with Internet connectivity and there switch to portal.azure.com and navigate to the Azure AD Connect blade:
In the Azure AD Connect view switch to the „Connect Sync“ blade and click on „Download Azure AD Connect“:
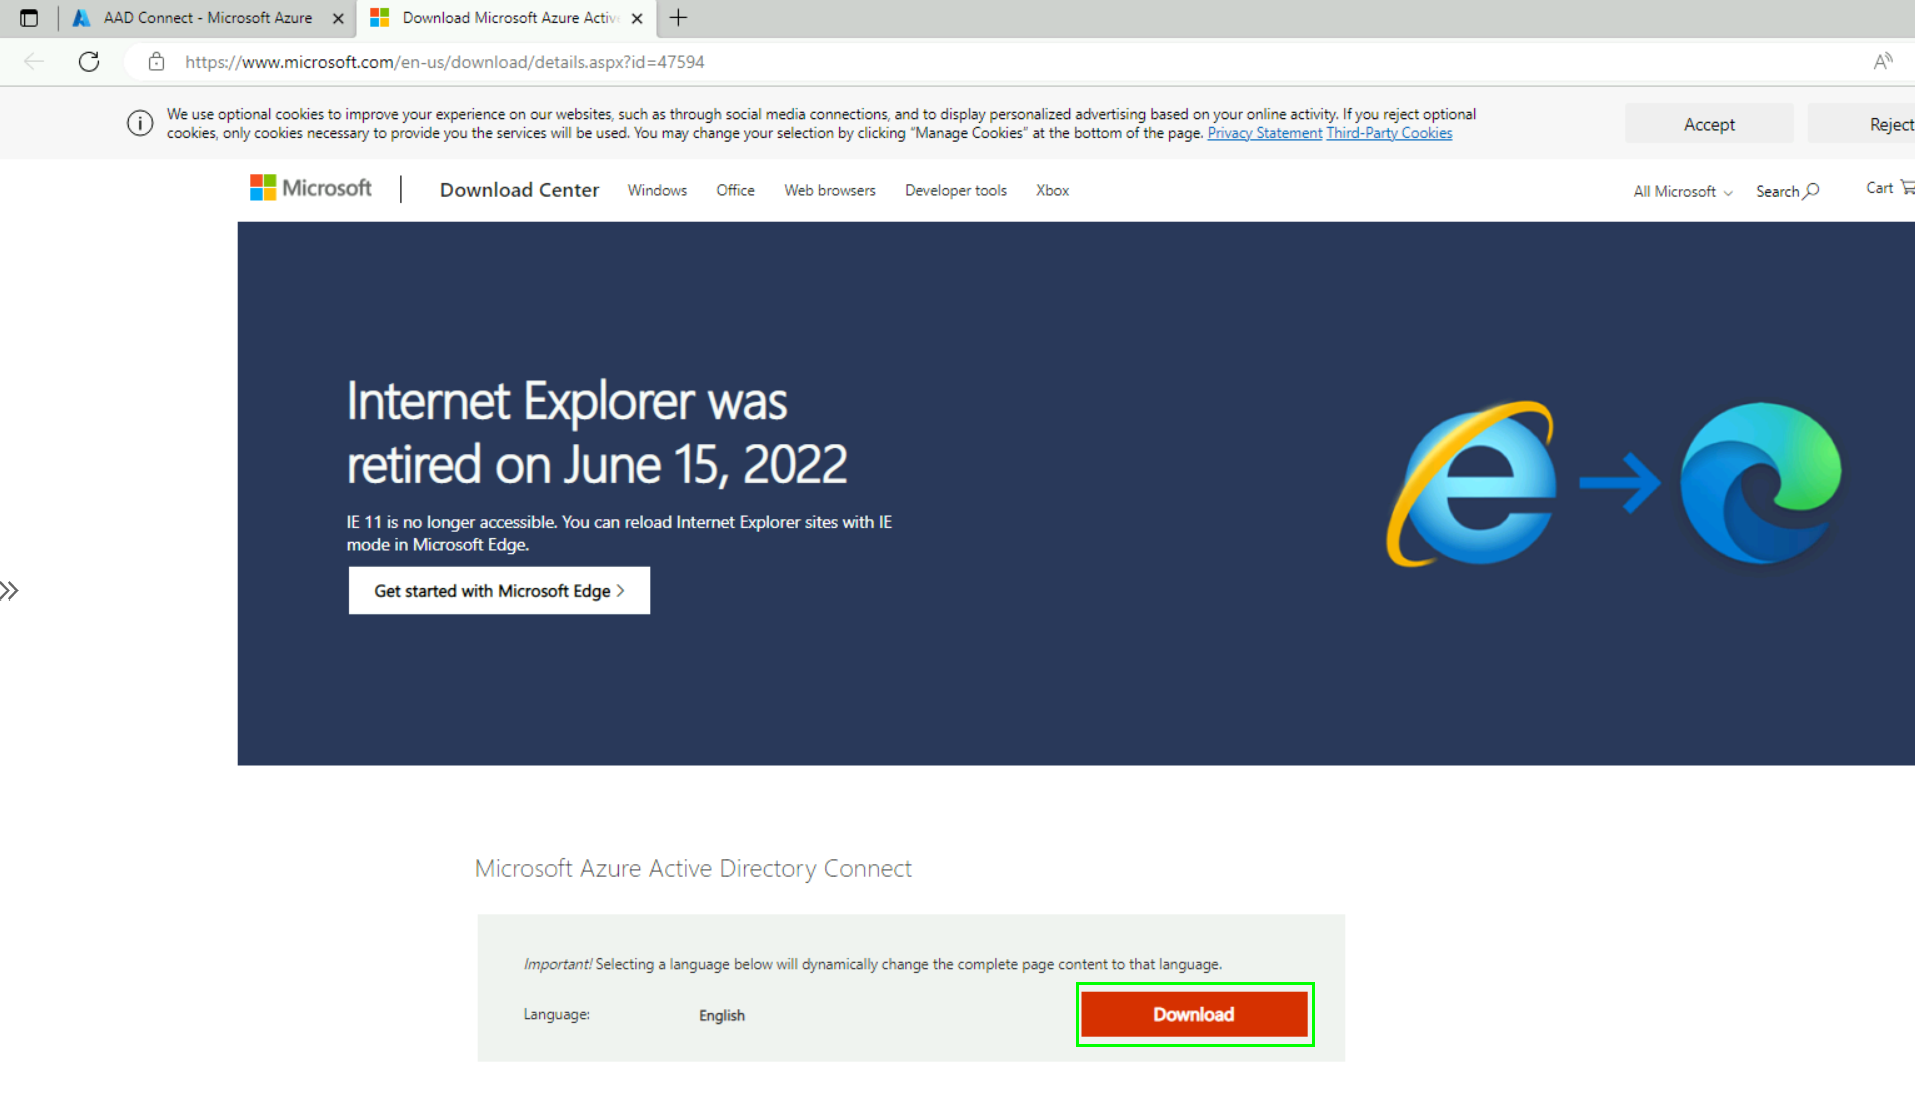
This will open a new browser-tab with the Microsoft Download Center, click on Download:
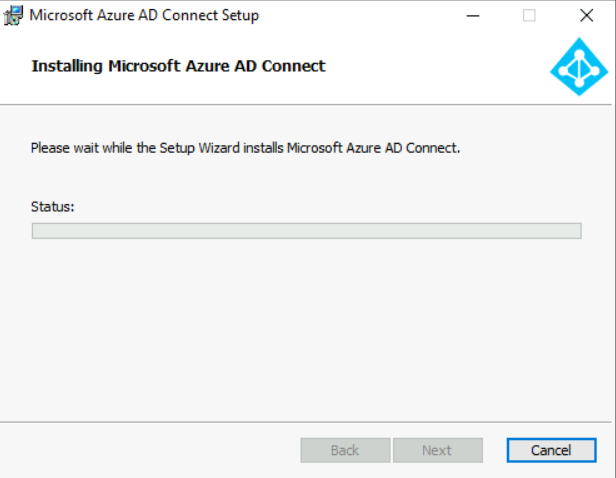
Now open the AzureADConnect.msi on the server, the installation will start imediately and should only take a few seconds:
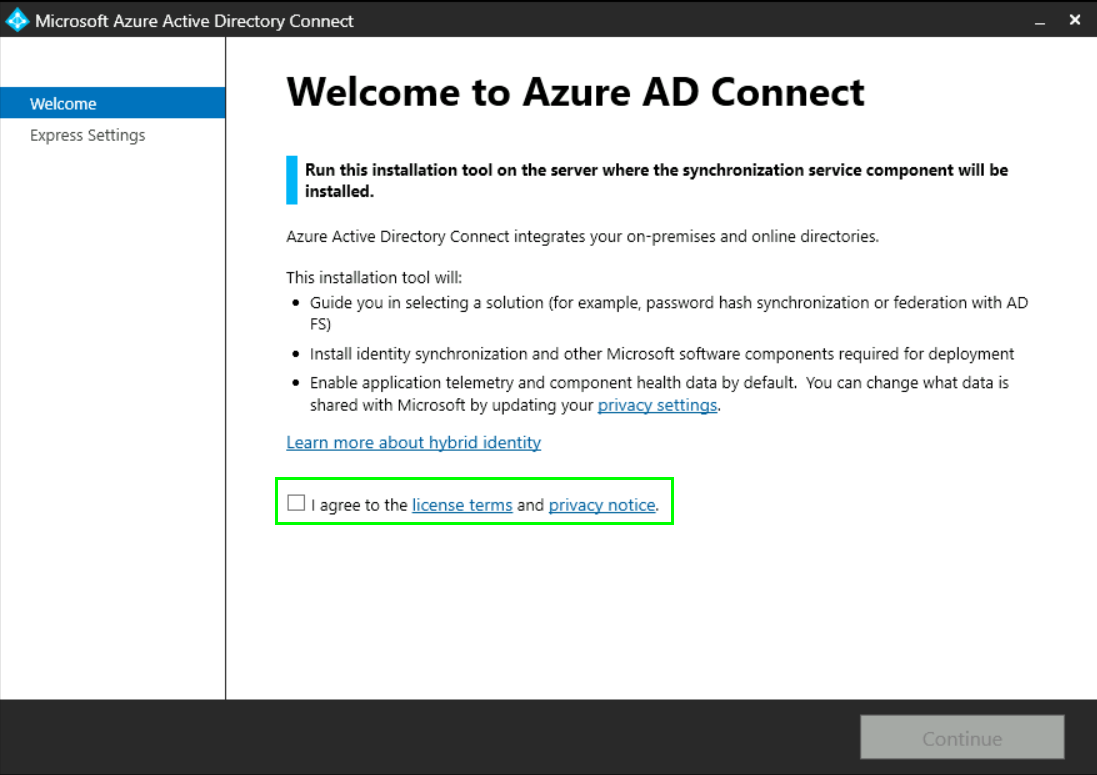
Now you need to accept the terms of use and click on Continue:
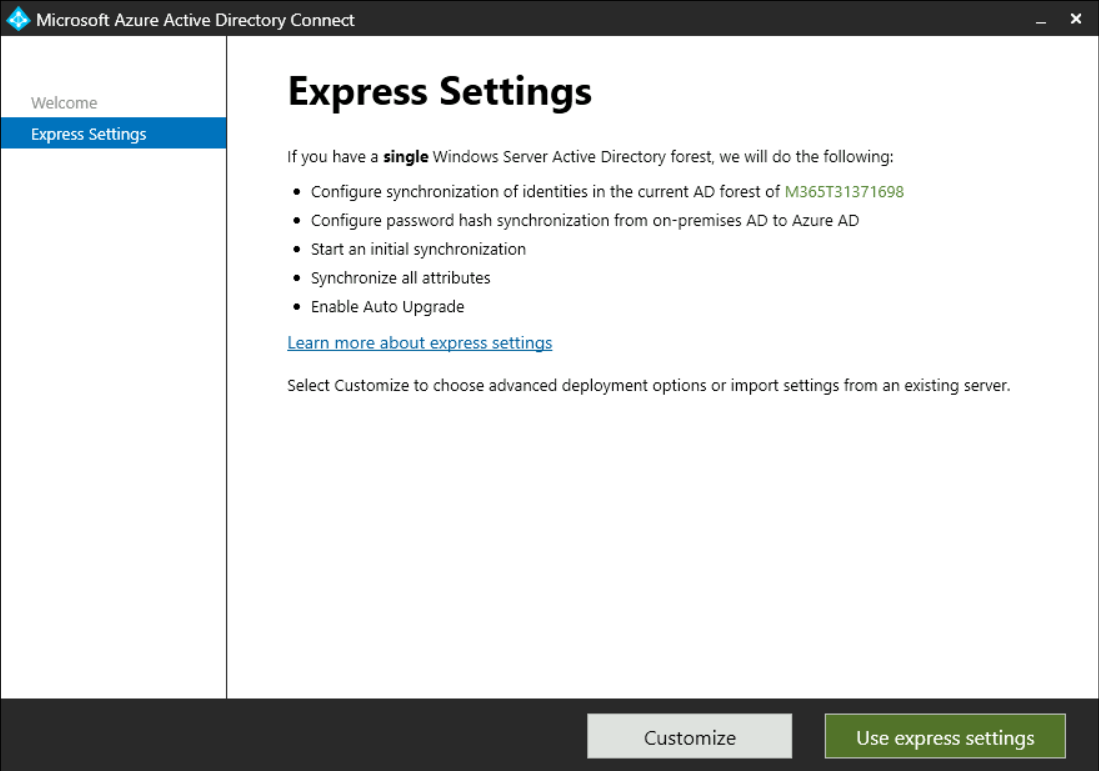
The wizard will show you the Express Settings which will sync your local AD with password hash sync, all attributes, auto upgrade and an initial sync. Feel free to use the Express Settings or if you want to change settings click on „Customize“. For this example Im going to click on „Use express settings“:
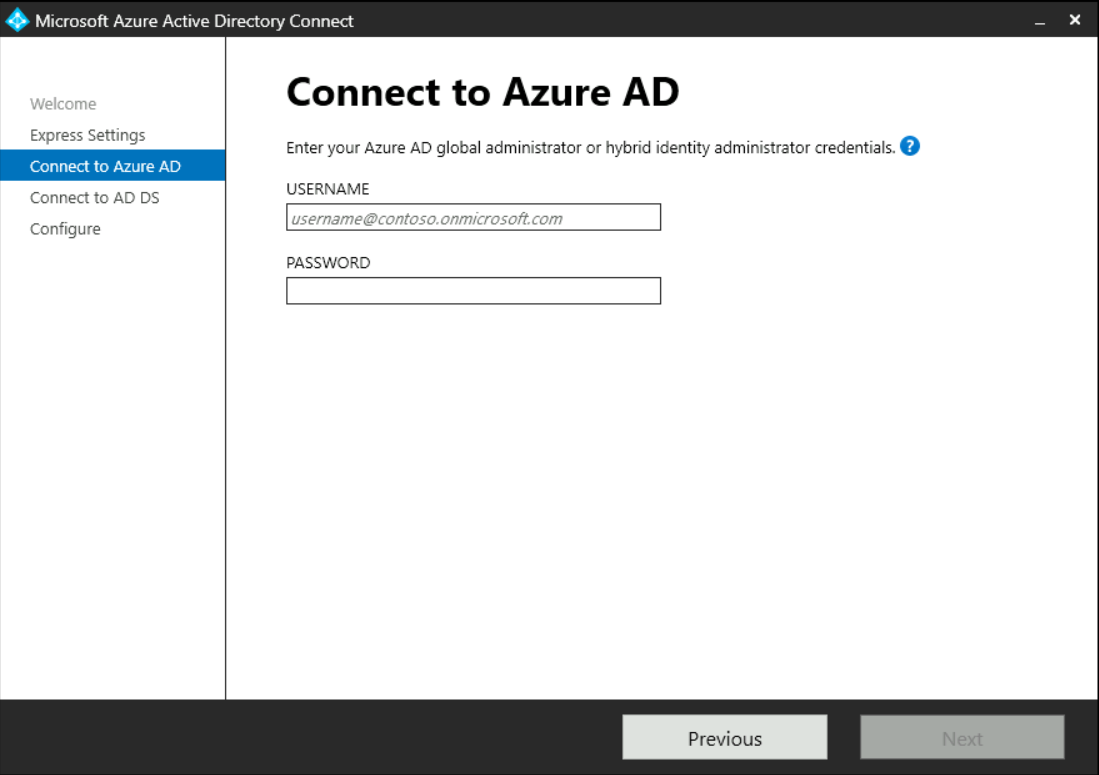
The first step is to sign in as an user from your Azure AD with the RBAC role „Global administrator“ or „Hybrid identity administrator“:
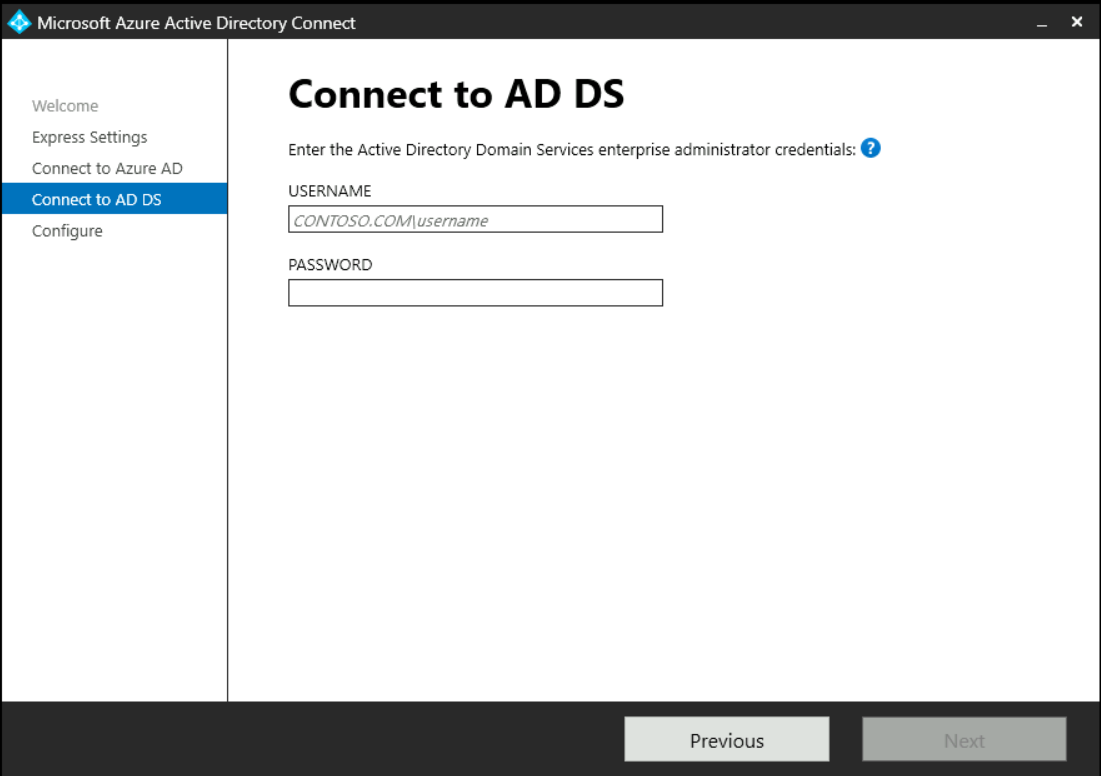
Next you need to login as an local AD user with the role „Enterprise Administrator“:
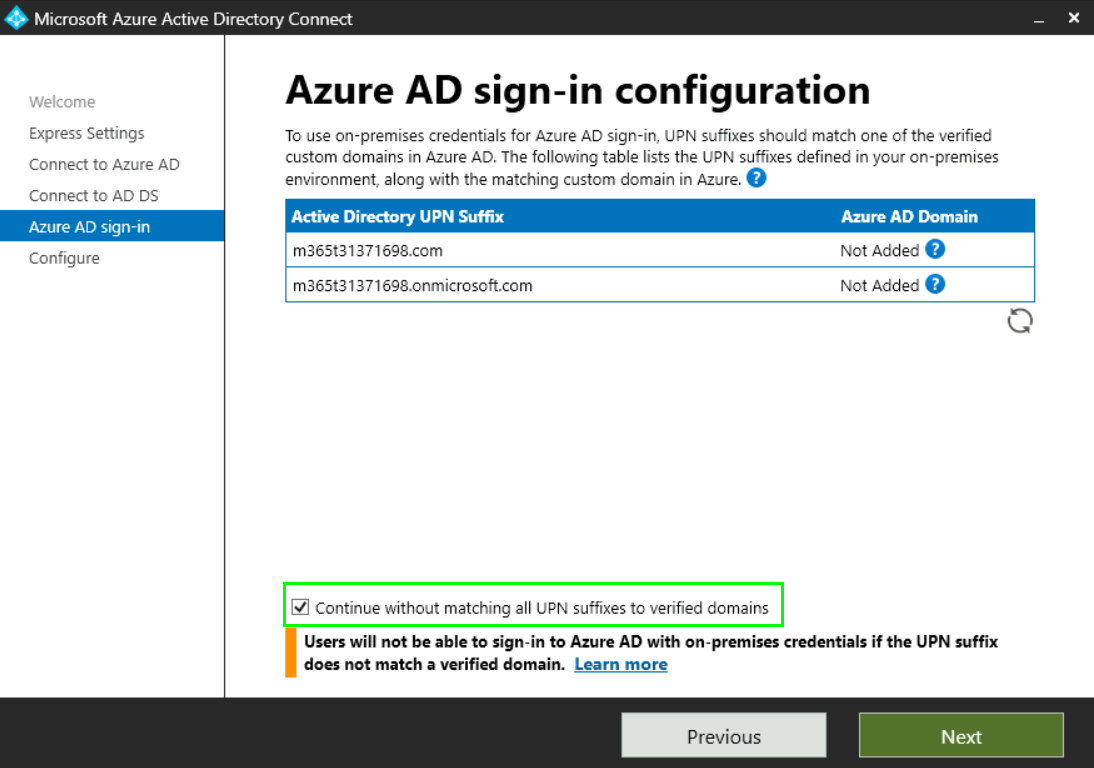
Maybe the wizard will show you that you need to change the UPNs to match the Azure AD domain, so you need to update the UPNs for Single-Sign-On to work correctly. Here Im going to check „Continue without matching all UPN suffices to verified domains“ because this is only an example to show how to configure the Connector:
The Wizard will show you the selected configurations and you need to confirm those steps:

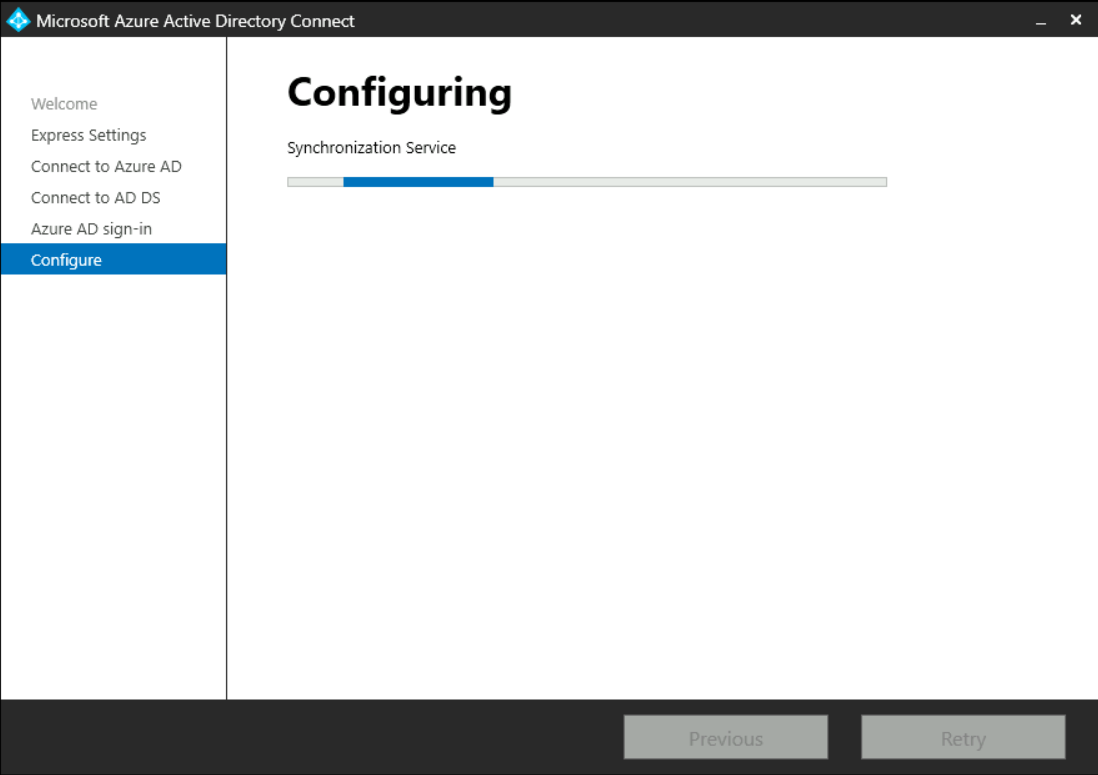
Now wait for the process to finish:
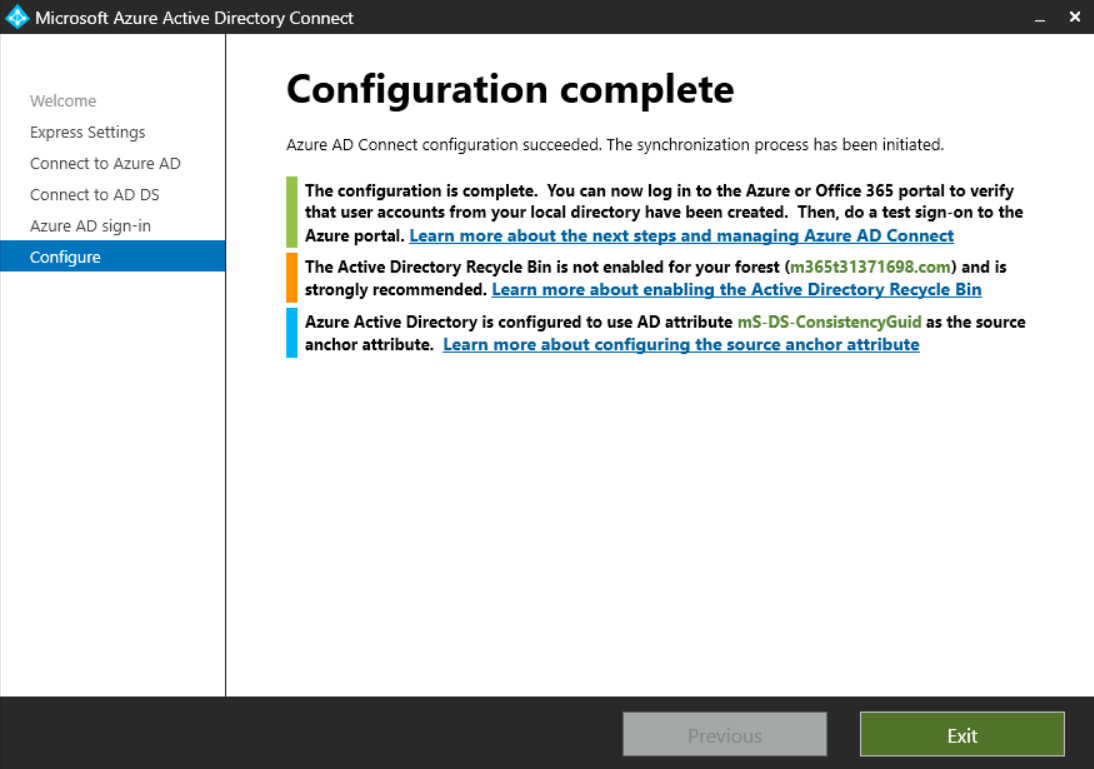
The process will create Accounts in your Windows Server AD and Azure AD as service accounts for the synchronization. Do not disable or delete those user accounts. This process might take a few minutes to finish as it also starts an initial sync of the directories. When the process is finished you will see the results and maybe some recommendations to implement:
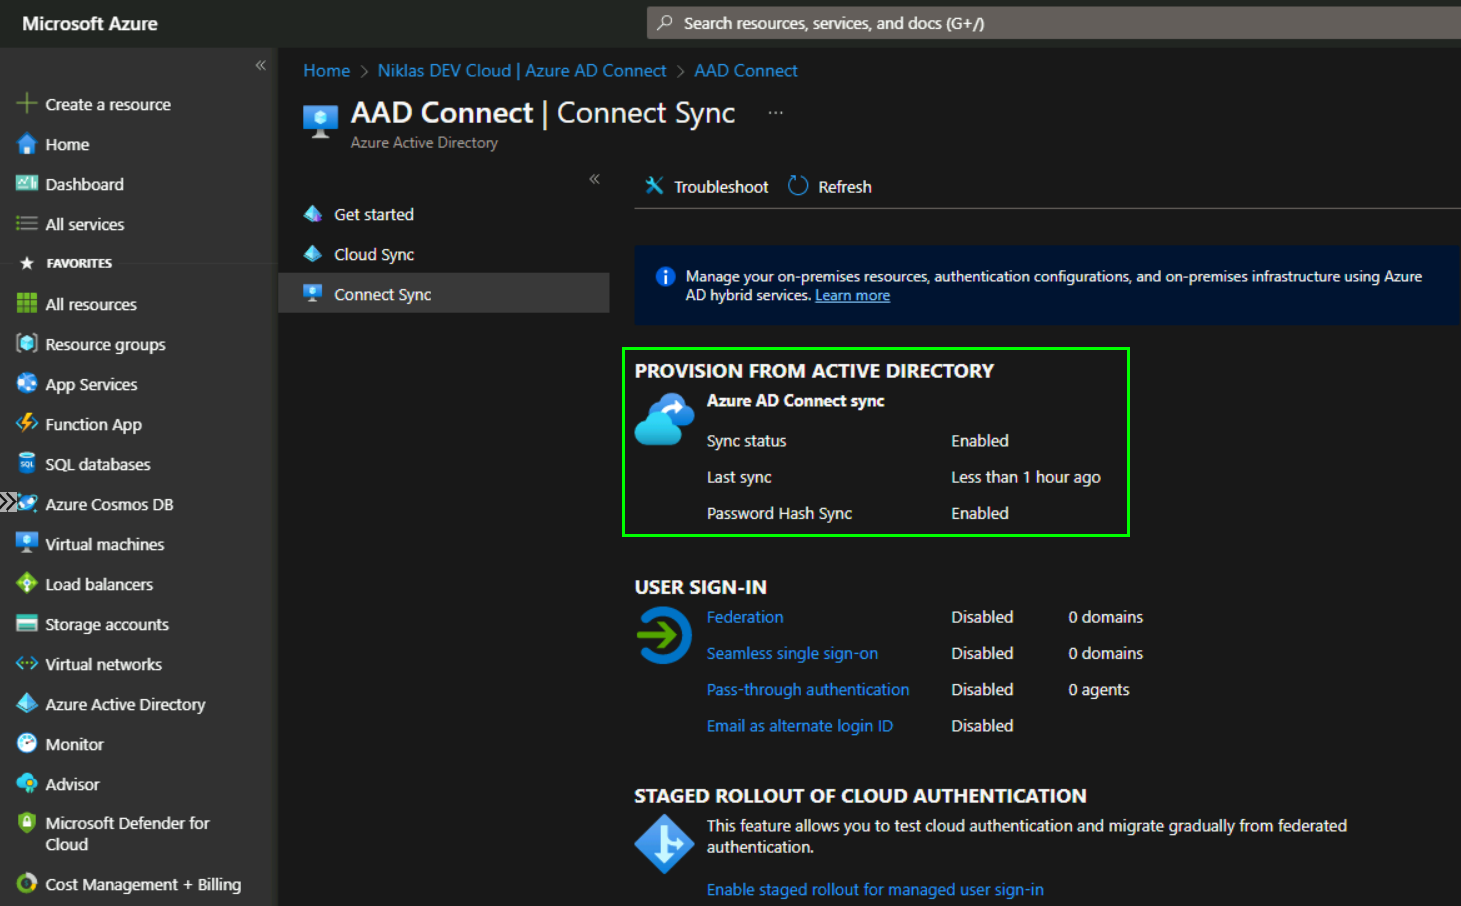
If you switch back to your Azure AD Connect page you will see that the sync has run. Here you can also monitor if the Connector works and when it last synced to Azure AD:
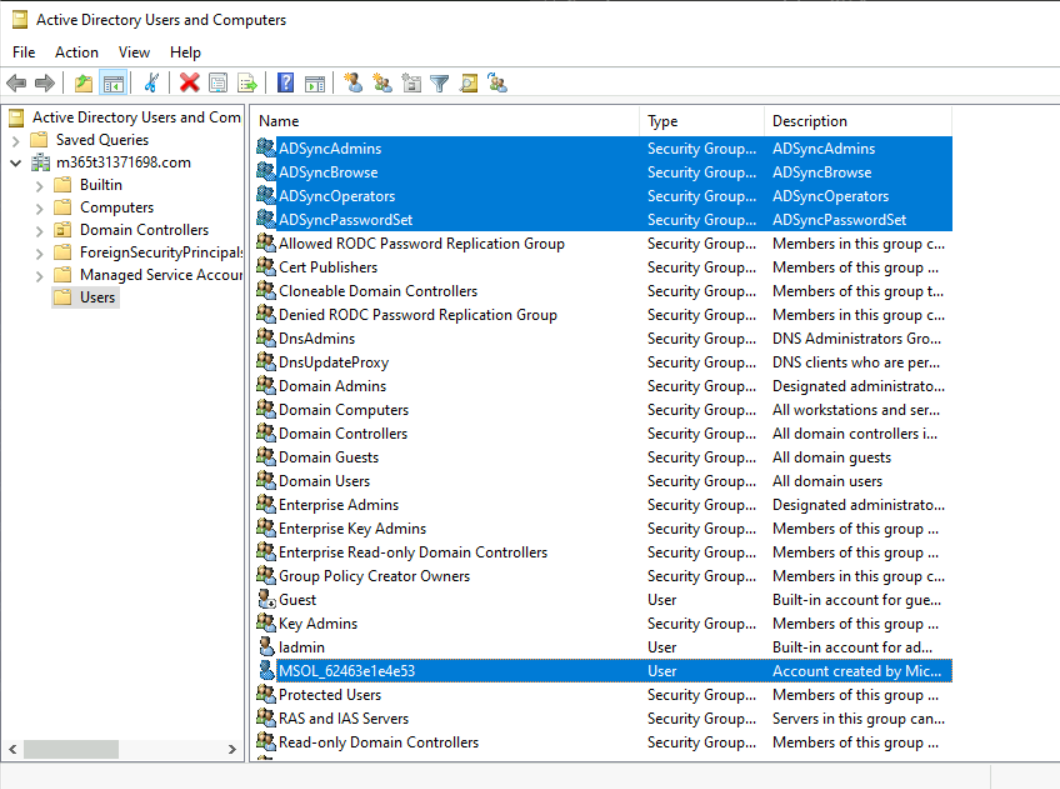
In your local Windows Server AD you will see a few new users:
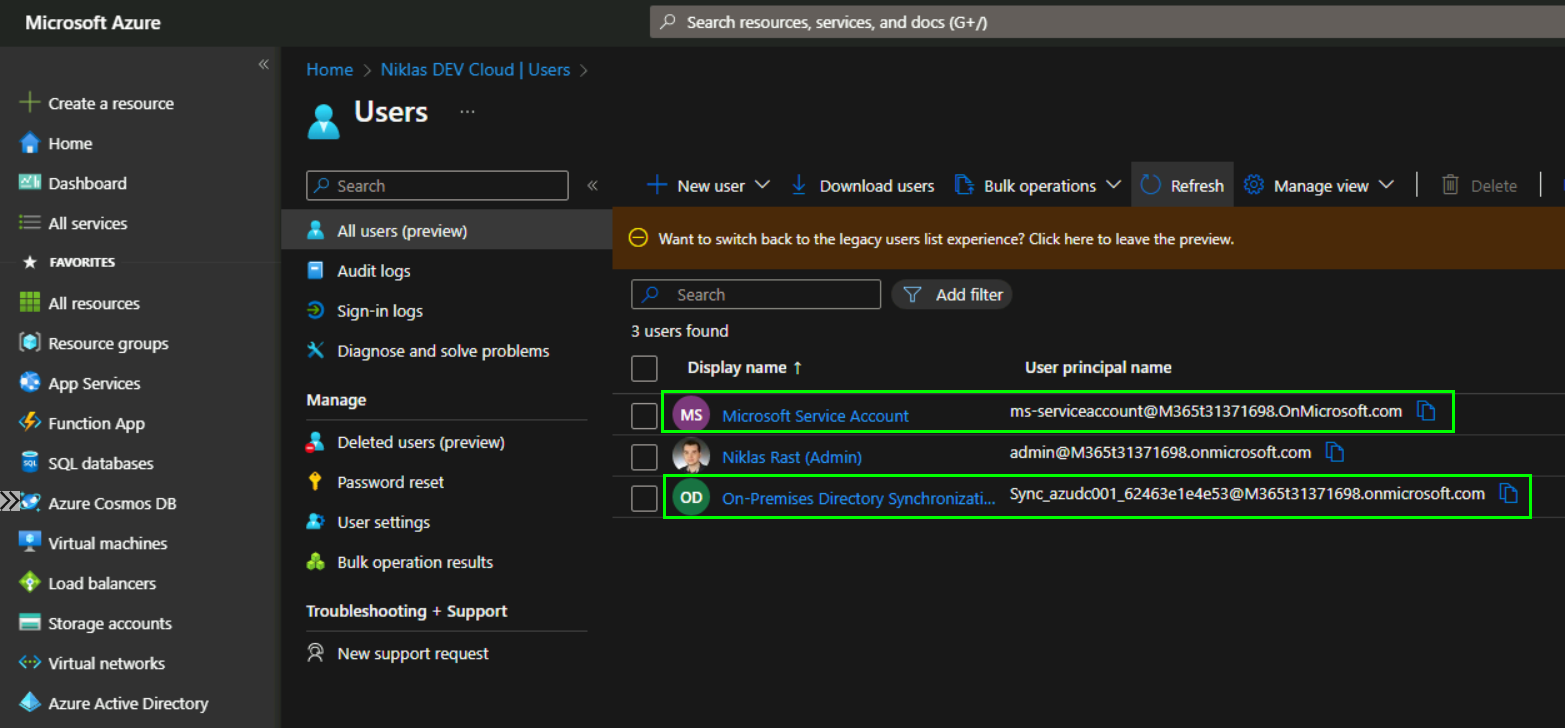
…also in Azure AD there will be some new Accounts from the Connector:
Your local Windows Server AD accounts should be replicated to Azure AD which might take some time based on how big your Windows Server AD is.
In Azure Active Directory you can see if a User Account is synced from Windows Server AD or created natively in Azure AD:
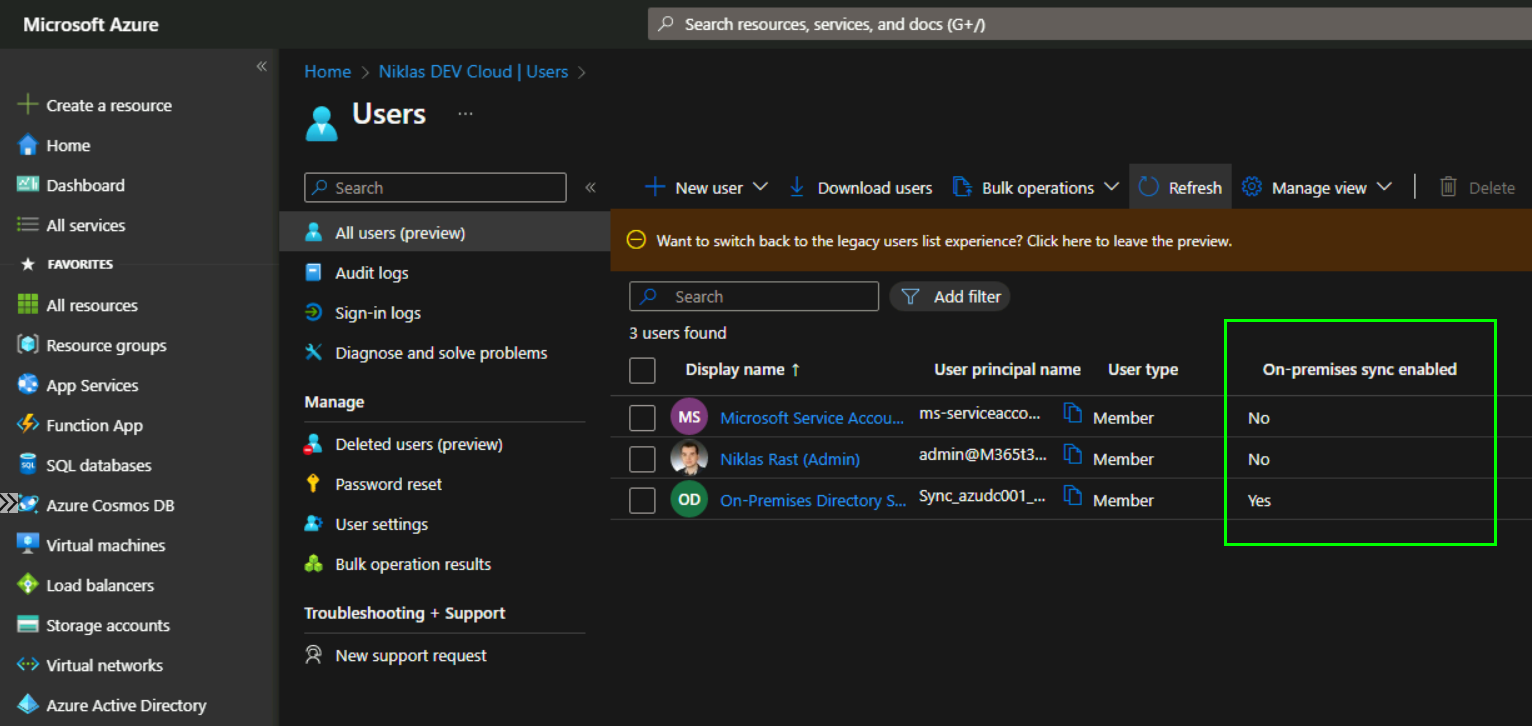
Comparing Synced Users to Cloud Native Users in Azure AD
Once you have set up Azure AD cloud sync, you will be able to see your synced users in Azure AD alongside any cloud native users that you have created. One key difference between these two types of users is that synced users are managed in your on-premises AD environment, while cloud native users are managed solely in Azure AD. Additionally, there may be certain attributes that are not synced from your on-premises AD environment to Azure AD, depending on how you have configured the synchronization.
Conclusion
By setting up Azure AD cloud sync, organizations can enjoy the benefits of managing their users in an on-premises Windows Server-based Active Directory environment while also leveraging the power of Azure AD for cloud-based identity and access management. With the right setup and configuration, Azure AD cloud sync can help organizations achieve a seamless, unified identity management experience across both on-premises and cloud environments.