Dive into Microsoft Defender for Endpoint Web Content Filter Feature
31 December 2023
Dive into Microsoft Defender for Endpoint Web Content Filter Feature
Microsoft Defender for Endpoint is a holistic, cloud-delivered endpoint security solution that includes risk-based vulnerability management and assessment, attack surface reduction, behavioral-based and cloud-powered next-generation protection, endpoint detection and response (EDR), automatic investigation and remediation, managed hunting services, and rich APIs. One of its most important features is the Web Content Filter.
Web Content Filter is a feature that helps in protecting the organization’s network by controlling the web content that users can access. It blocks malicious and inappropriate websites based on pre-defined categories. This can be used as a powerful tool to guard against cyber threats, improve productivity, and comply with regulatory requirements. It operates on a Windows endpoint by using the Windows SmartScreen engine.
Requirements
To use this feature, organizations must have a Microsoft 365 E5 or Microsoft 365 E5 Security license. It also requires the client device to be a Windows 10 Enterprise, version 1709 or later.

Furthermore, it can help ITs to upmanage legacy proxies to secure clients from everywhere without a VPN.
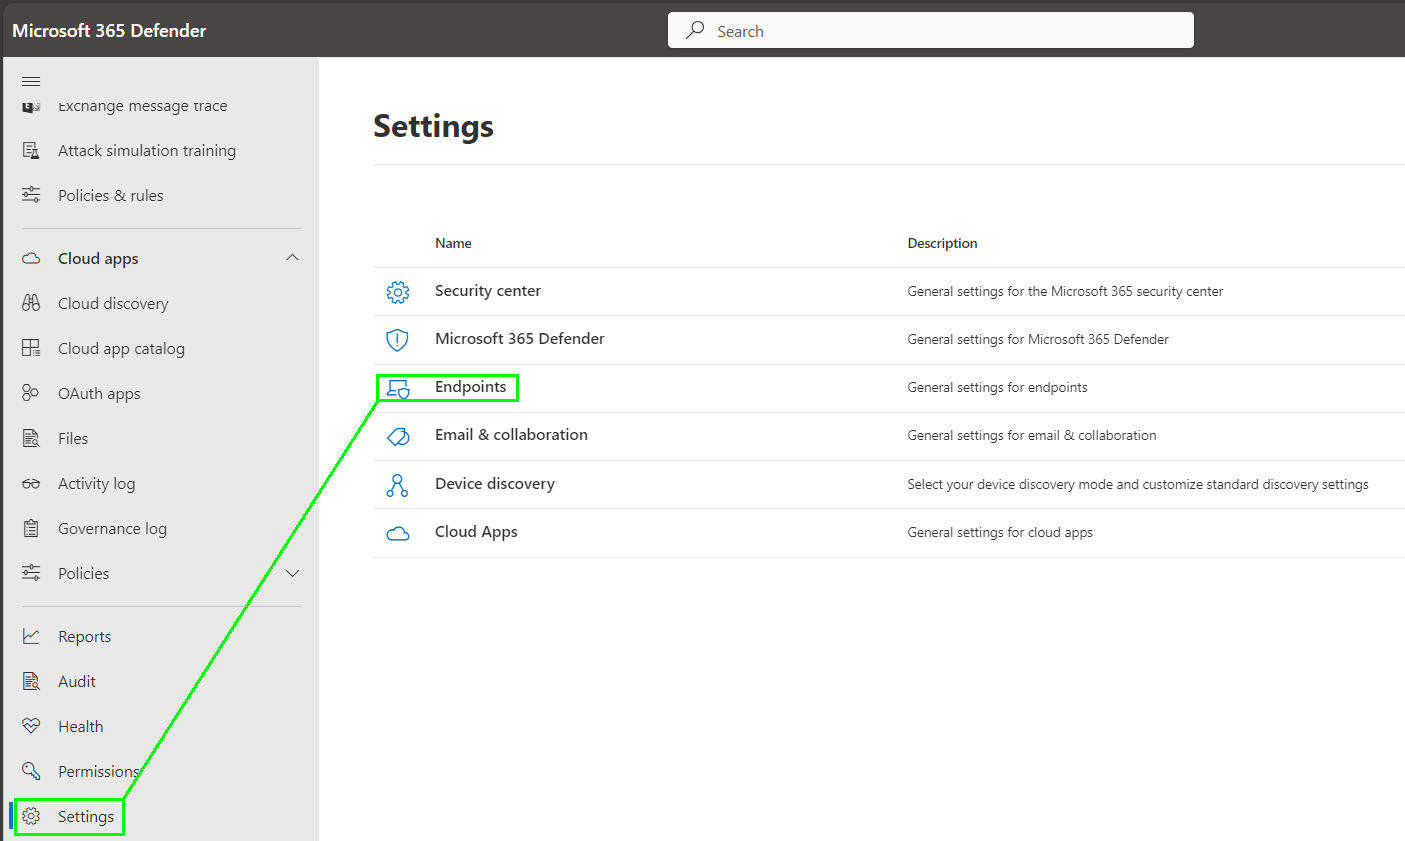
Configuration in Microsoft Security Center
To enable the Web Content Filter, navigate to the Endpoint Settings page in the Microsoft 365 Security Center at https://security.microsoft.com:
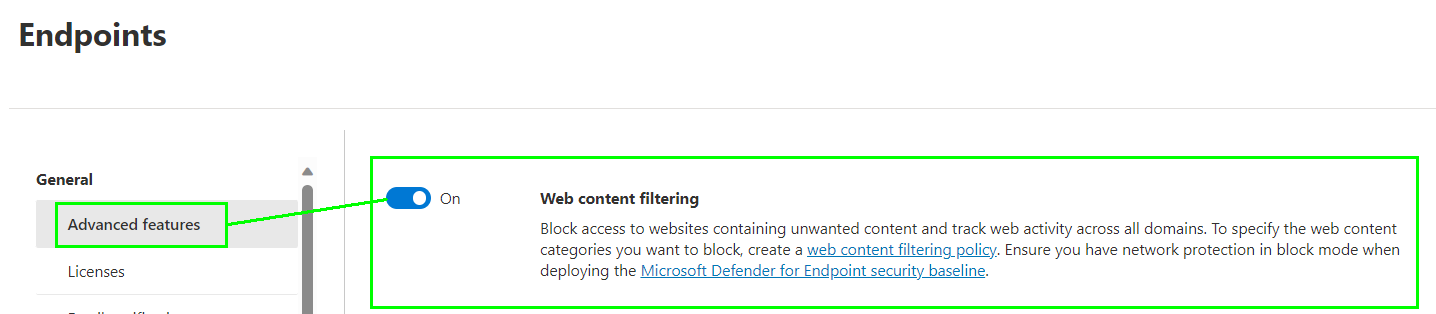
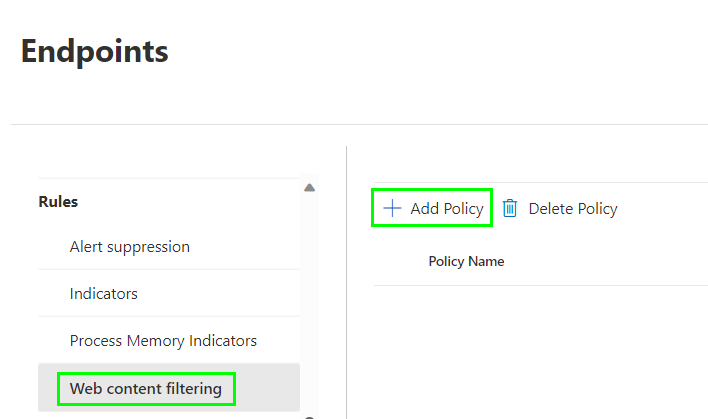
First we need to enable the „Web content filtering“ feature:
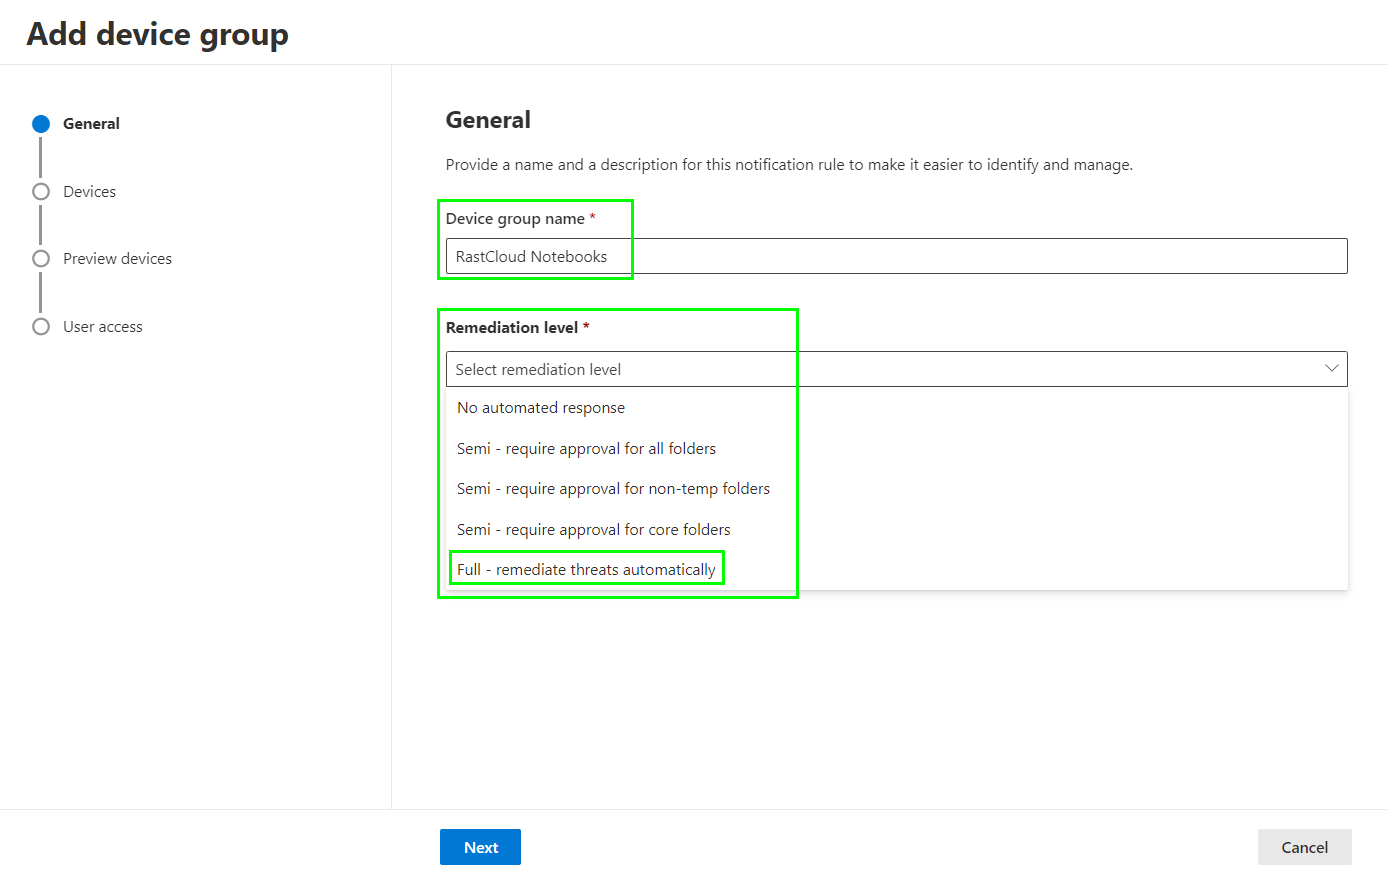
Now we need to define a device group to scope the policy to. Sadly the Security Center does not use existing Entra ID groups, instead you need to create so called device groups to scope policies to a group of devices. So lets create a device group:

Define a name and set the Remediation level to „Full – remediate threats automatically“ as we want Defender to act on its own without interaction of an Security Administrator or Operator:
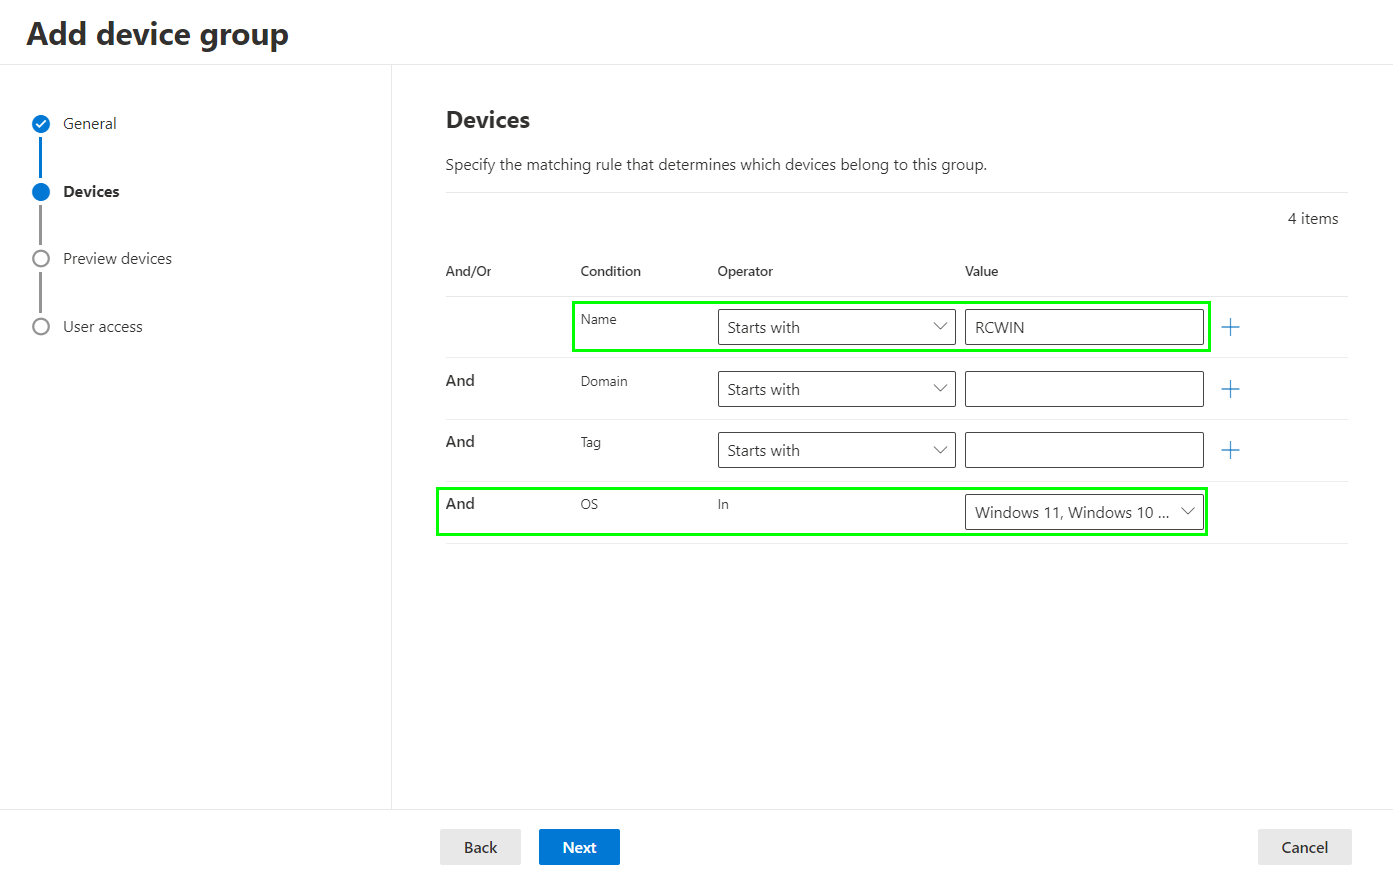
To scope devices we need to add filters. In this example I set the filter to apply on each device where the hostname starts with „RCWIN“ and it needs to be Windows 10/11/AVD for the operating system:
Finish the device group creation wizard.
Next, we need to create a category list in which we define which web content categories should be blocked. So lets switch to „Web content filtering“ in the left hand menu in the „Rules“ section and create a new policy:
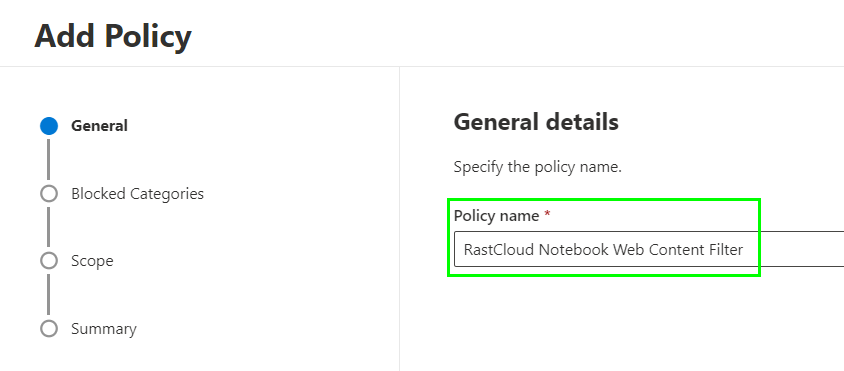
Define a name for the policy:
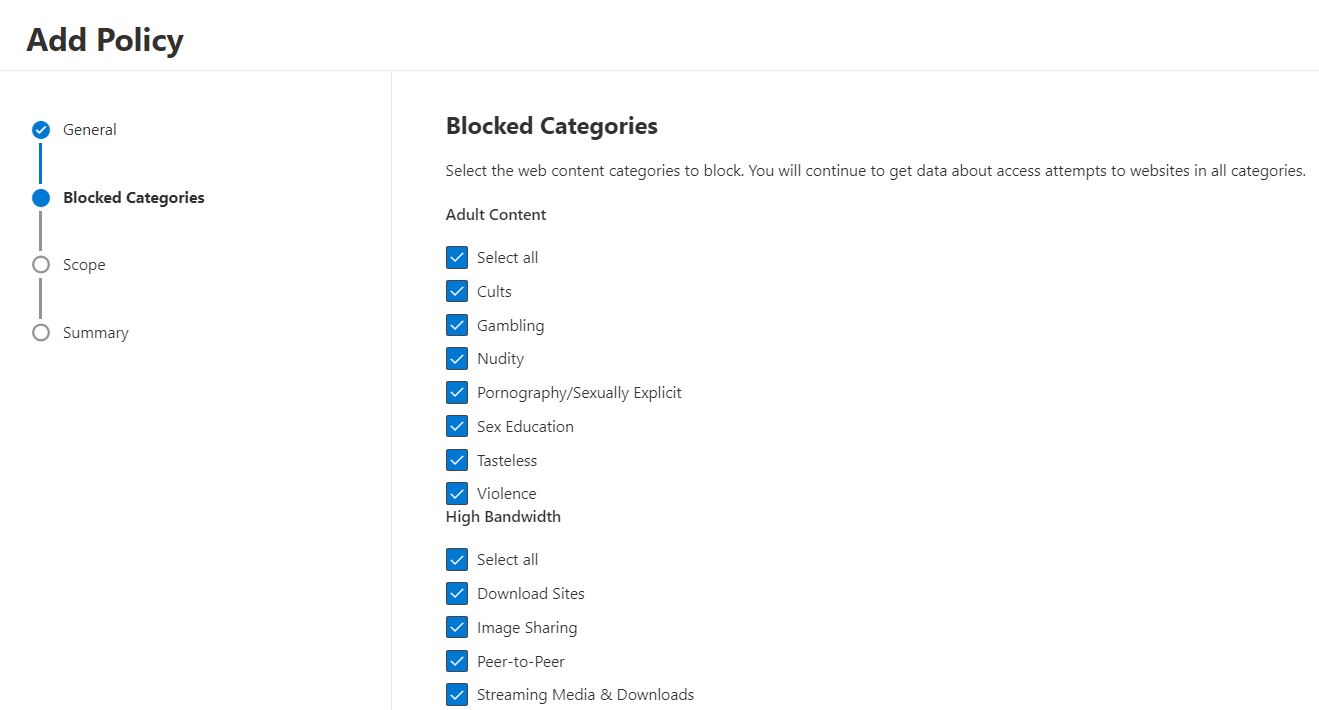
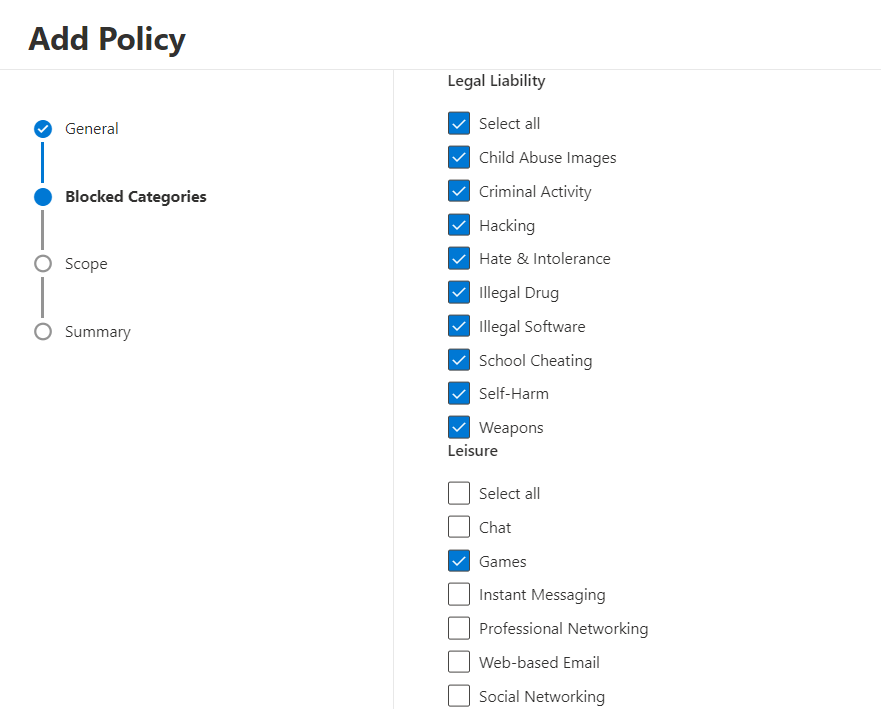
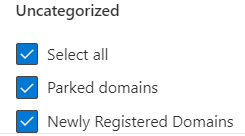
Now simply check the categories that you want to block in your environment from the list:
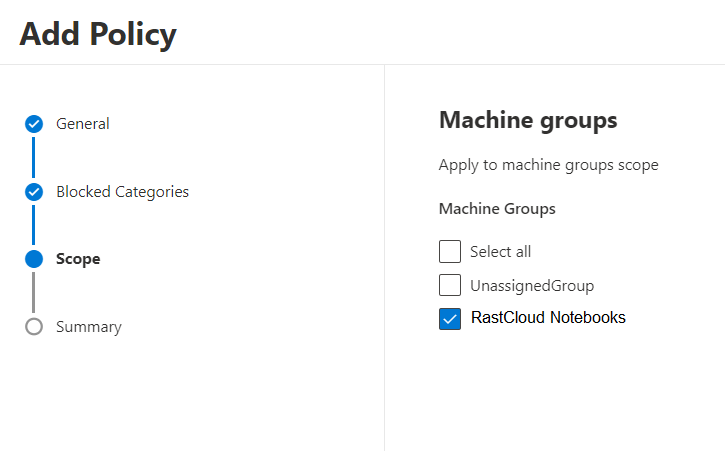
Once you have selected all categories that need to be blocked move on and assign the policy to the earlier created device group:
Finish the wizard. You have configured everything that is needed in the Microsoft Security Center now.
Device Configuration Profile
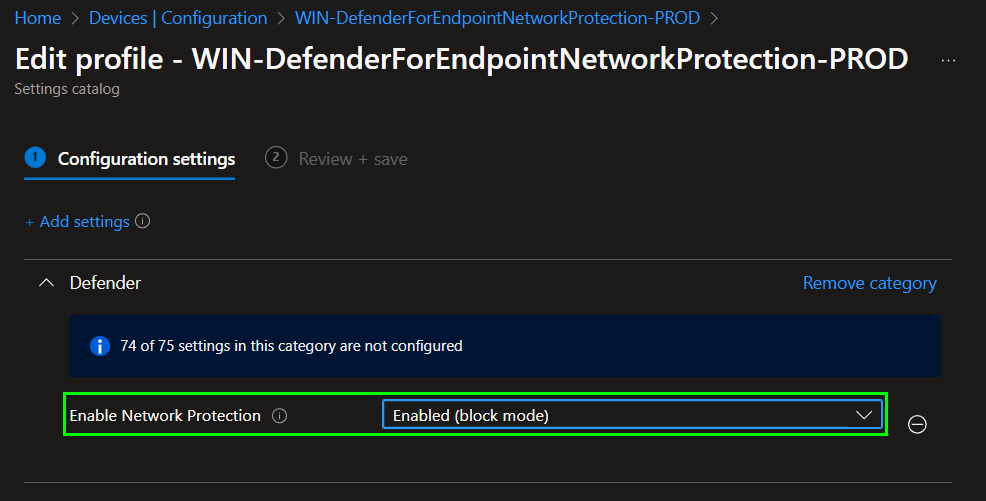
To create a device configuration profile, go to https://endpoint.microsoft.com > Devices > Configuration profiles > Create profile from settings catalog. Then search for „Network protection“, Enable the feature in block mode as in the following screenshot:
Assign the profile to a device group and finish the wizard.
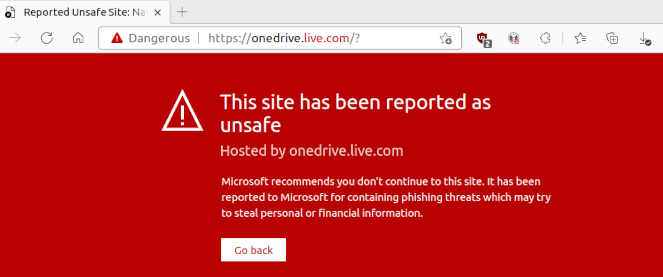
Once all configurations are created and applied on a device, a user who tries to access a blocked url will see the following SmartScreen warning:
For 3rd Party web browsers the user will not have this red SmartScreen page but the browser will show an HTTP Error code and there will be a Windows Toast notification informing the user:

Web Content Filter for iOS, Android, and macOS
Web Content Filter is not limited to Windows. It can also be configured for iOS, Android, and macOS devices, extending its protective coverage to a wide range of devices. Simply scope a content category list from the Security Center to a device group of onboarded iOS, Android or macOS devices and deploy the Defender agent to those devices over Intune.
Troubleshooting Blocked Content
If you encounter issues with blocked content, you can use the website „https://incompass.netstar-inc.com/urlsearch“ to troubleshoot. Simply enter the URL of the blocked page, and the tool will tell you which category the page is assigned to.
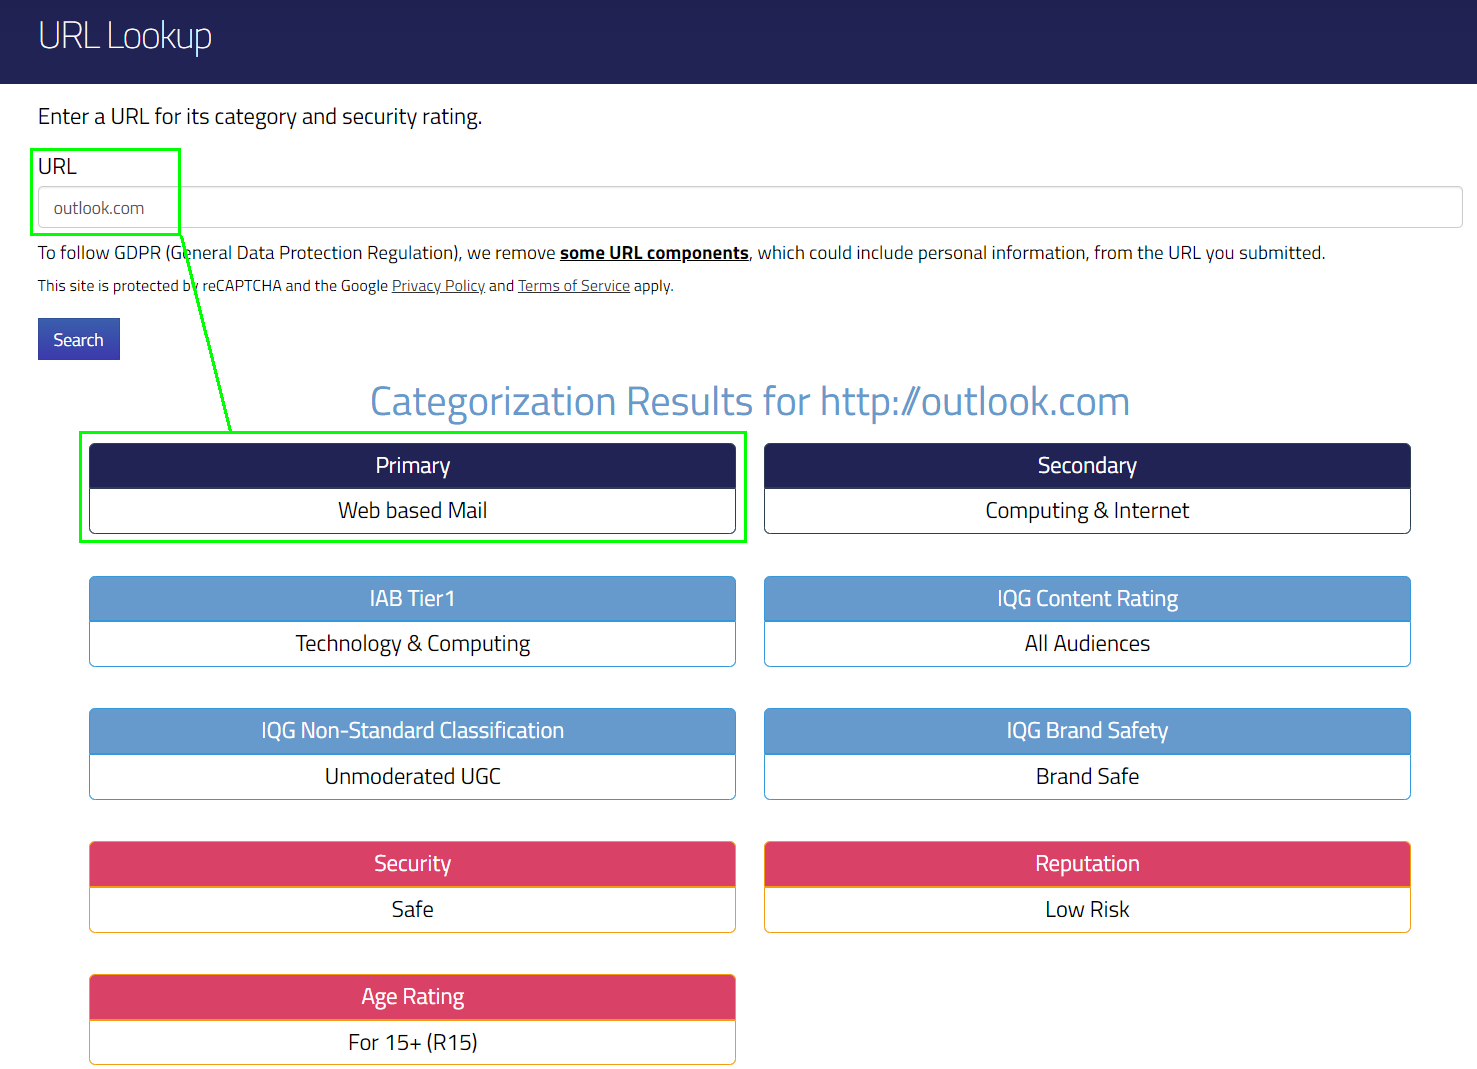
This is handy since this information isn’t available directly from the Security Portal.
Unblocking websites manually
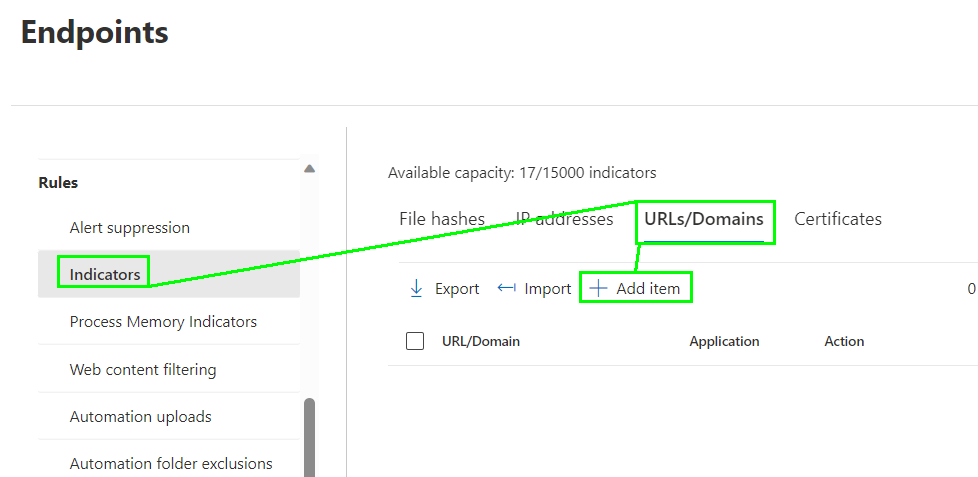
Of course you can unblock separate web sites if they were blocked from a parent category. If you for example blocked the category „Web-based Email“ then https://outlook.com would be blocked. But if you want to unblock outlook.com you need to add an „Indicator“ for the URL. So start by navigating to „Indicators“ at the „Rules“ section and click on „+ Add item“ under „URLs/Domains“:
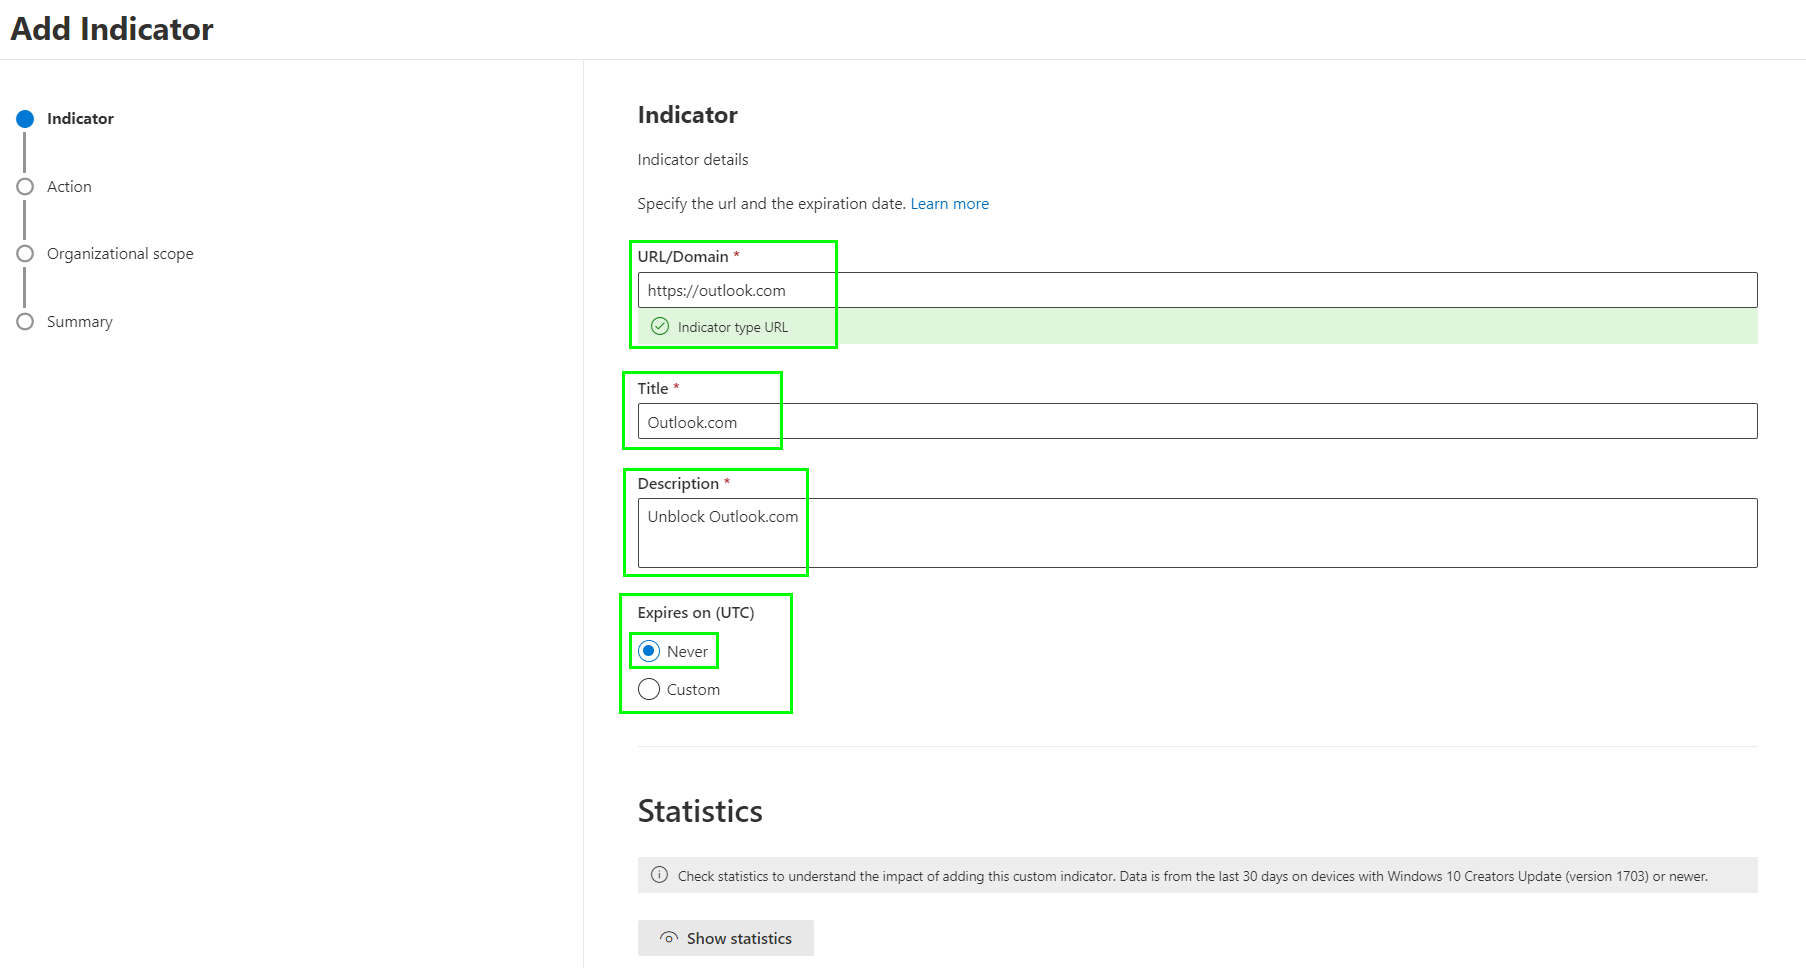
Define the URL, set a Title and Description and set if the URL should be unblocked forever or only for a defined time:
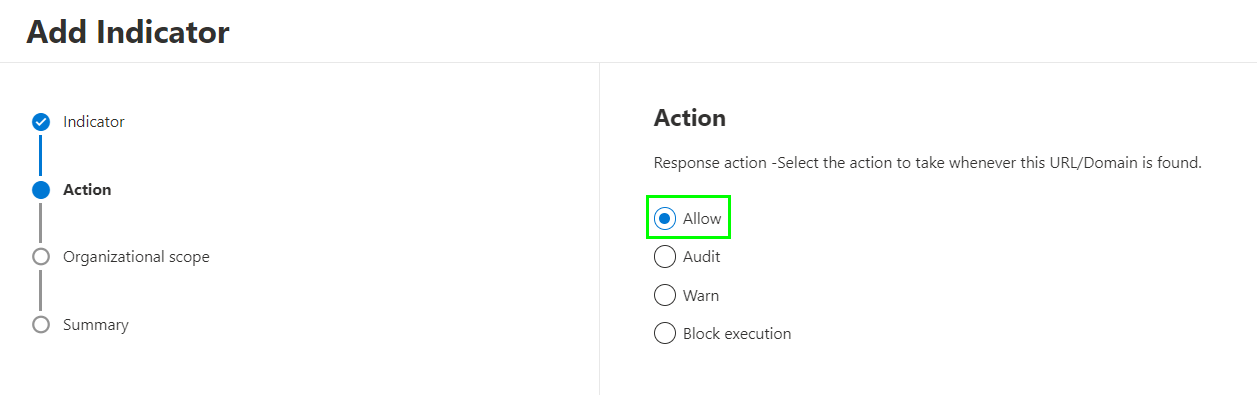
Now you can Allow the URL. But it also has other options that might be usefully someday:
- Audit: Allow the url but create a log in the Timeline of the Client in Security Center when a user tries to access the url.
- Warn: Warn the user that the site might be dangerous but let him access the site.
- Block execution: Set the url on your blocklist. No device from the scope will be able to access this url.
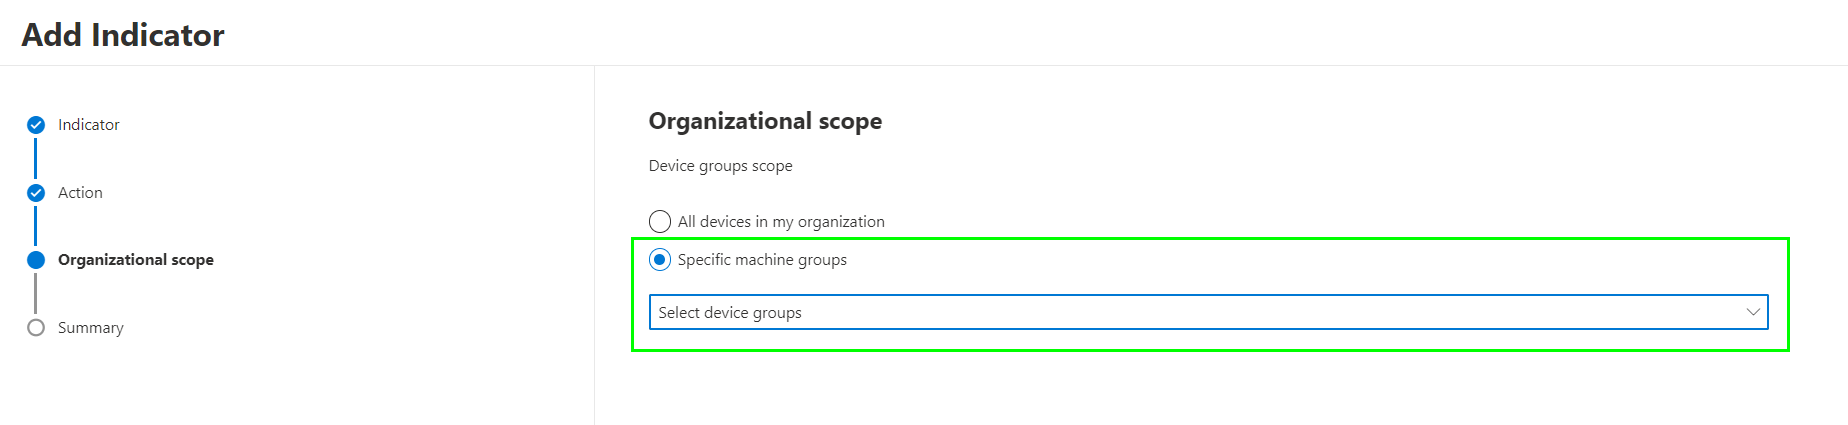
Scope the Indicator to the device group:
Finish the wizard. You can setup to maximum 15000 indicators, shared over all Indicator types.
Conclusion
The Web Content Filter feature in Microsoft Defender for Endpoint is a powerful tool that can significantly enhance your organization’s security posture. It offers control, flexibility, and the ability to secure a wide range of devices. We highly recommend trying this feature to see the benefits it can bring to your organization. From its ability to block malicious content to its wide device compatibility, it’s a feature that will surely add a robust layer of protection to your cybersecurity framework.