Mastering Windows 11 start menu. Custom layouts with Microsoft Intune
31 December 2023
Mastering Windows 11 start menu. Custom layouts with Microsoft Intune
Welcome to another exciting journey through the world of Modern Work Solutions! In this blog post, we’ll dive into the realm of Windows 11 and explore how to configure a custom Start Menu layout using Microsoft Intune’s OMA-URI settings. Organizations are constantly seeking ways to streamline user experiences and boost productivity as well as for a corporate branding on which a user can easily switch devices and work without the need to search for applications. One powerful tool in achieving this goal is the ability to preset a customized Start Menu layout for Windows 11 devices. By the end of this post, you’ll have all the knowledge you need to take control of your Windows 11 Start Menu and create a tailored experience for your users.
Why Customize the Start Menu in Windows 11?
Before we delve into the technical details, let’s address the ‚why‘ behind this customization. Organizations have several compelling reasons to preset a Start Menu layout:
- Consistency: A consistent Start Menu layout across all devices ensures that users can easily find and access the apps and tools they need. This consistency enhances the overall user experience.
- Productivity: By placing essential apps and resources front and center, you can boost productivity. Users won’t waste time searching for frequently used applications.
- Branding: Customize the Start Menu with your key applications, reinforcing your corporate identity.
Configuring the Windows 11 Start Menu Layout via OMA-URI in Microsoft Intune
So lets see how we can easily configure the pinned apps on an Windows 11 start menu.
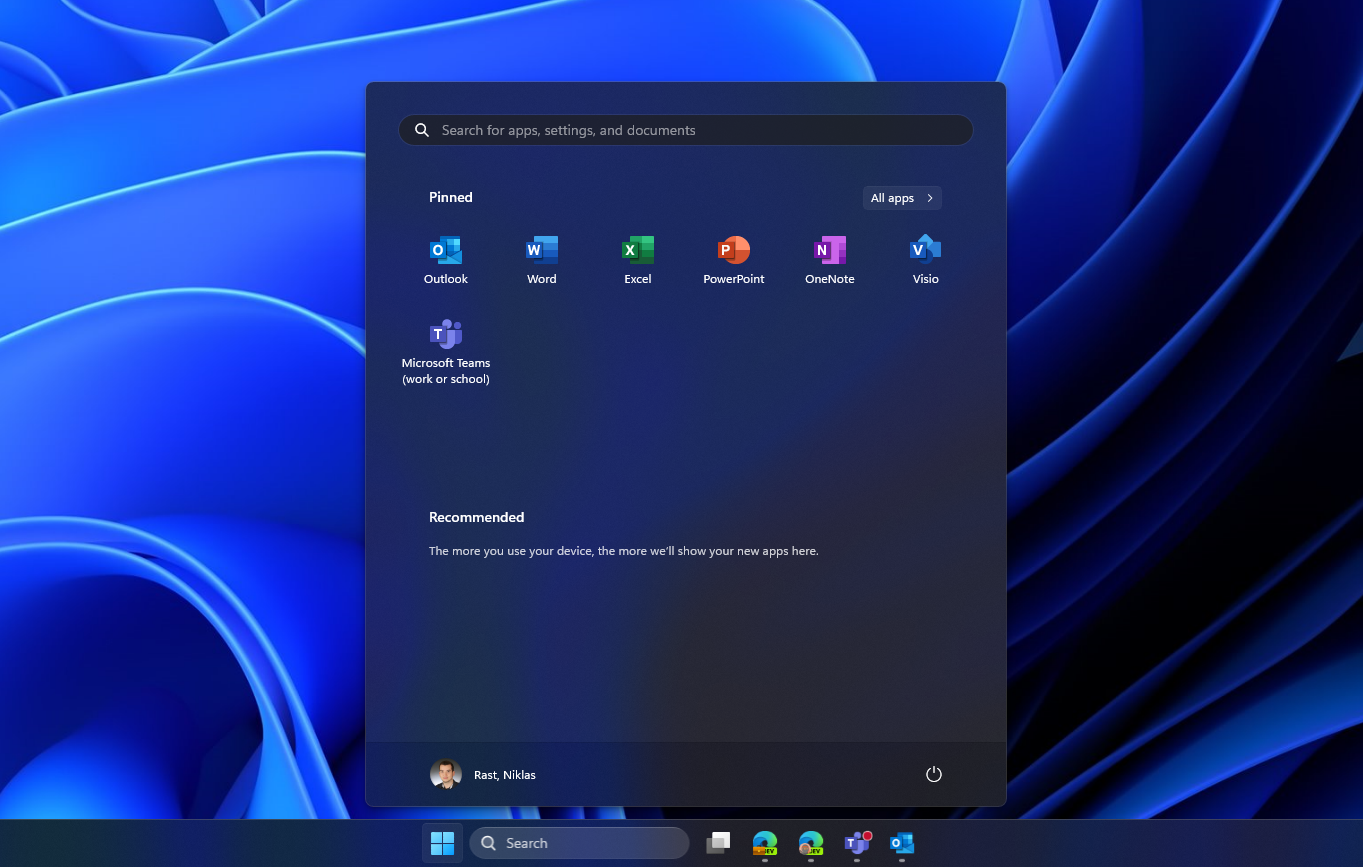
In my opinion it is the easiest way to configure the start menu on an Windows 11 device manually, capture it and deploy the configuration with Intune to all other devices. I defined some default apps on my pilot device in the start menu:
Now lets capture this pin configuration with the following simple PowerShell command:
Export-StartLayout -Path „C:\Temp\LayoutModification.json“
This will create a JSON file called LayoutModification.json in our C:\Temp directory:

If you open the JSON file you will see that our pinned apps have been written into the settings file:
{
  "pinnedList": [
    {
      "desktopAppLink": "%ALLUSERSPROFILE%\\Microsoft\\Windows\\Start Menu\\Programs\\Outlook.lnk"
    },
    {
      "desktopAppLink": "%ALLUSERSPROFILE%\\Microsoft\\Windows\\Start Menu\\Programs\\Word.lnk"
    },
    {
      "desktopAppLink": "%ALLUSERSPROFILE%\\Microsoft\\Windows\\Start Menu\\Programs\\Excel.lnk"
    },
    {
      "desktopAppLink": "%ALLUSERSPROFILE%\\Microsoft\\Windows\\Start Menu\\Programs\\PowerPoint.lnk"
    },
    {
      "desktopAppLink": "%ALLUSERSPROFILE%\\Microsoft\\Windows\\Start Menu\\Programs\\OneNote.lnk"
    },
    {
      "desktopAppLink": "%ALLUSERSPROFILE%\\Microsoft\\Windows\\Start Menu\\Programs\\Visio.lnk"
    },
    {
      "desktopAppLink": "%APPDATA%\\Microsoft\\Windows\\Start Menu\\Programs\\Microsoft Teams (work or school).lnk"
    }
  ]
}
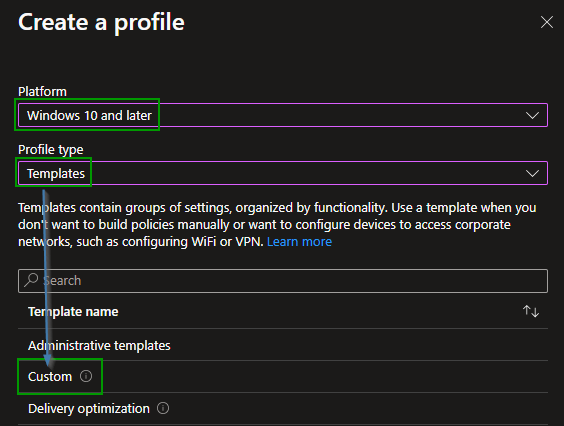
Now that we have the configuration lets hand over to https://endpoint.microsoft.com and create a new custom configuration profile for Windows.
Now we need to add the configuration settings here.
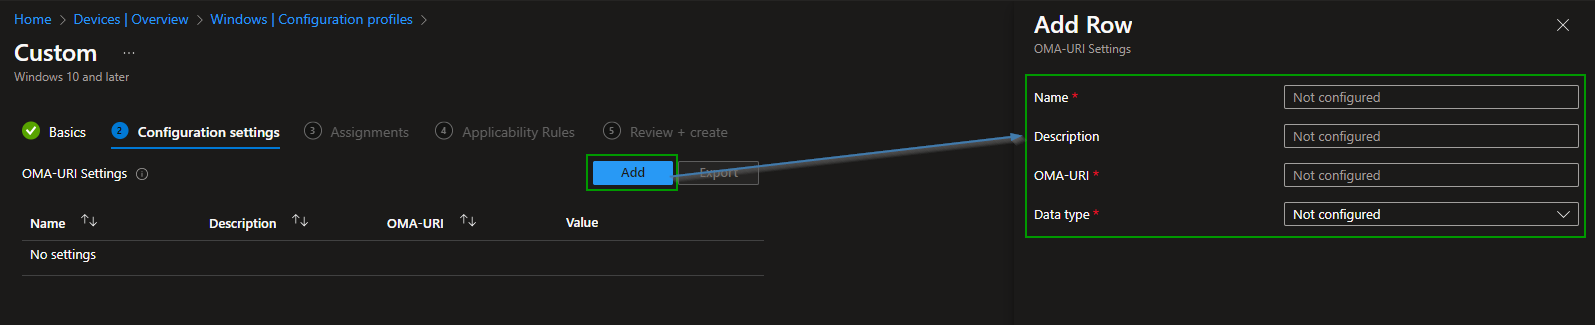
Name: ConfigureStartPins
OMA-URI: ./Vendor/MSFT/Policy/Config/Start/ConfigureStartPins
Data type: String
Value: <Copy the content from your JSON file here>
Now your profile should look something like this:

Assign the profile to your group of devices and wait for them to sync. After the next reboot the layout should be applied. Optimally you have this profile ready and applied to devices during the Autopilot enrollment phase.
Conclusion
Customizing the Windows 11 Start Menu layout through Microsoft Intune’s OMA-URI settings is a powerful way to enhance user experiences, boost productivity, and maintain a consistent, branded, and secure environment within your organization. By following the steps outlined in this blog post, you can take control of the Windows 11 Start Menu and tailor it to your organization’s unique needs. Remember that flexibility is key, and you can adapt the Start Menu layout as your organization evolves. So, go ahead, empower your organization with a Start Menu layout that makes sense for you, and watch as your users navigate their digital workspaces with ease and efficiency. Your journey to mastering Modern Work Solutions continues!