Windows 365 – An overview and the setup steps.
31 December 2023
What is Windows 365?
Windows 365 is a VDI service from Microsoft Azure. This service is not based on usage, but is billed via the price of the necessary license.
With this VDI approach, Microsoft offers a „Cloud PC“ with which users can process their daily tasks from any device. The Cloud PC behind Windows 365 can be accessed via a modern web browser or the Microsoft Remote Desktop Client. The Remote Desktop Client is available as a native app for Windows, iOS, Android and macOS, on all other platforms you can connect to and use the Cloud PC via the web browser.
WHICH CLOUD PC types are available?
Microsoft basically subdivides Windows 365 into „Business“ and „Enterprise“ editions. Both editions are available in different sizes, here you can use the license to define the available memory and hard drive memory. The „Business“ licenses are intended for small and medium-sized companies, here you can activate from one to 400 licenses in one tenant. As soon as you need more than 400 licenses, you have to use the „Enterprise“ edition. Both editions can exist in parallel in one tenant.
The Business Edition can be activated in a few steps via the Windows 365 Portal, with the Enterprise Edition you have to create a „Provisioning Policy“ via Microsoft Intune.
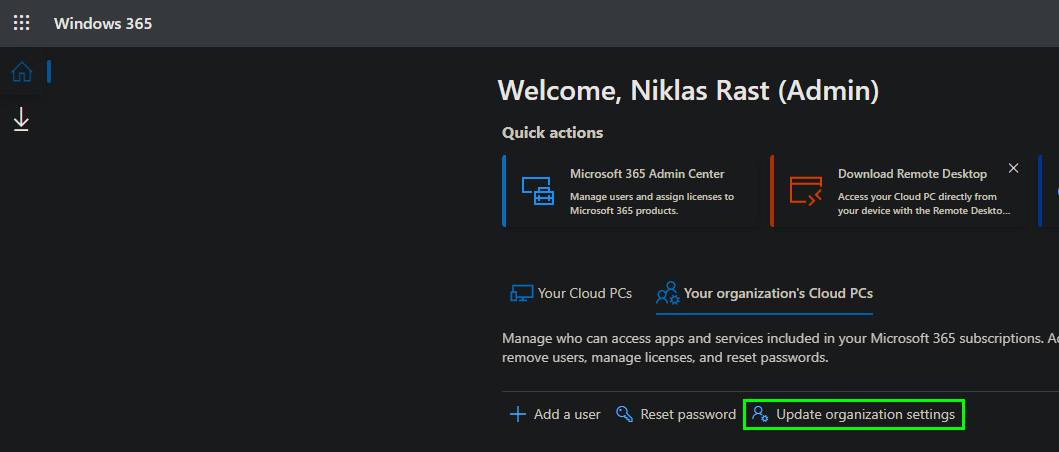
Setup Windows 365 Business To activate Windows 365 in the Business Edition, we have to go to the settings in the Windows 365 portal at https://windows365.microsoft.com/.

Here we now select „Update organization settings“ to configure the settings for the Windows 365 Business Deployment.
In the settings we now have the options to set up the user type, the operating system, the language and region settings and to join Microsoft Intune.
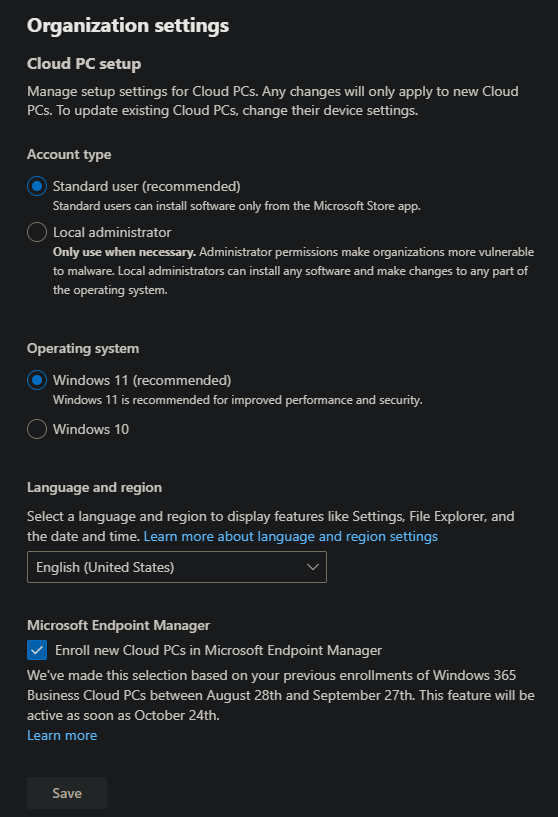
Basically, users in corporate environments should not have local admin rights, so you should select „Standard User“ here. However, if the requirements in your own company are different, you can also select „Local administrator“ here, in which case the assigned users will have administrative rights on the Cloud PC.
You can choose between Windows 10 and Windows 11 as the available operating systems. The language and region settings should be chosen to suit your company. The last configuration option deals with whether the Cloud PC will be rolled out in Microsoft Intune. If the company uses and has licensed Microsoft Intune, then this is a good addition to providing policies and applications via Microsoft Intune on the cloud PCs.
After all the settings have been made, you have to complete them with „Save“.
Setup Windows 365 Enterprise
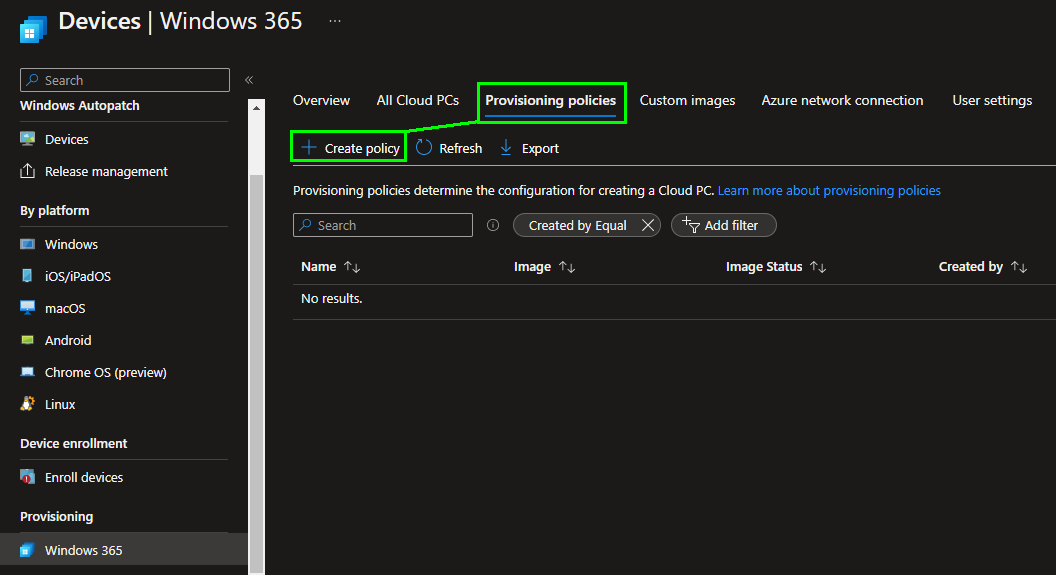
A provisioning policy via Microsoft Intune is required to use Windows 365 in the Enterprise Edition. To do this, we open https://endpoint.microsoft.com/ and switch to „Windows 365“ under „Devices“.
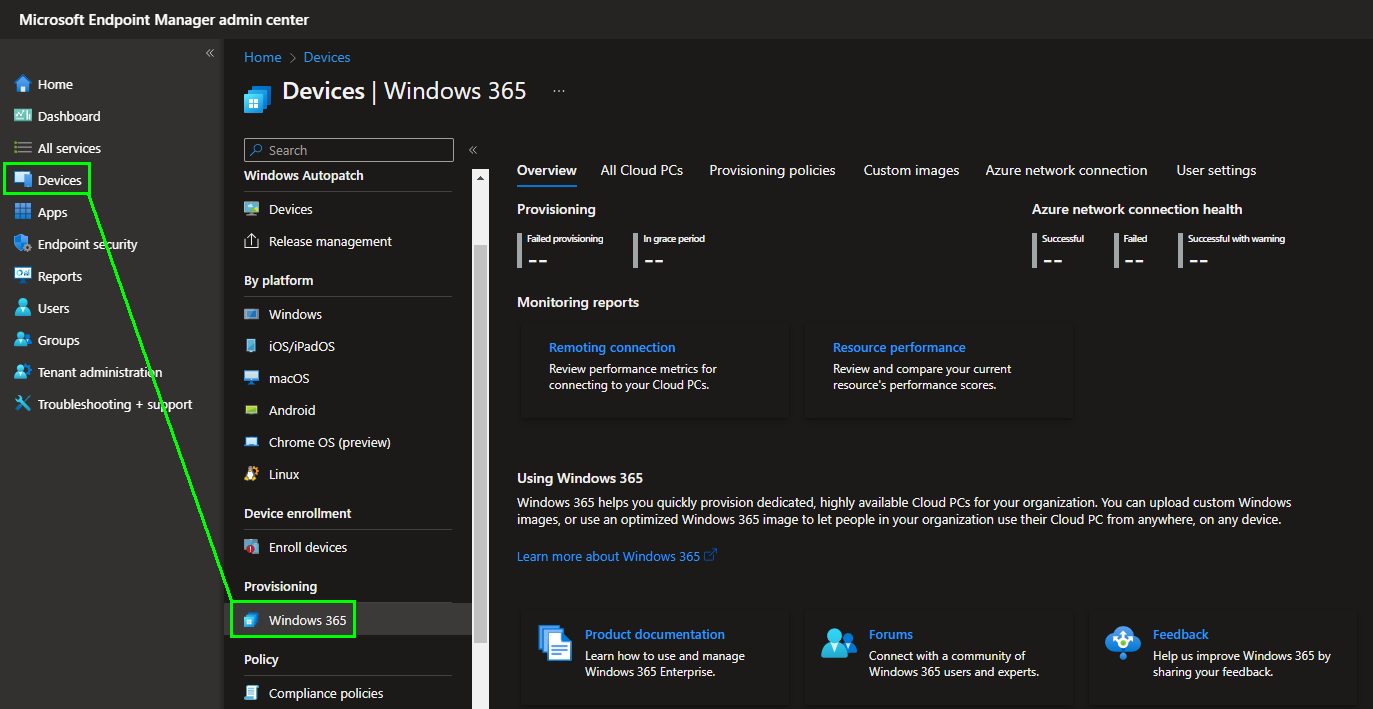
On this page we now call up the „Provisioning policies“ area and create a new provisioning policy there via „Create policy“.
Here we first assign a name for the deployment policy and select the appropriate settings for our own company between the „Join type“ and the network configuration.
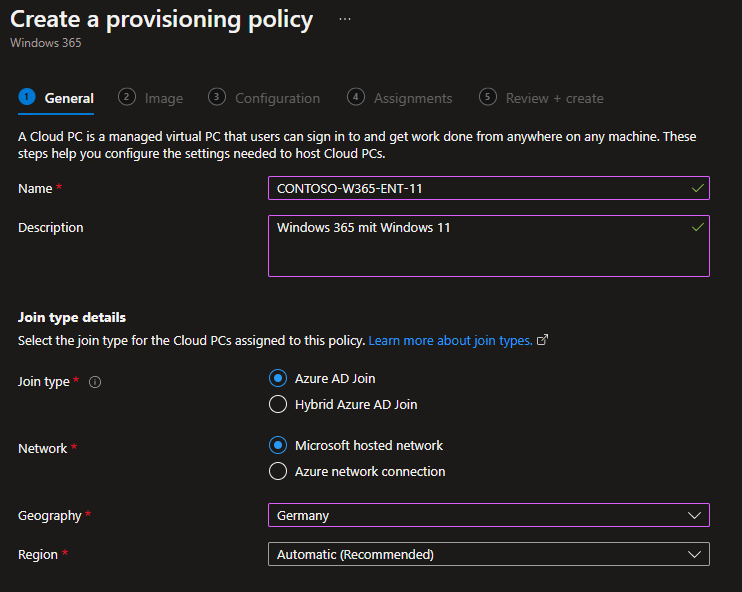
In the best case, the name briefly describes the settings, in my example I create a Windows 365 configuration, based on Windows 11 and in the Windows 365 Enterprise Edition: W365-ENT-11. The company name can be used as a prefix.
The join type determines how the cloud PC comes into Azure AD. In contrast to the Business Edition, with the Enterprise Edition we have the option of including the Cloud PC in an Active Directory. This requires that you have a vNET in Azure that is connected to the OnPrem Active Directory or in which an Active Directory is available. In this example, however, we will discuss a configuration for an Azure AD join.
In addition to the AD Join, we can include an Enterprise Cloud PC in an Azure vNET to make existing systems or applications available on the Cloud PC. For example, if the company has set up a file share in Azure and this should be available from the Enterprise Cloud PCs, these Cloud PCs can be included in the corresponding vNET and the systems are then available from them. Alternatively, you can include the Cloud PC in the „Microsoft hosted network“, there you have a direct Internet connection, but you don’t have to worry about the vNET. Here we show the connection via the „Microsoft hosted network“.
In the next step we select the operating system image for the Enterprise Cloud PCs. We have access to the Azure Gallery for images, but we can also select self-created images.
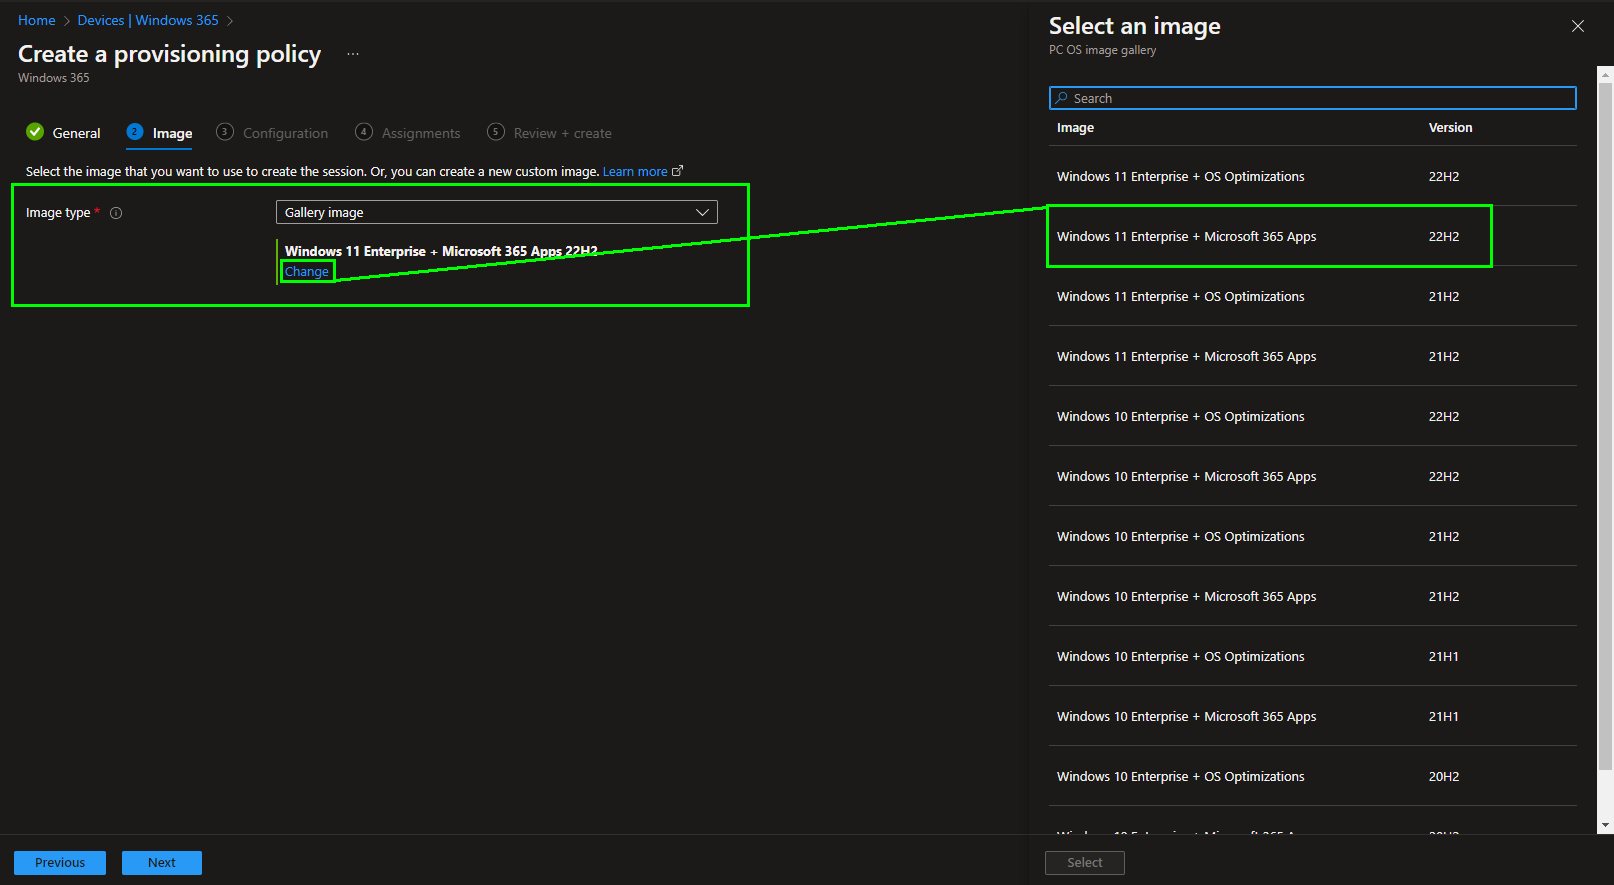
Windows 10 and 11 images from the Azure Image Gallery are available here, with and without pre-installed Microsoft 365 Apps. For this example we select a Windows 11 Enterprise with the Microsoft 365 Apps.
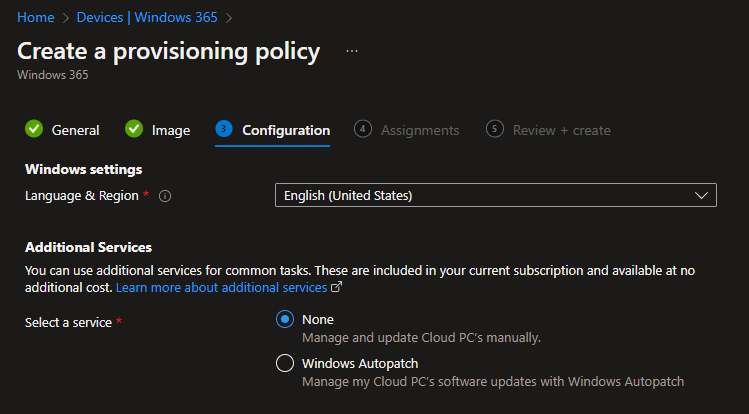
We then have to define the language and region settings and can then optionally include the Cloud PC in the Windows Autopatch Service. I will create a separate post for Windows Autopatch, so we will not go into it further in this post.
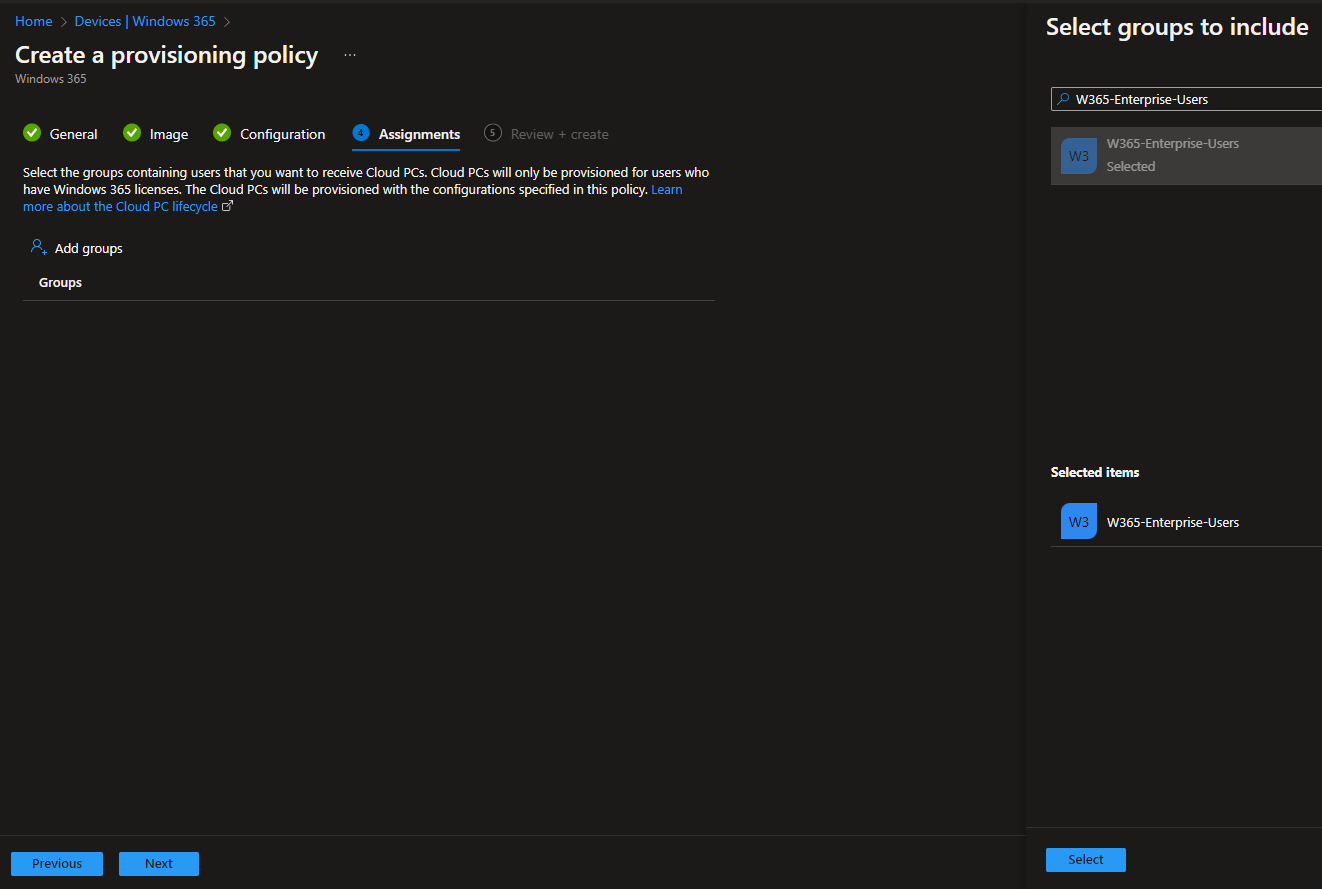
Finally, we have to assign the configuration to an Azure AD group for users. To simplify things, you can select the same Azure AD group that is used to distribute the licenses to the users.
Use the Cloud-PC
We have now configured the Cloud PCs and the only question left is how a user can now use this Cloud PC. There are different ways to do this:
Use via web browser
The easiest way, which works from any operating system, is via the website https://windows365.microsoft.com/. There the user has to log in with his Azure AD access data and is then presented with cloud PCs of both Windows 365 editions that have been provisioned for him.
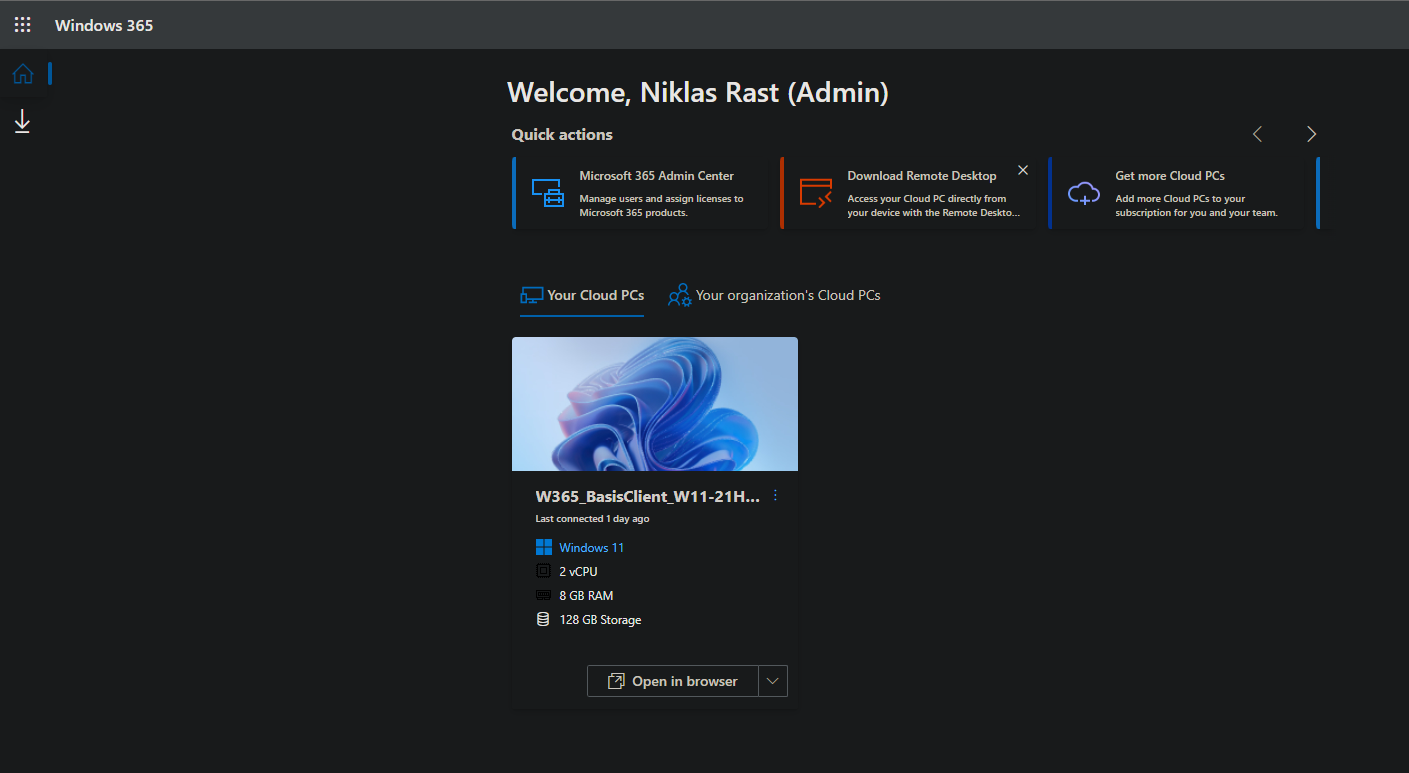
Here the user can click on „Open in browser“, which starts an RDP session on the cloud PC in the web browser:

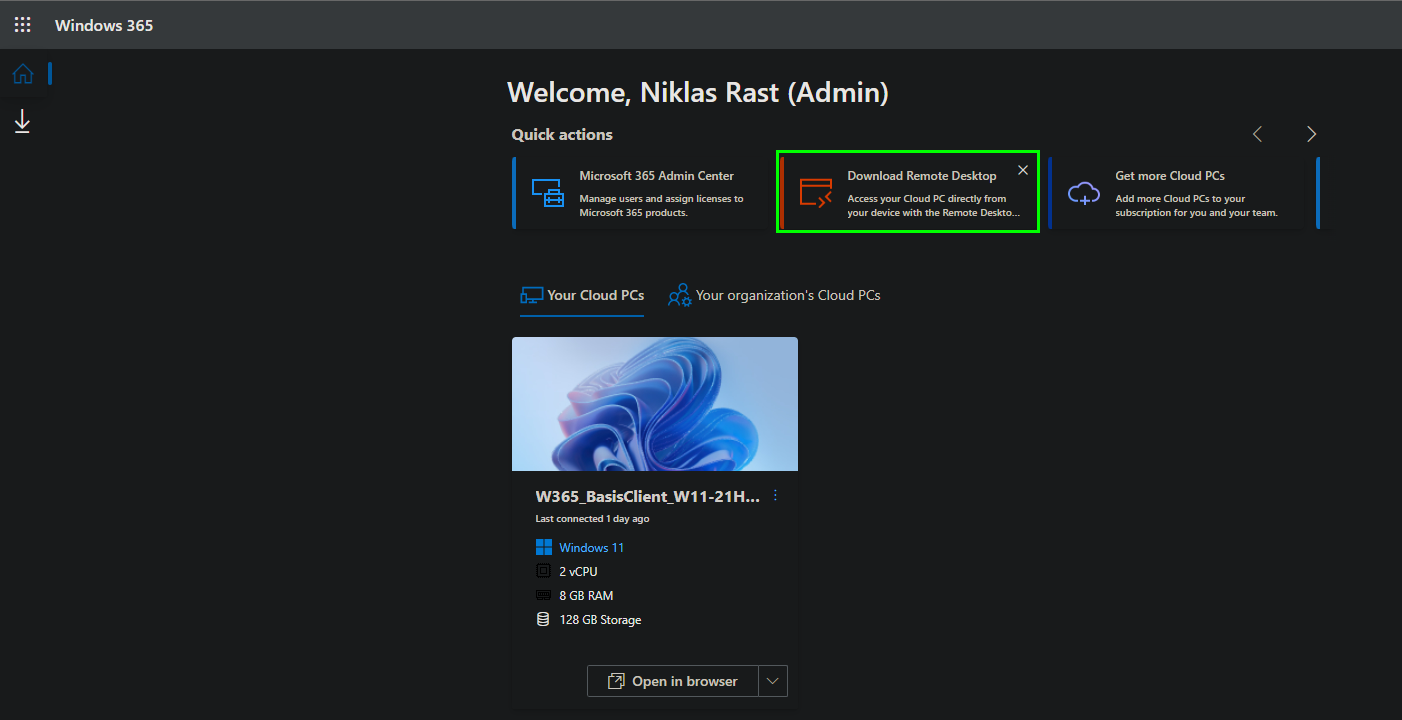
Use via the Remote Desktop App
Alternatively, you can install the Remote Desktop App. This can be started comfortably on the client and you can save the access data. The download is also stored in the Windows 365 portal.
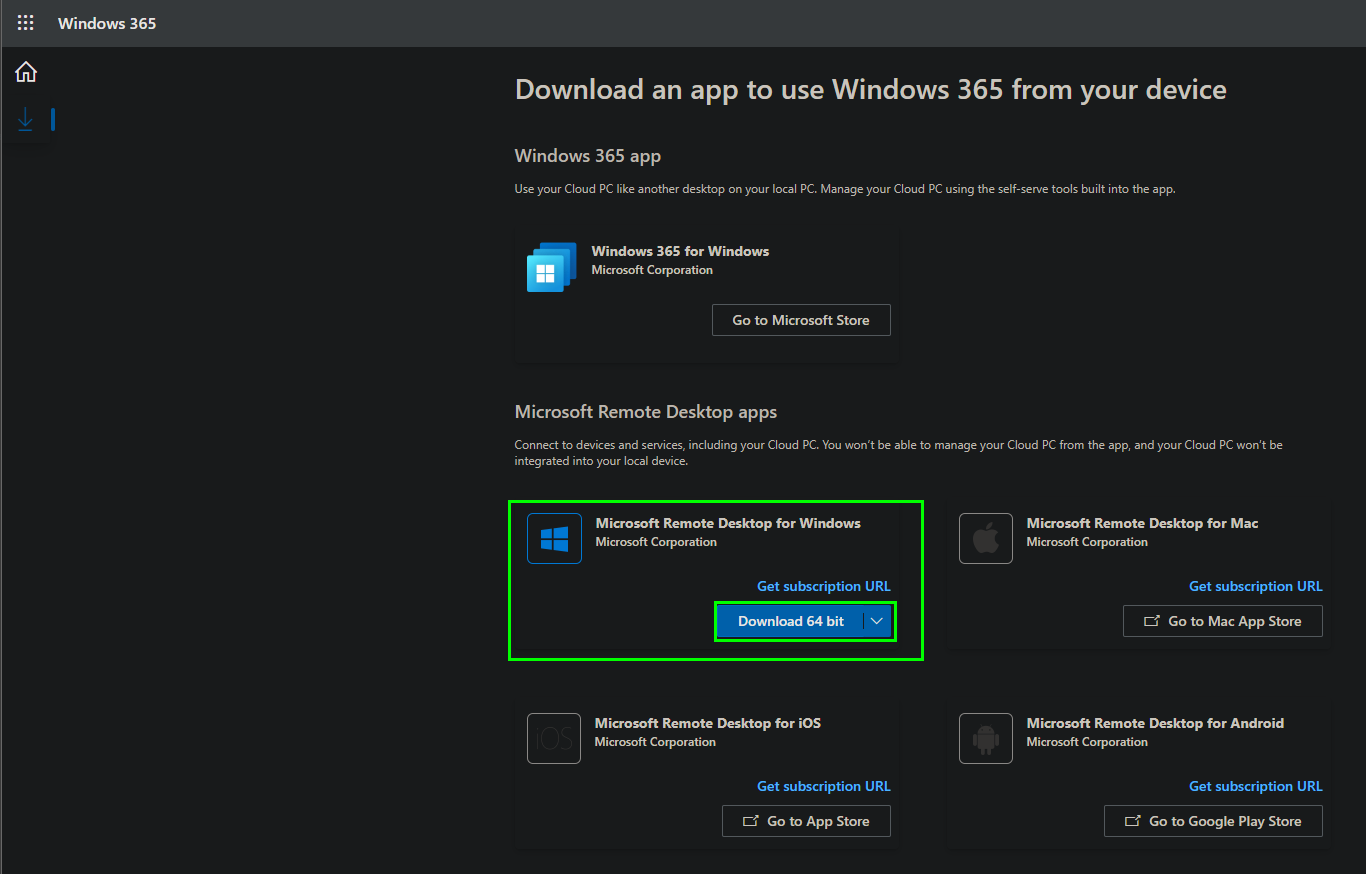
The Microsoft Remote Desktop App is available natively for Windows, MacOS, iOS and Android. Corresponding download links are available on this page. We select the Windows version here and install it. The Windows Installer can be run with or without local administrator rights, which means that the application can also be installed by the user in self-service.
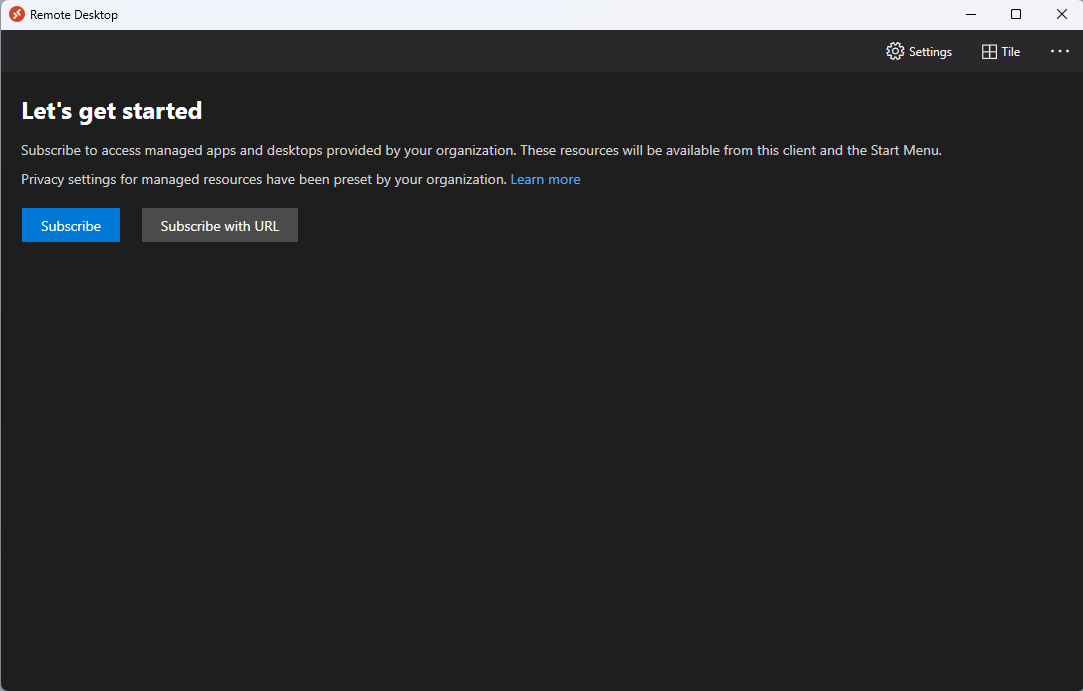
Once the application is installed we can connect the Windows 365 Cloud PC, for this we click on „Subscribe“
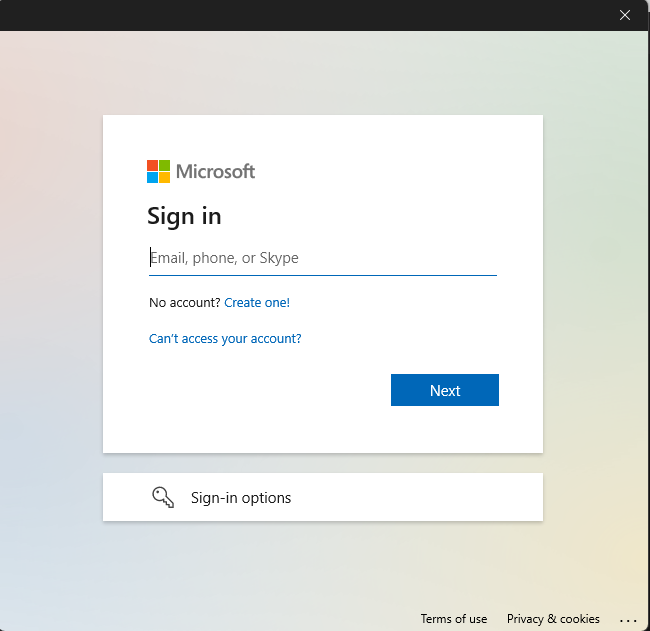
The login is now queried here, for this we use the access data with the account from Azure AD to which a Windows 365 license is assigned.
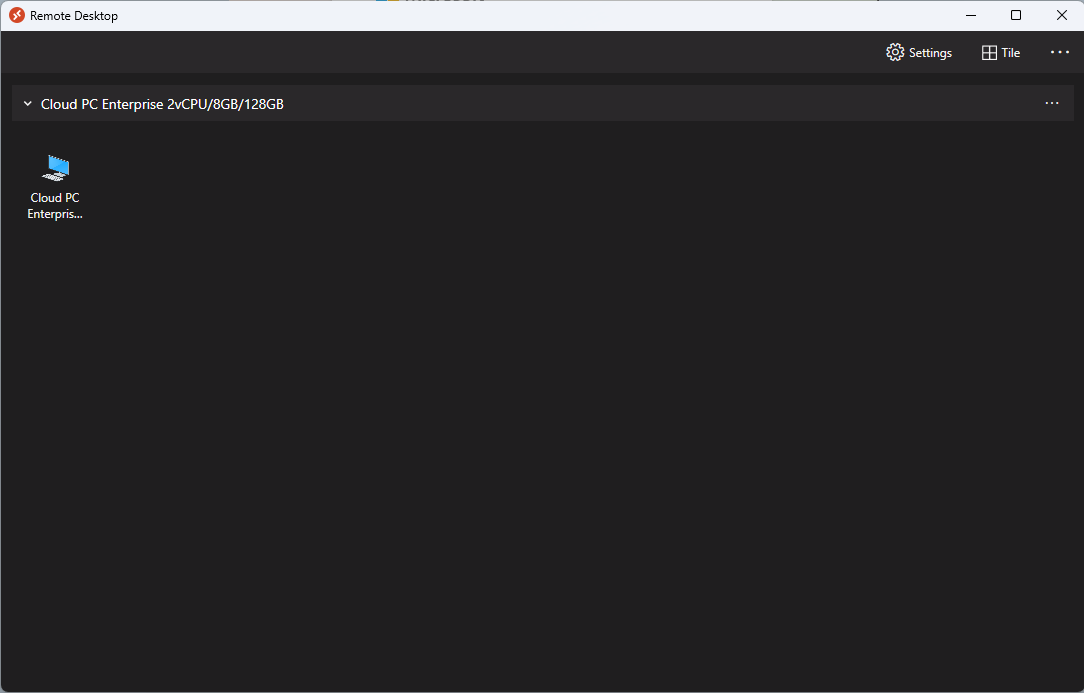
After the registration is complete, we will see our Cloud PC in the list.
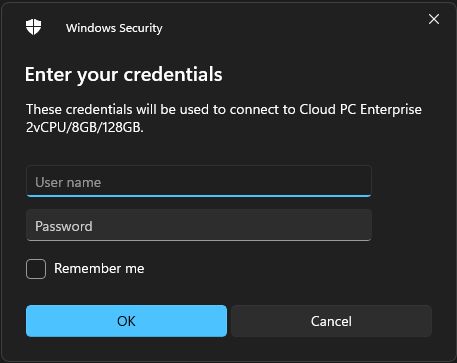
With a double click on the cloud PC we start the connection, we have to authorize ourselves again. This access data can be saved so that it does not have to be re-entered locally the next time you log on.
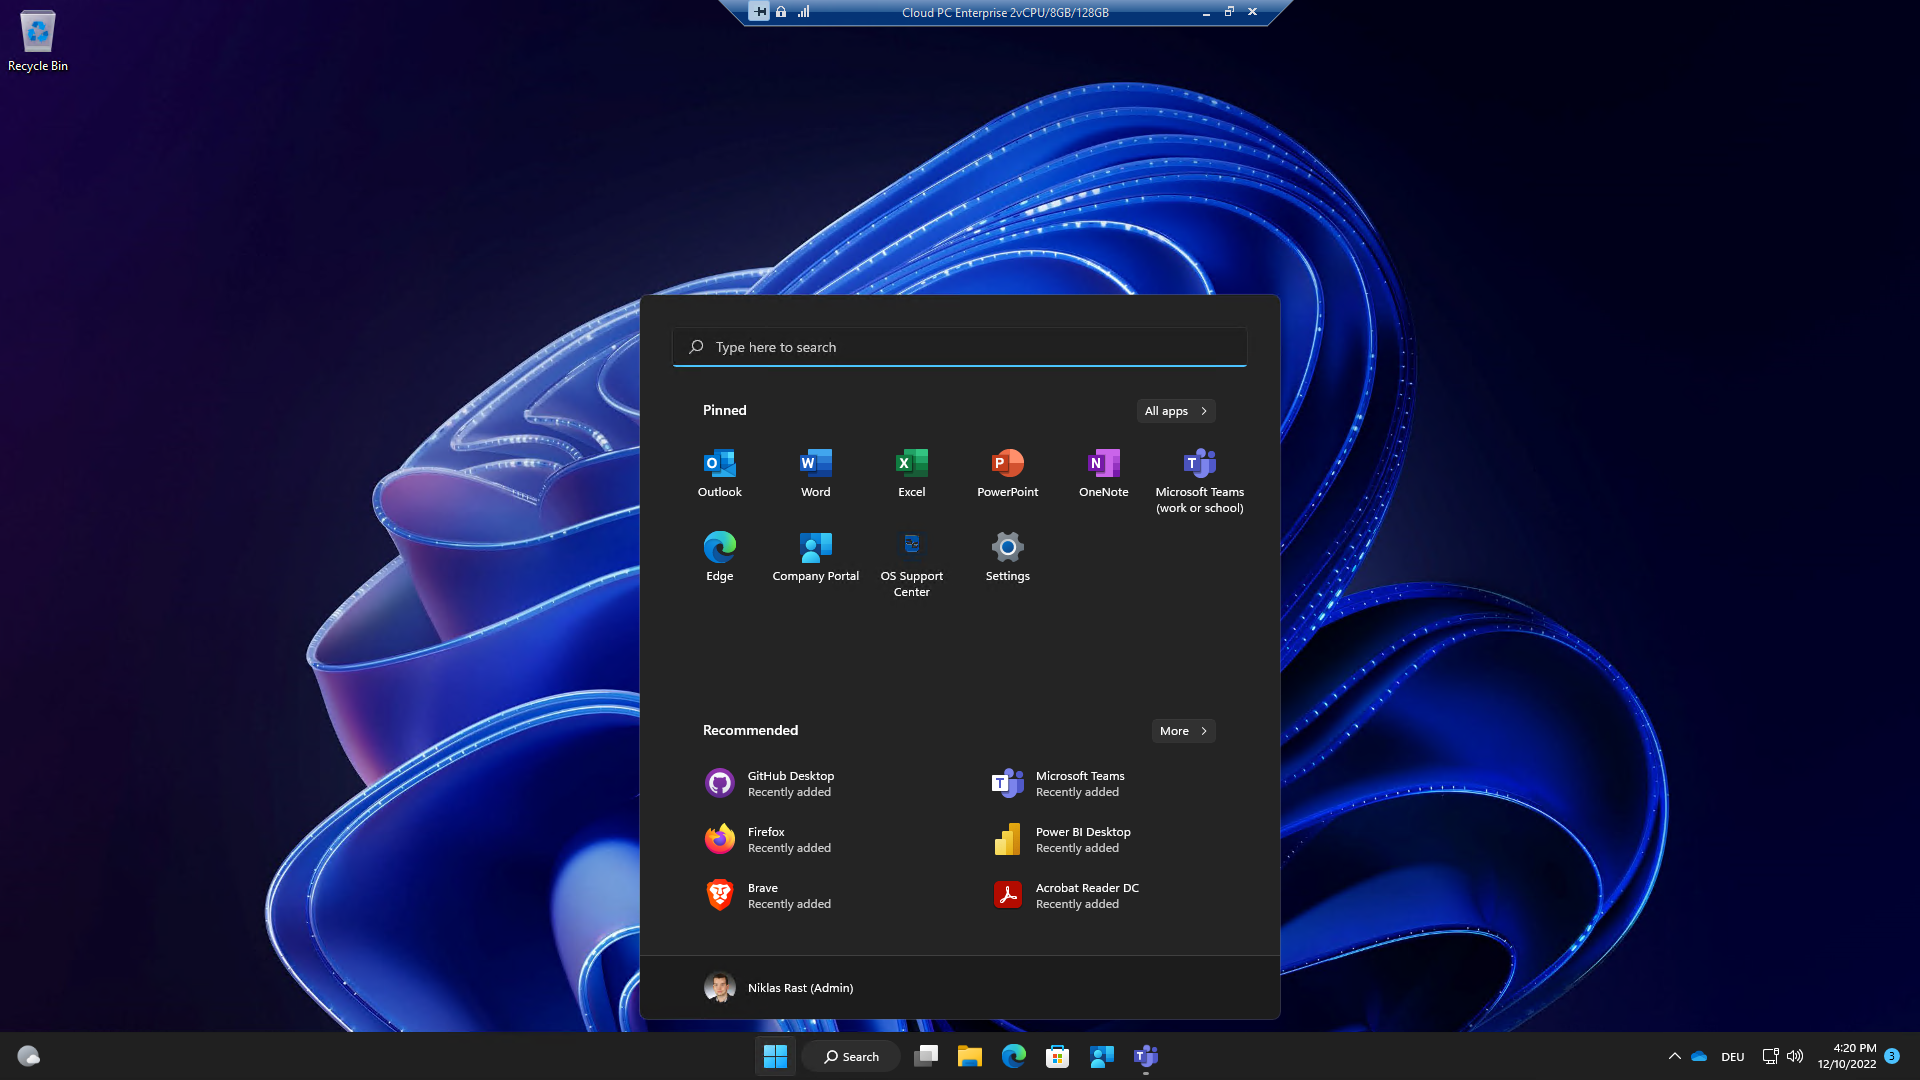
The session is now established and we can work with the Windows 365 Cloud PC.